I fell in love with this dresser when I saw it and I knew I had to have it for my new craft room! Here is my makeover of the dresser. I purchased this antique dresser from a vintage furniture dealer on Marketplace.
My plan was to paint it a pale pink, add a furniture transfer and gold leaf. Here is how I did it!
This post may contain affiliate links, please see Disclosure Policy
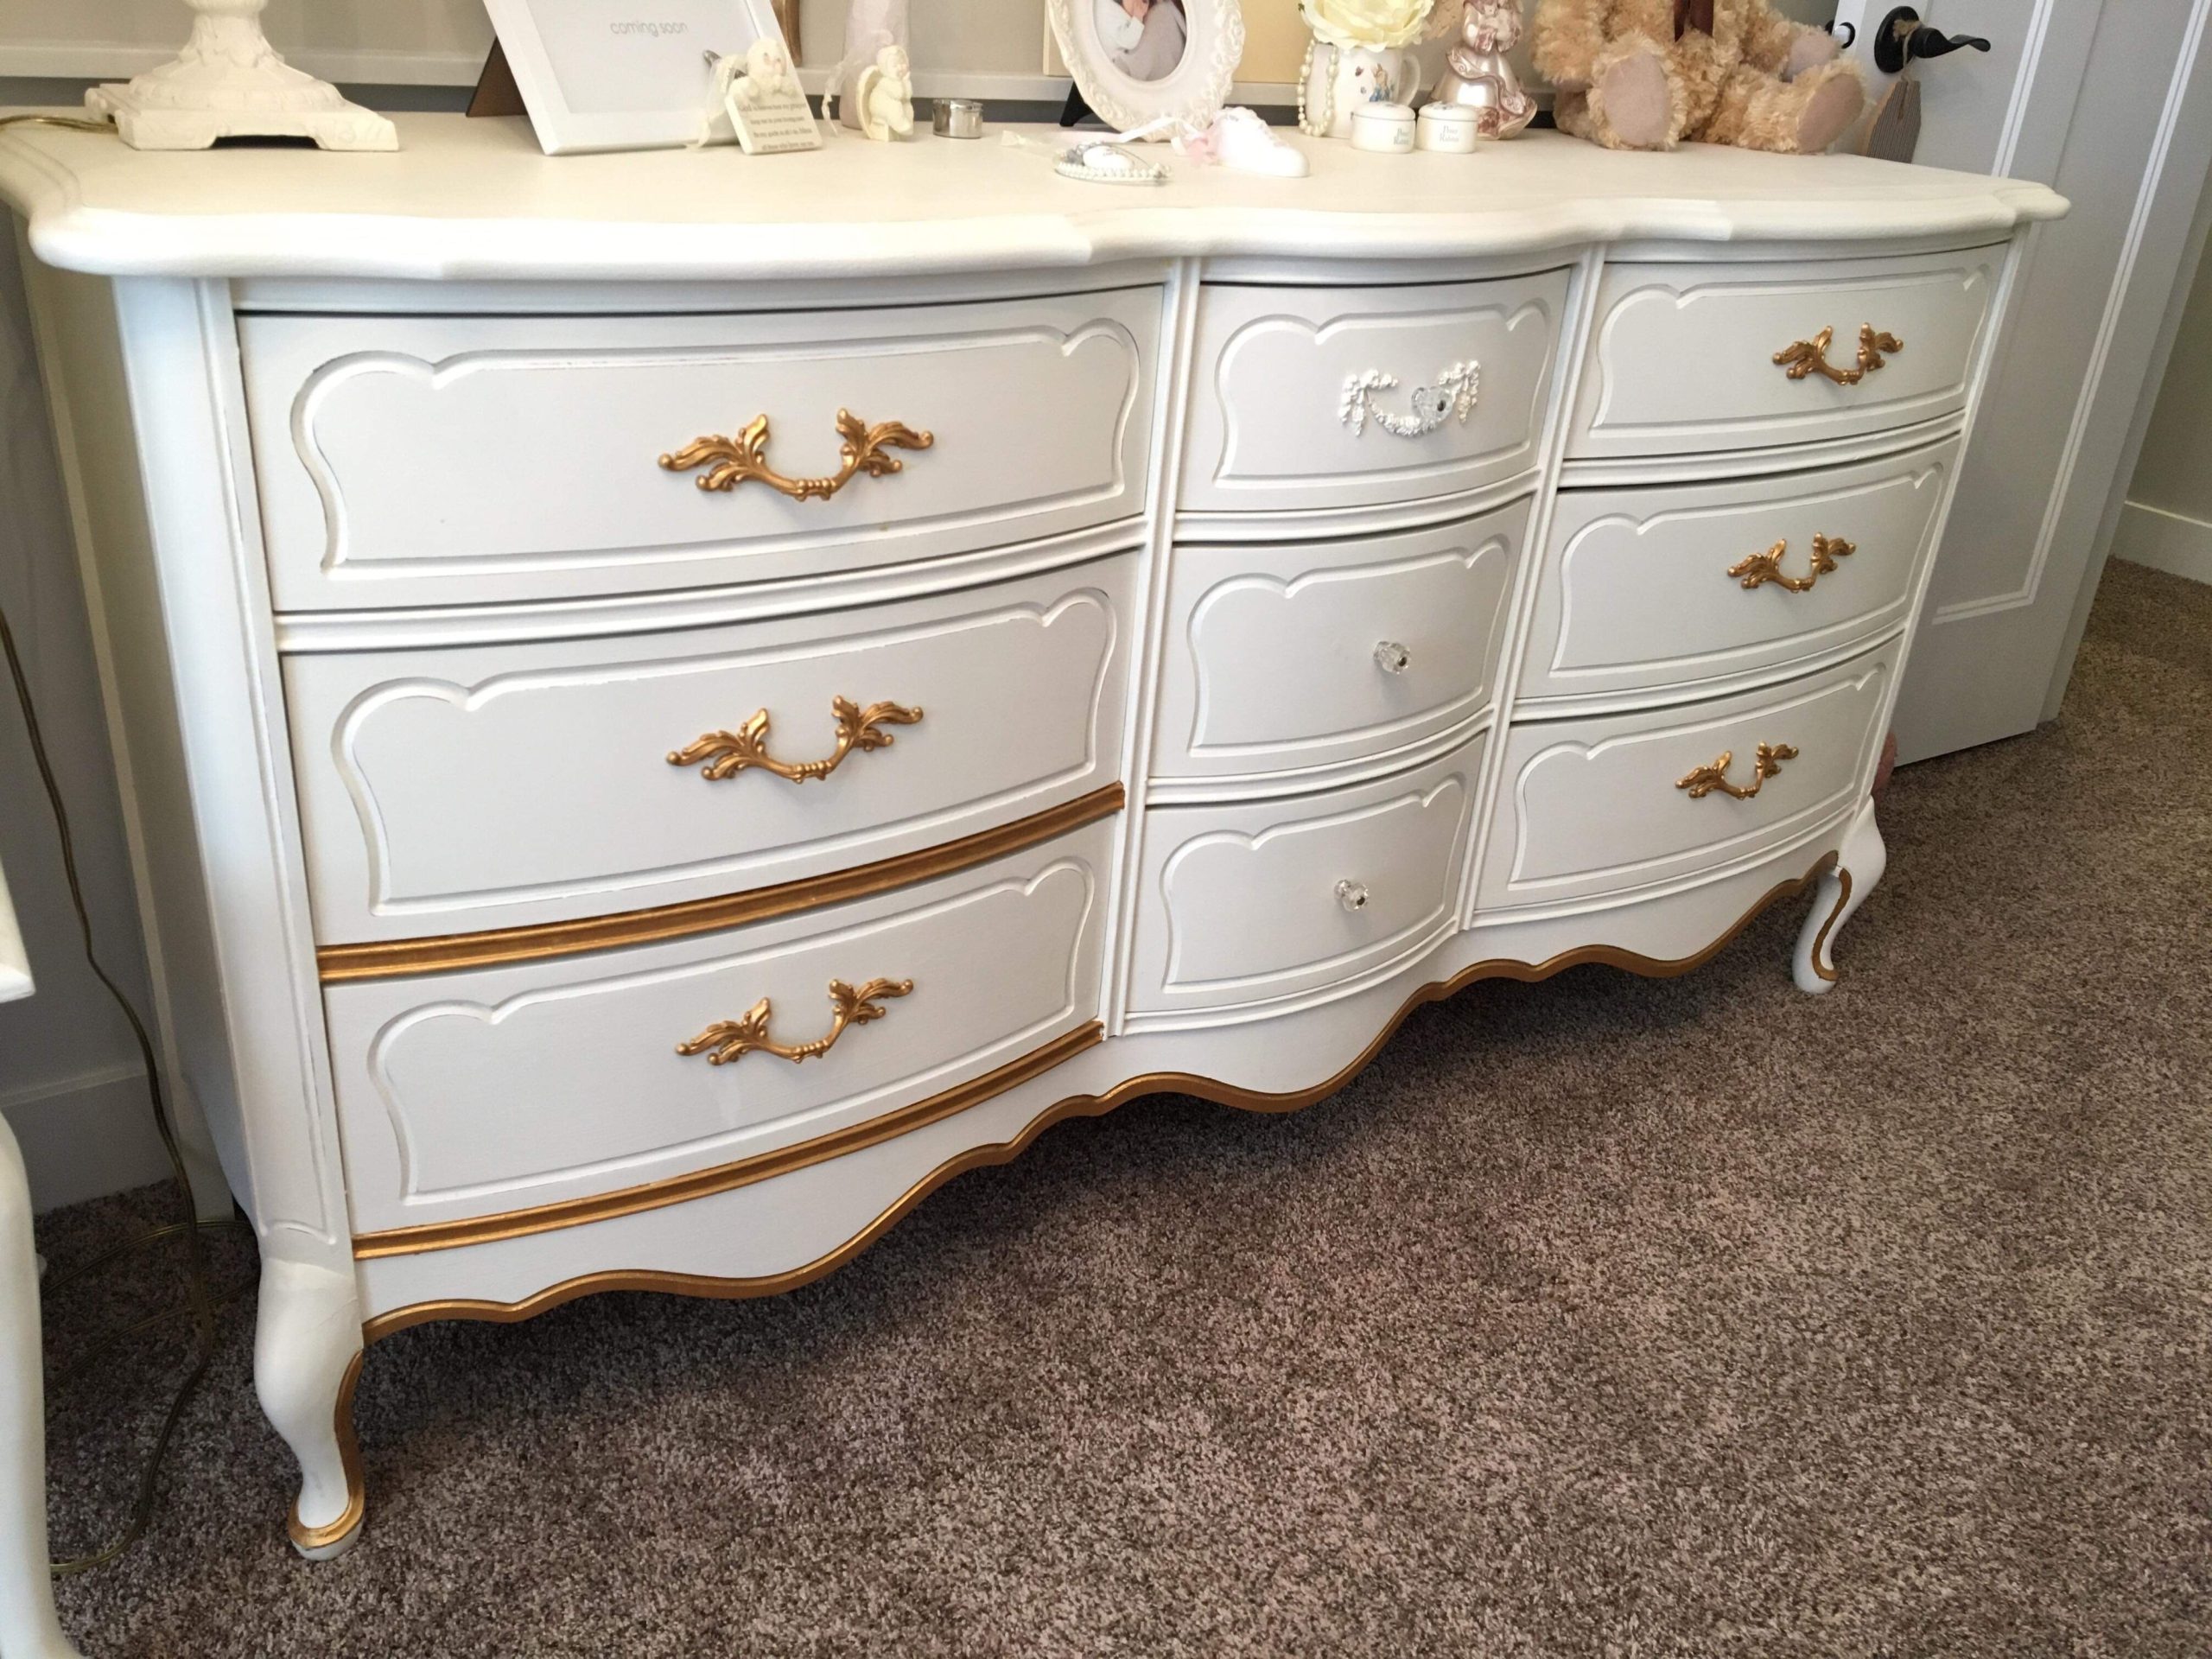
Before
The furniture piece came to me in a beautiful cream colored chalk paint. A nice blank canvas for me to add decorative elements to!
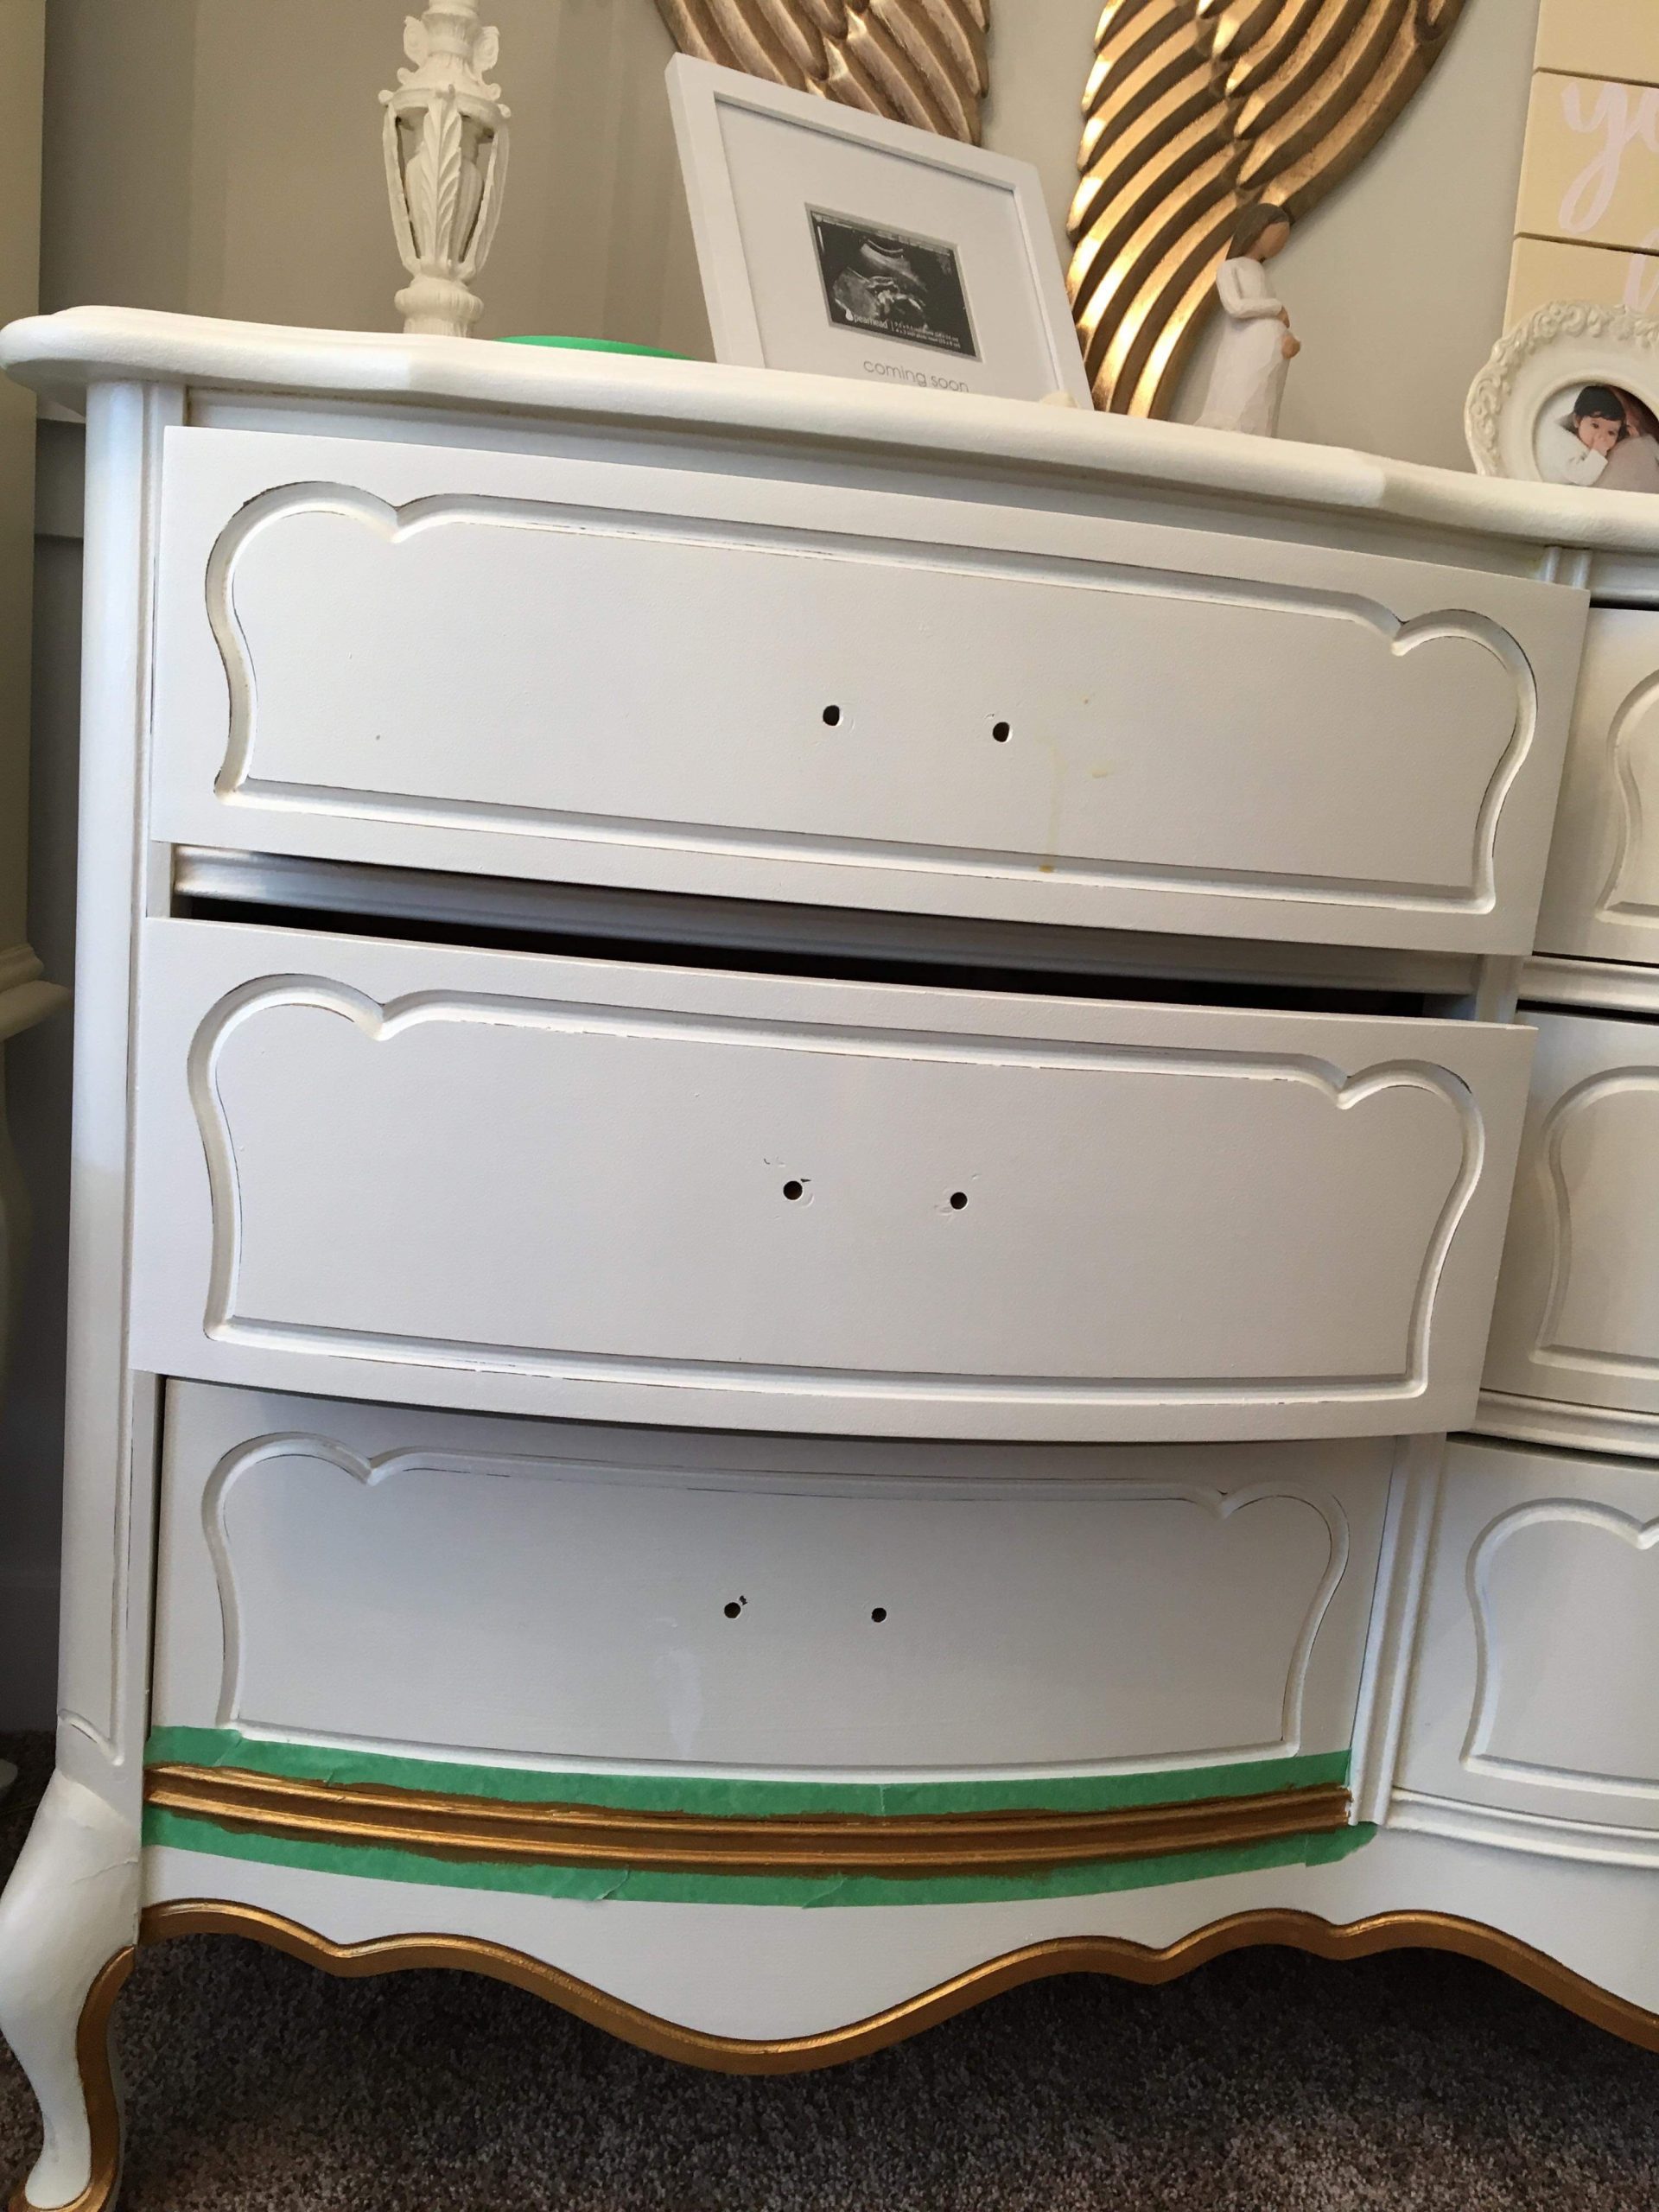
Removing Hardware
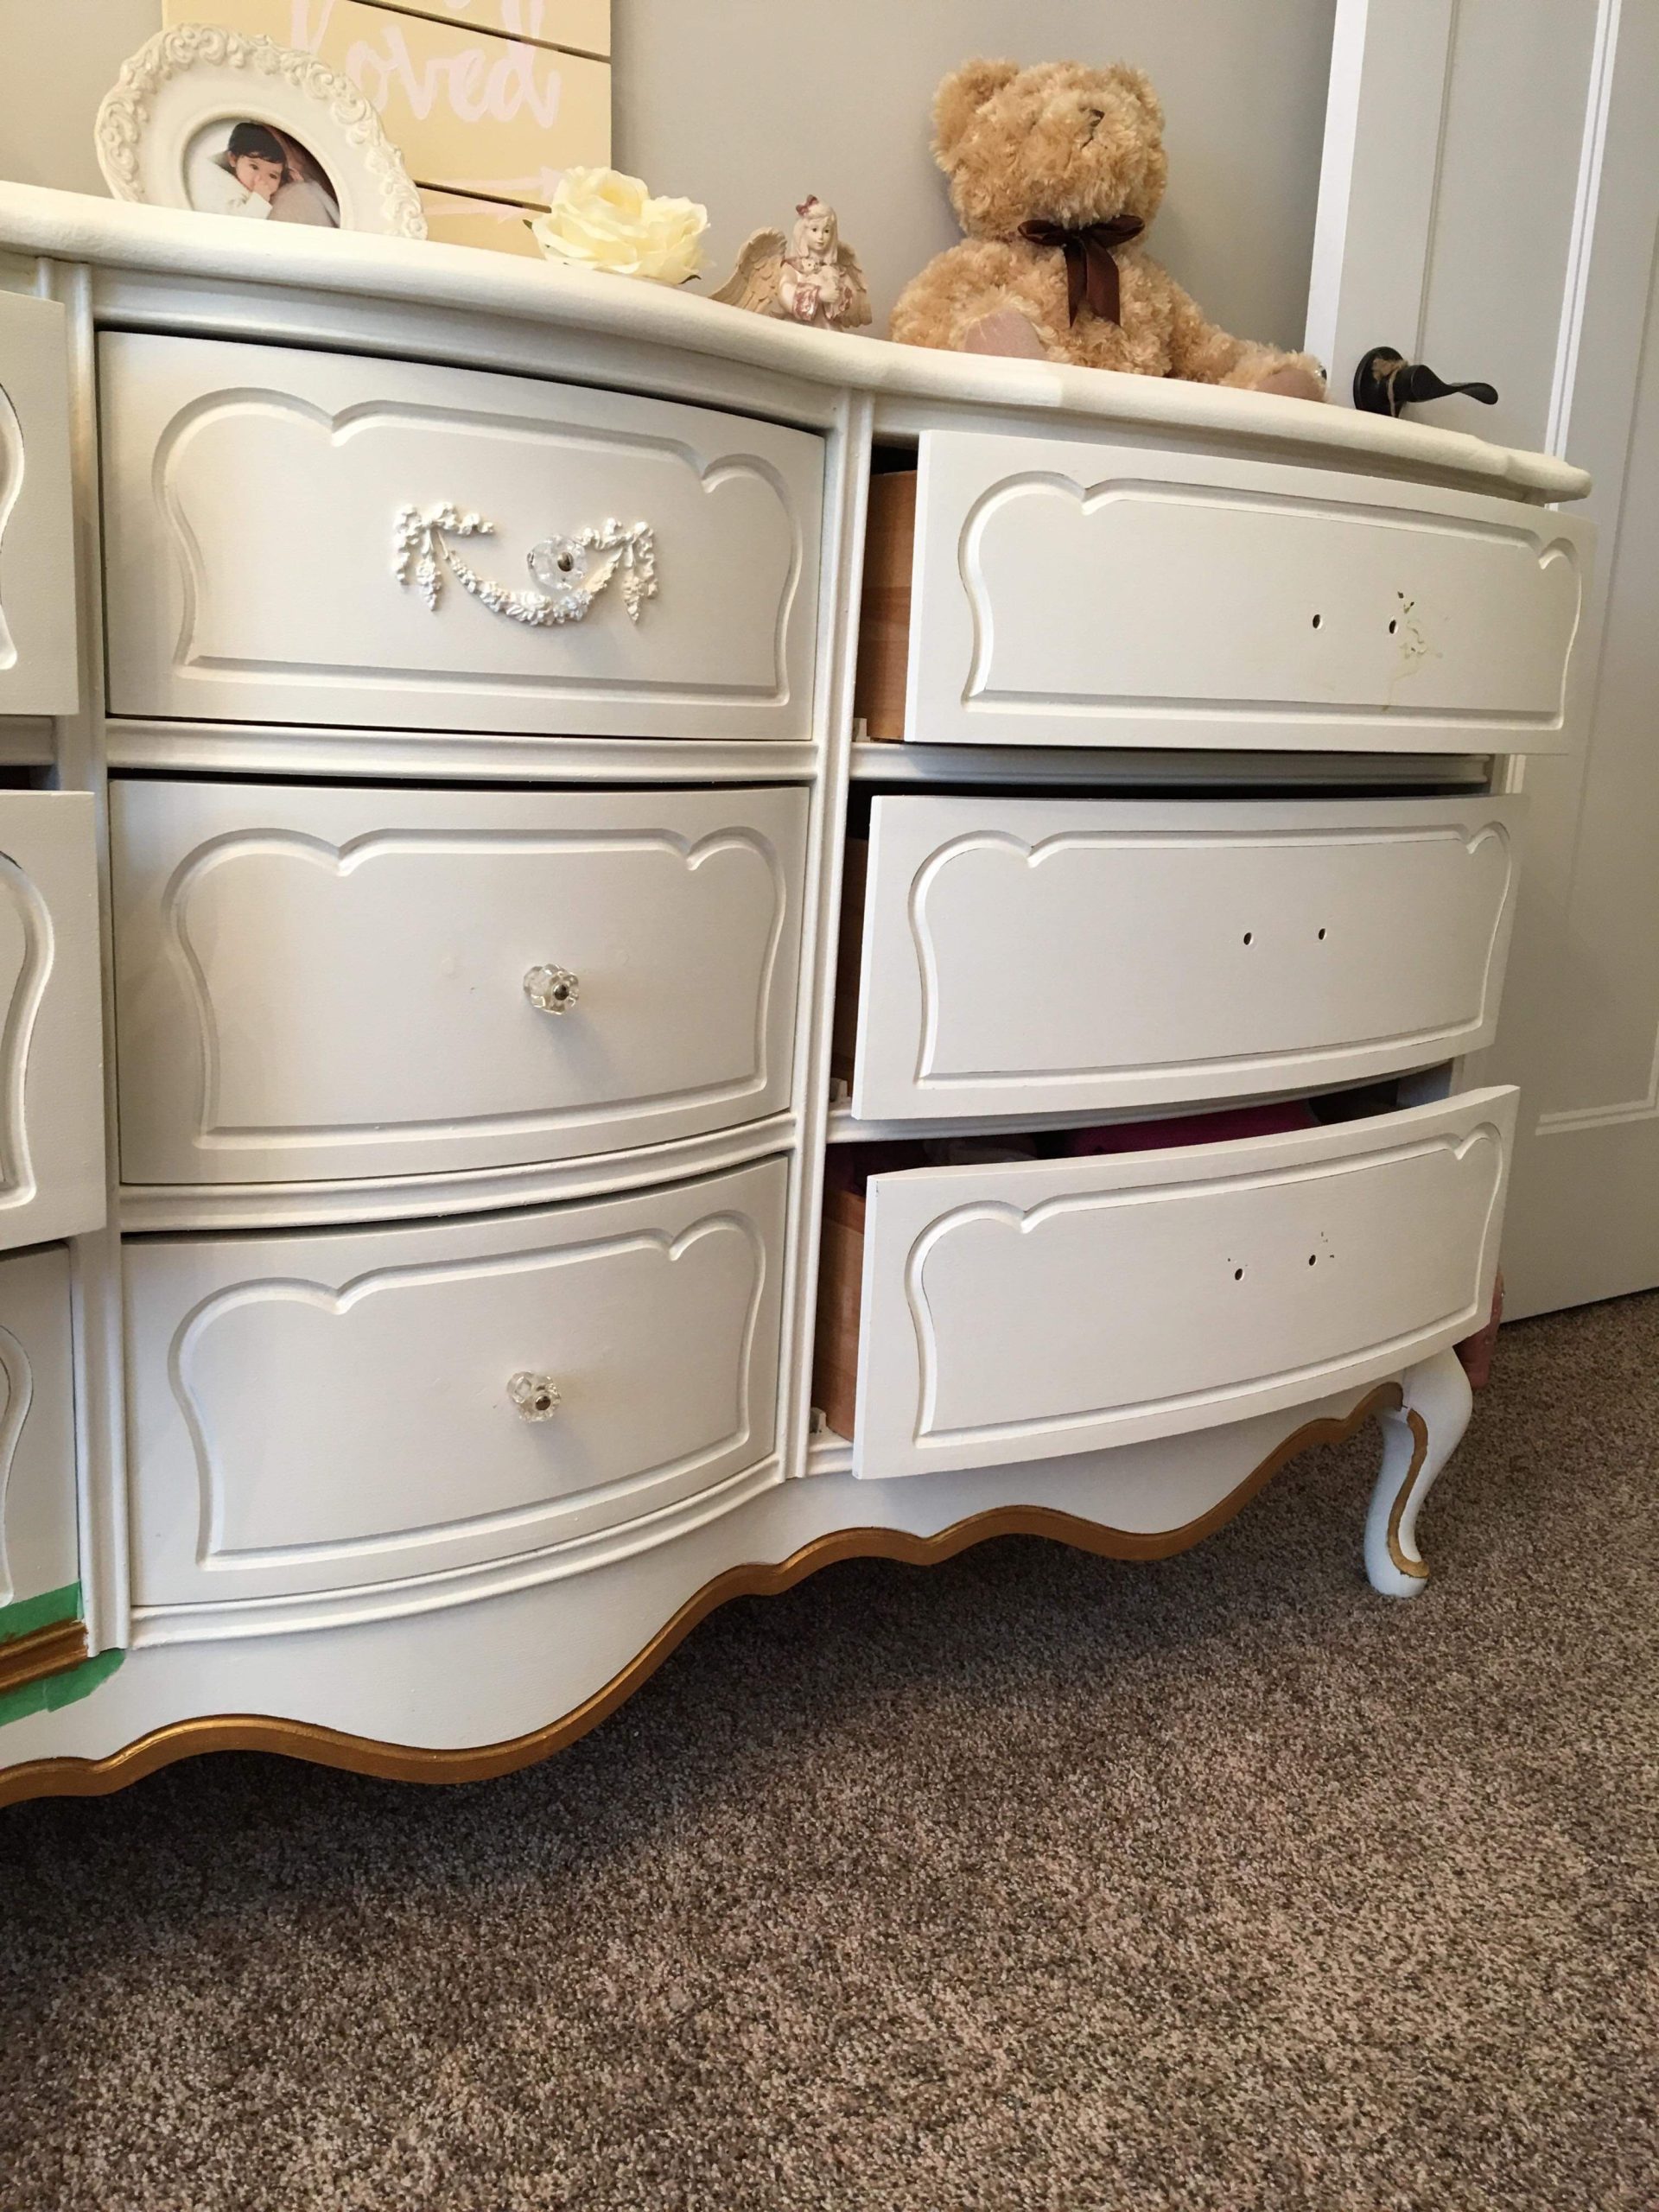
I recommend removing hardware when you are beginning to paint a larger piece of furniture. I also removed the drawers. Make sure you don’t mix up where the drawers are to be returned to!
Steps to Transformation
I started by painting the hardware out in Gold Metallic Rustoleum paint. Here is a link to another amazing gold metallic paint as well!
I also started by using painters tape to tape off the parts of the dresser that I wanted to paint in gold.
Painting Step
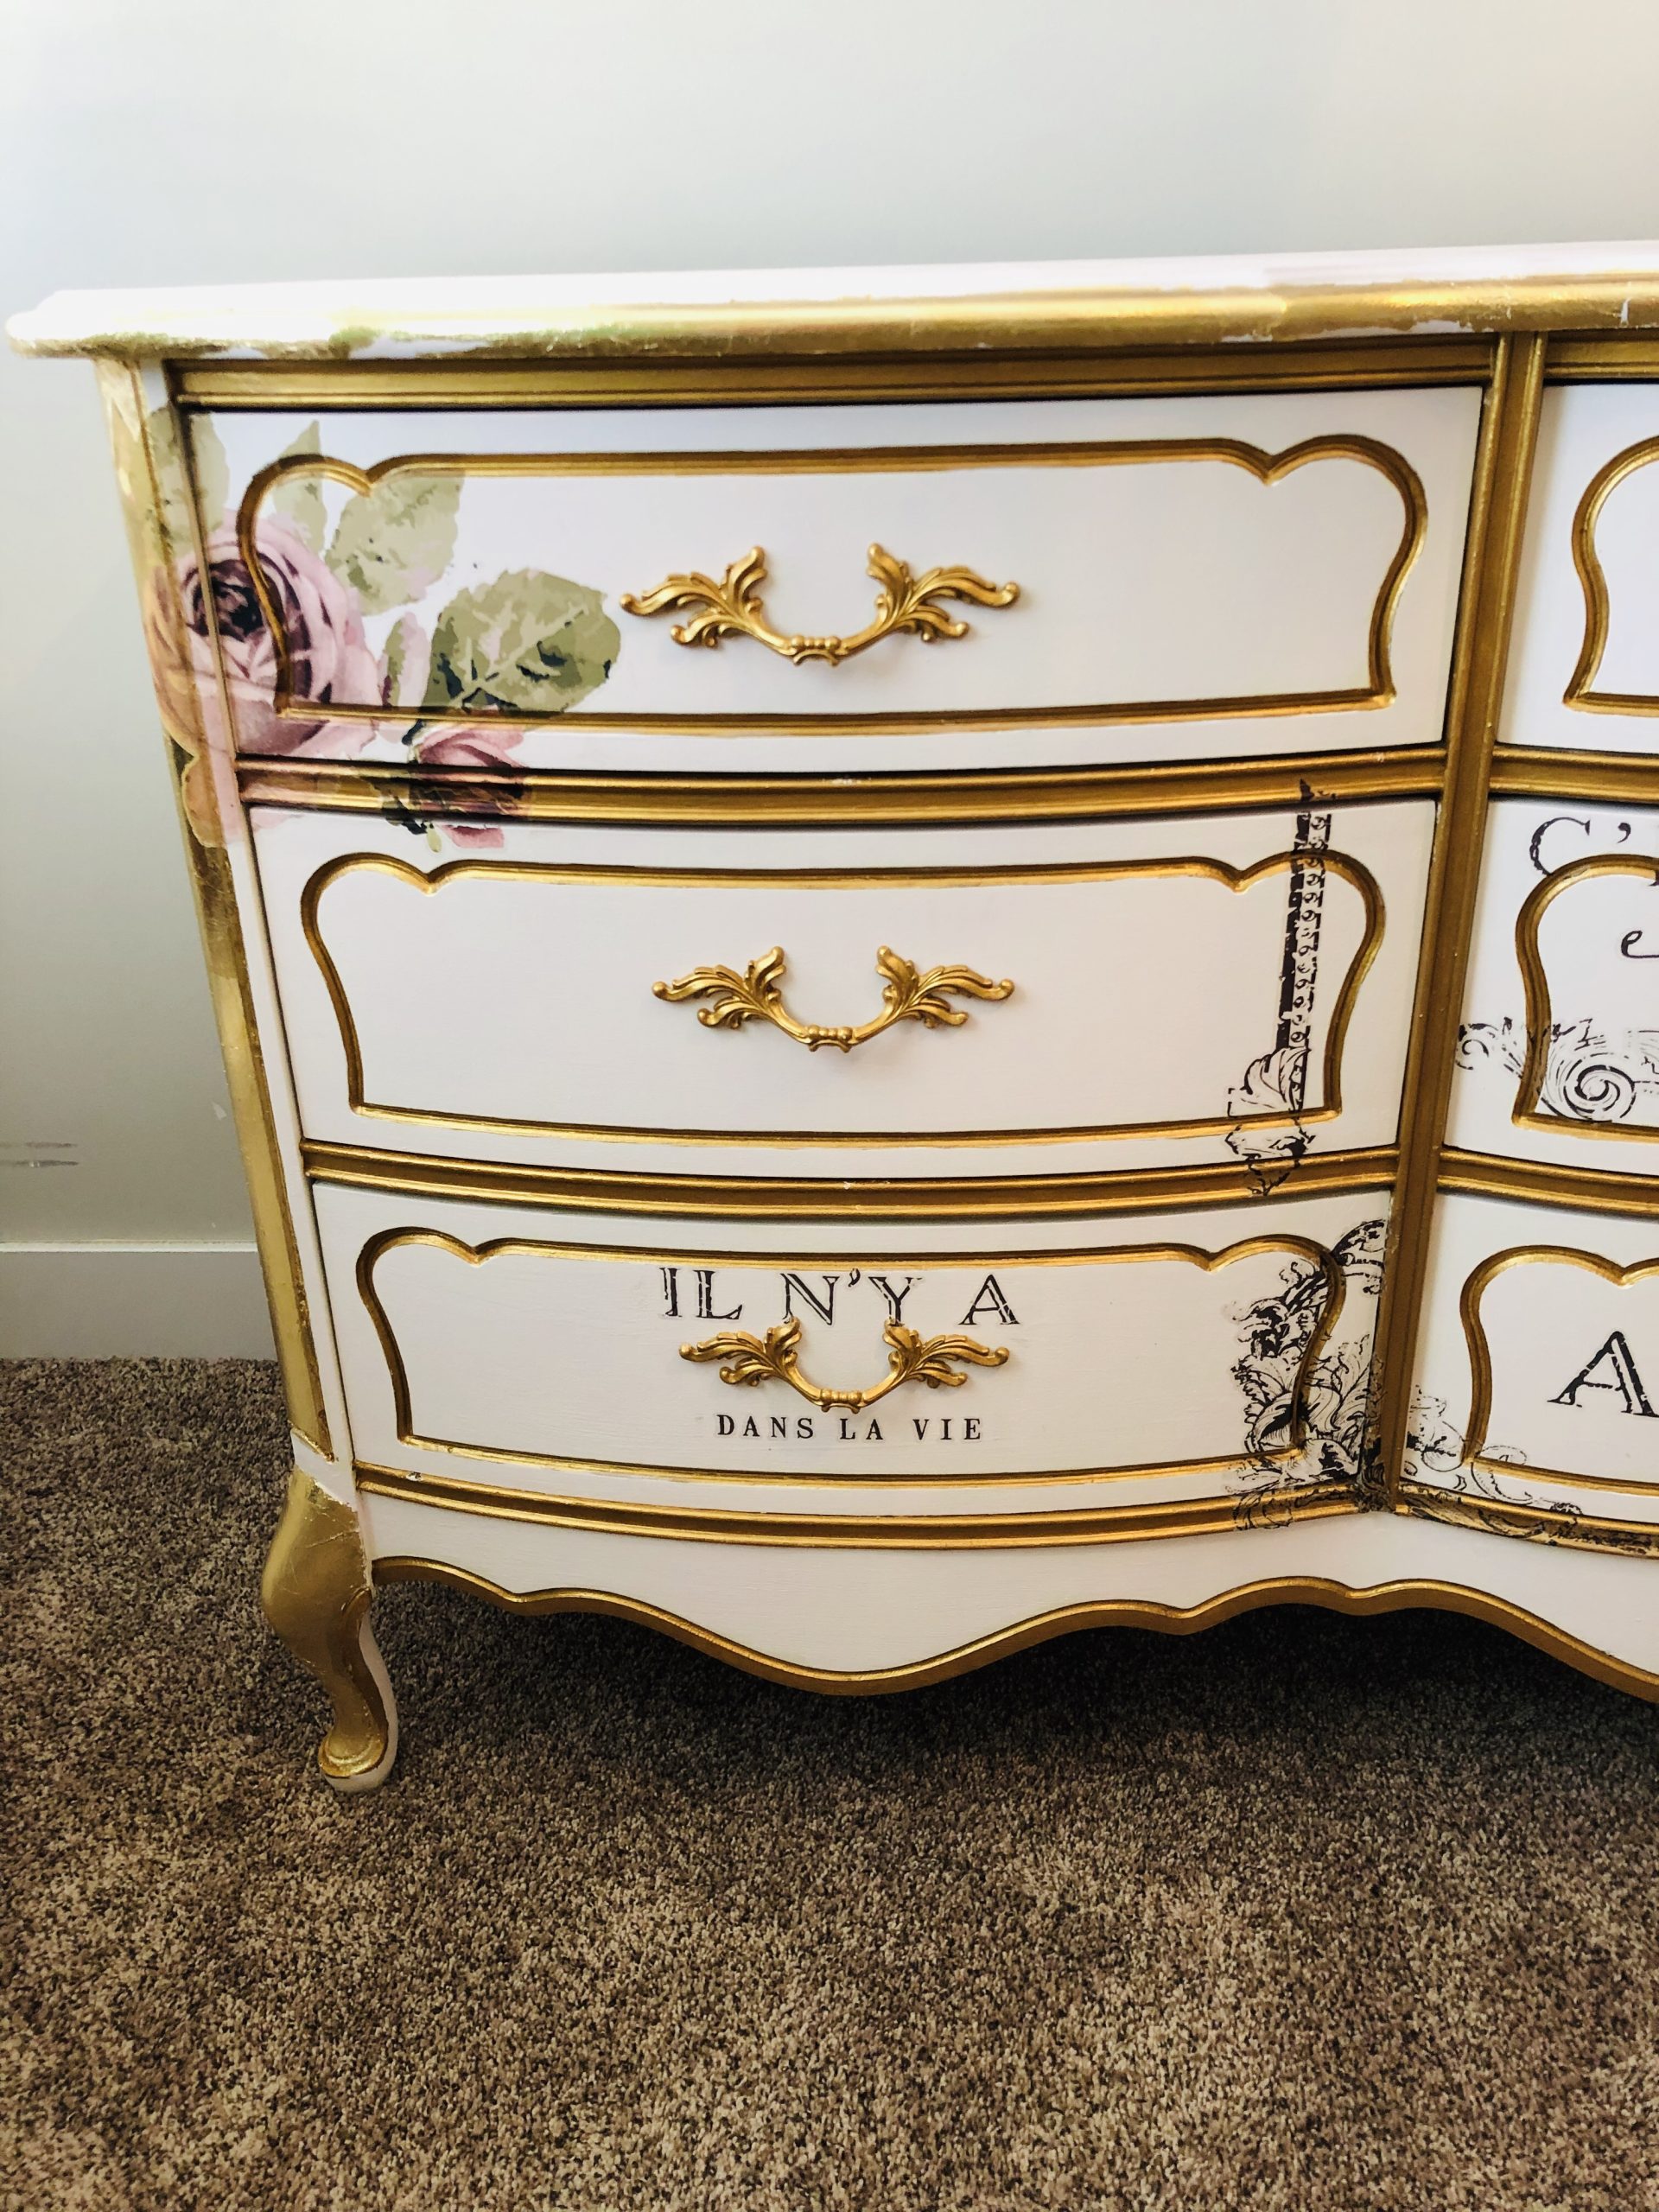
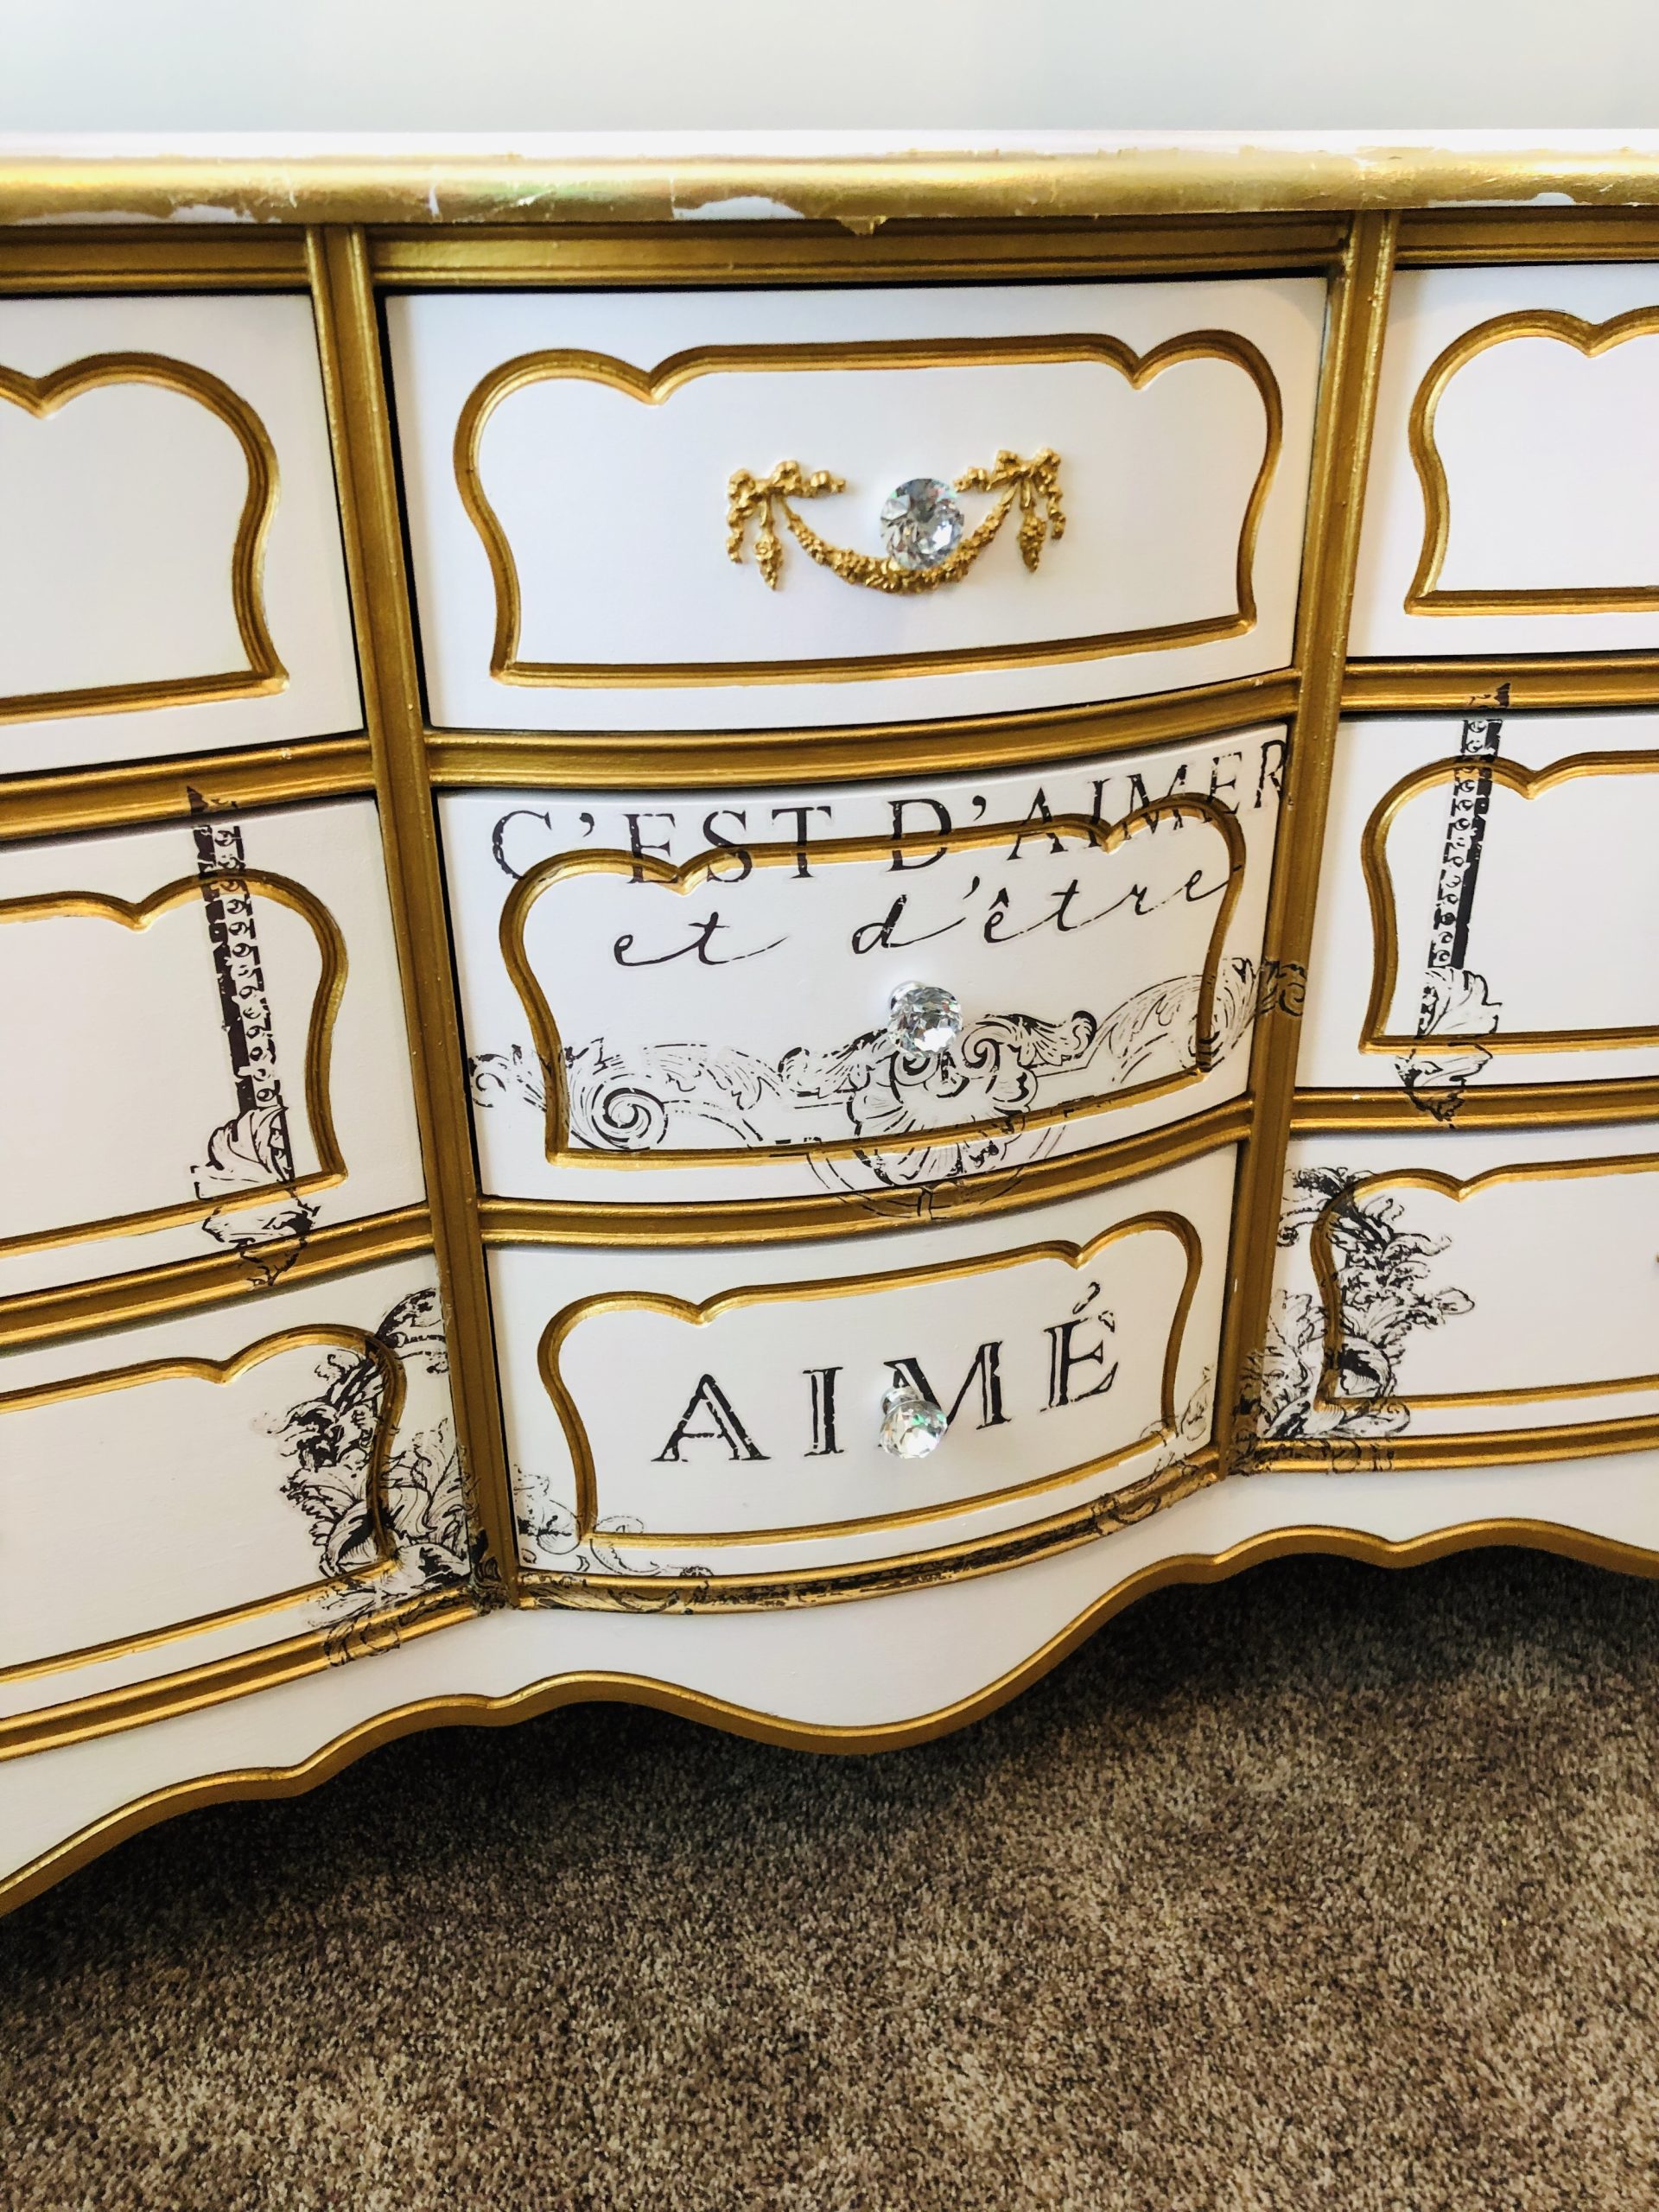
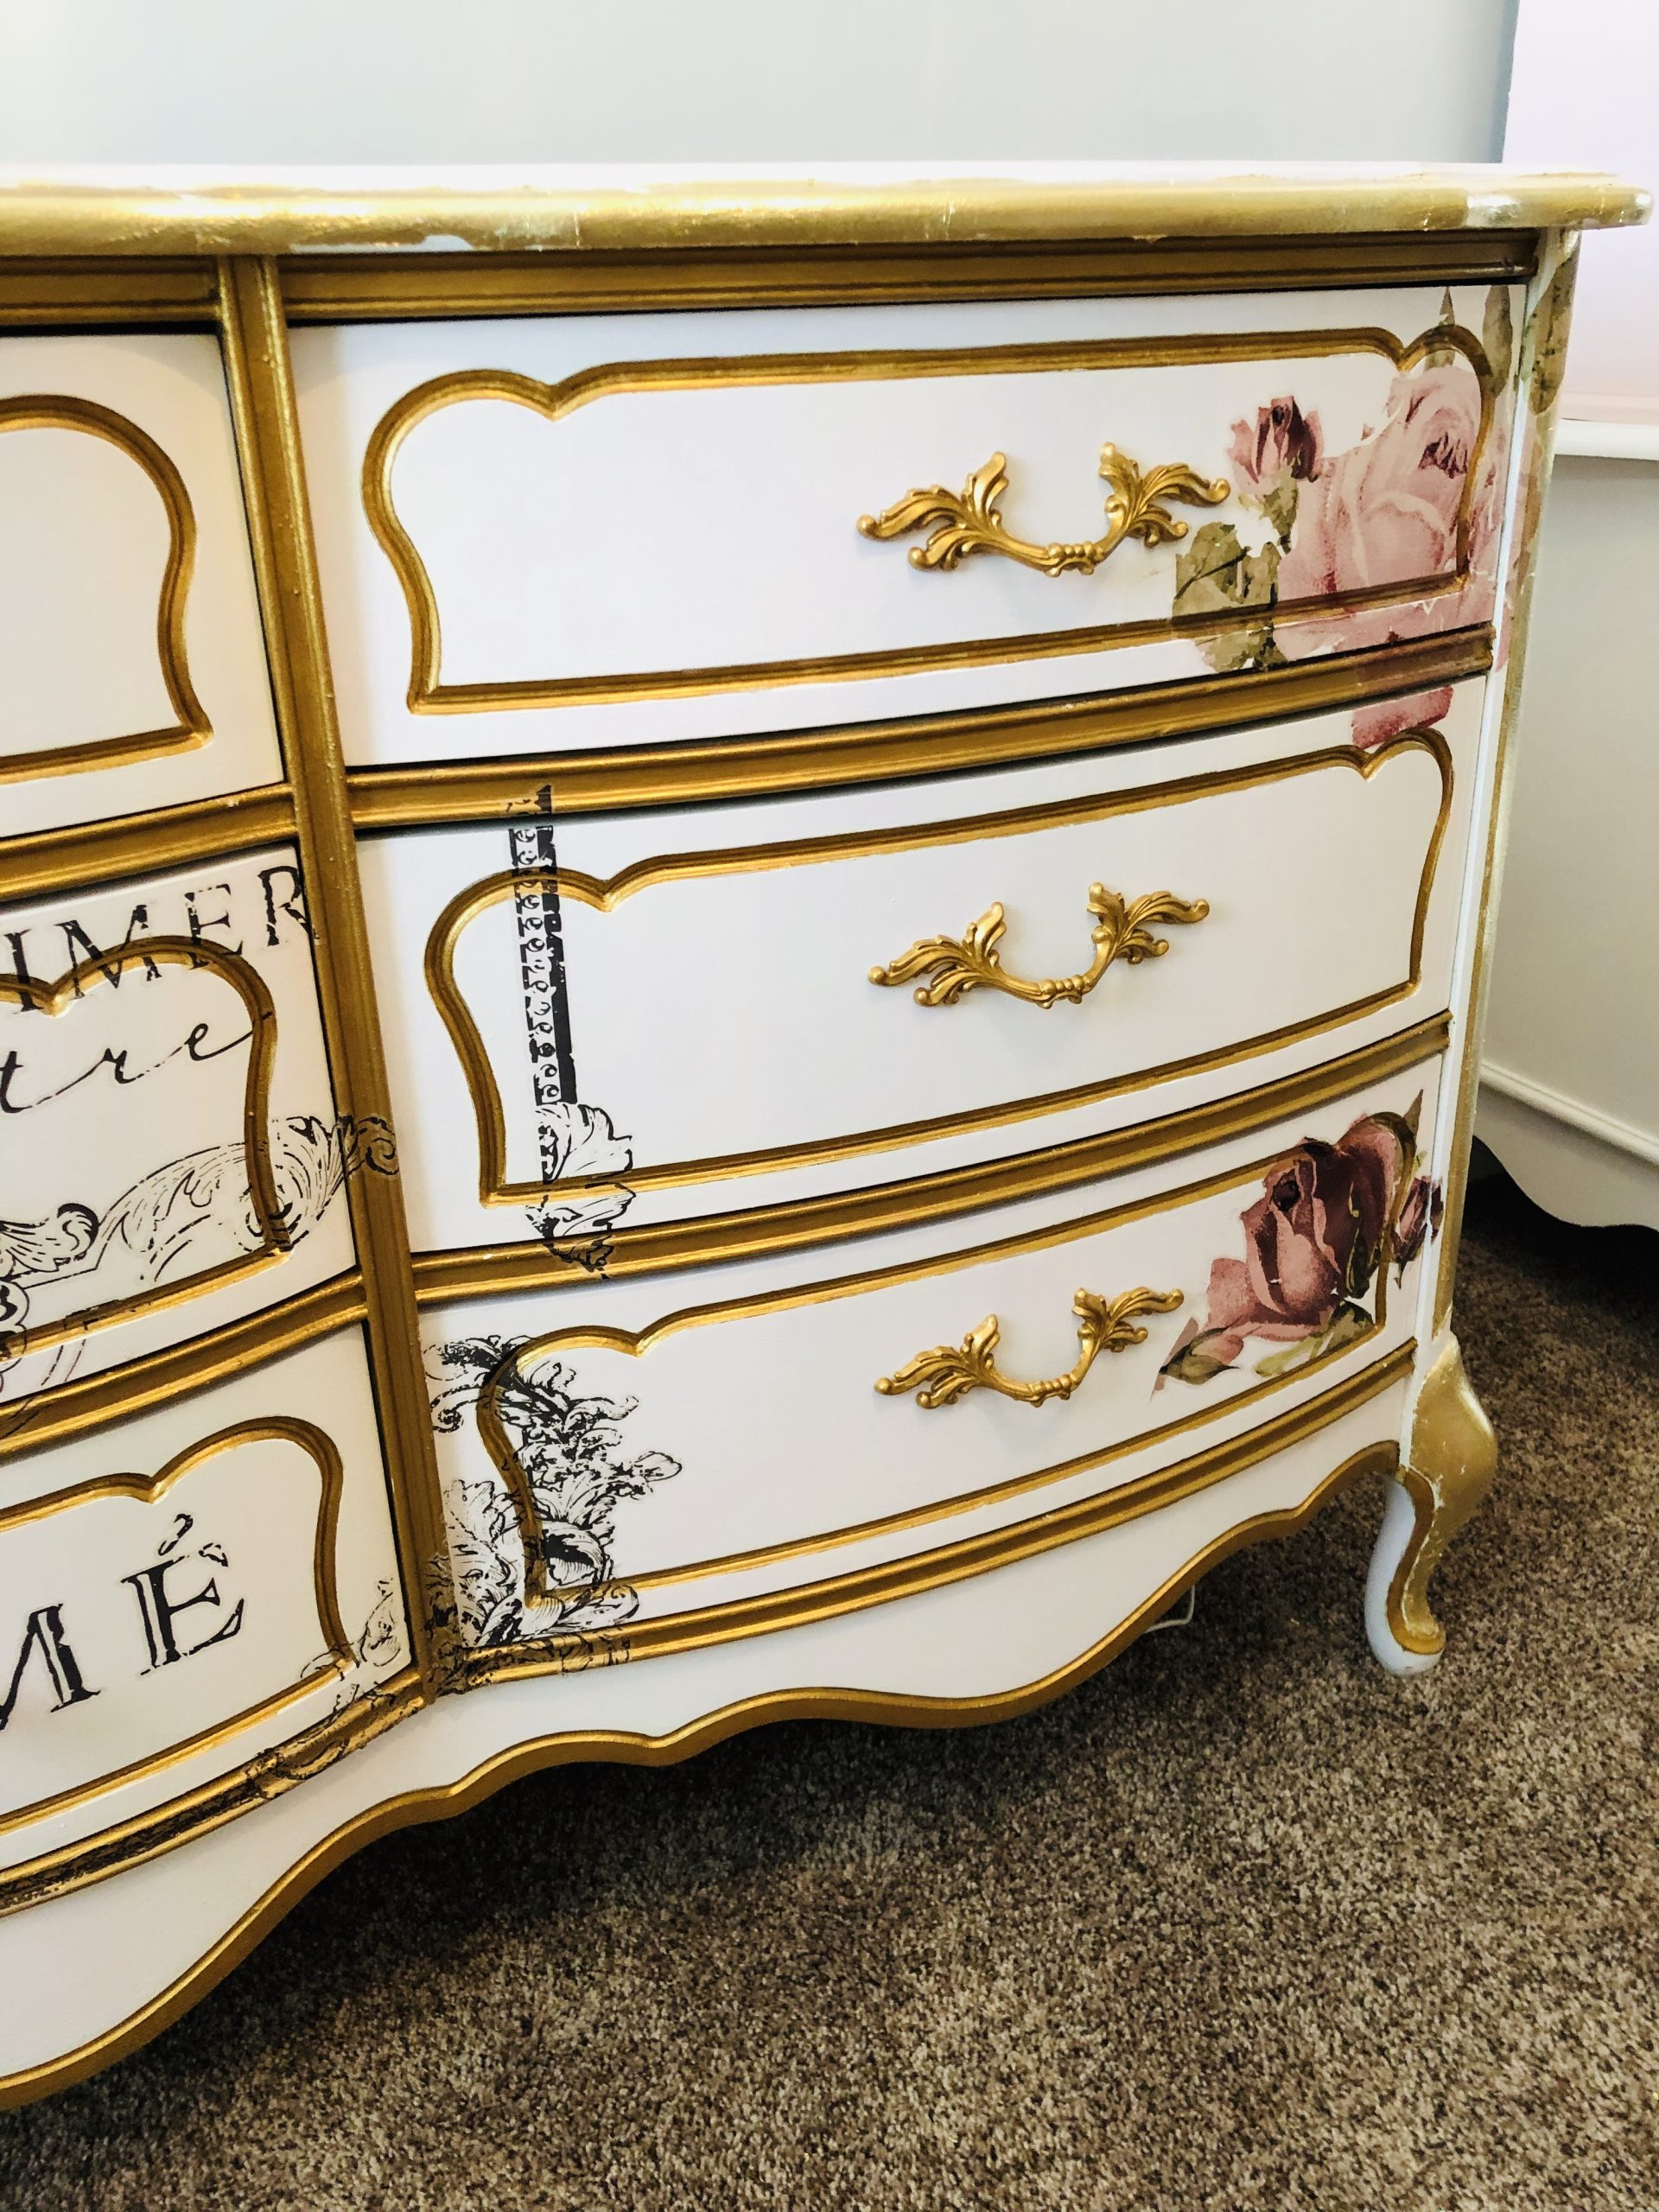
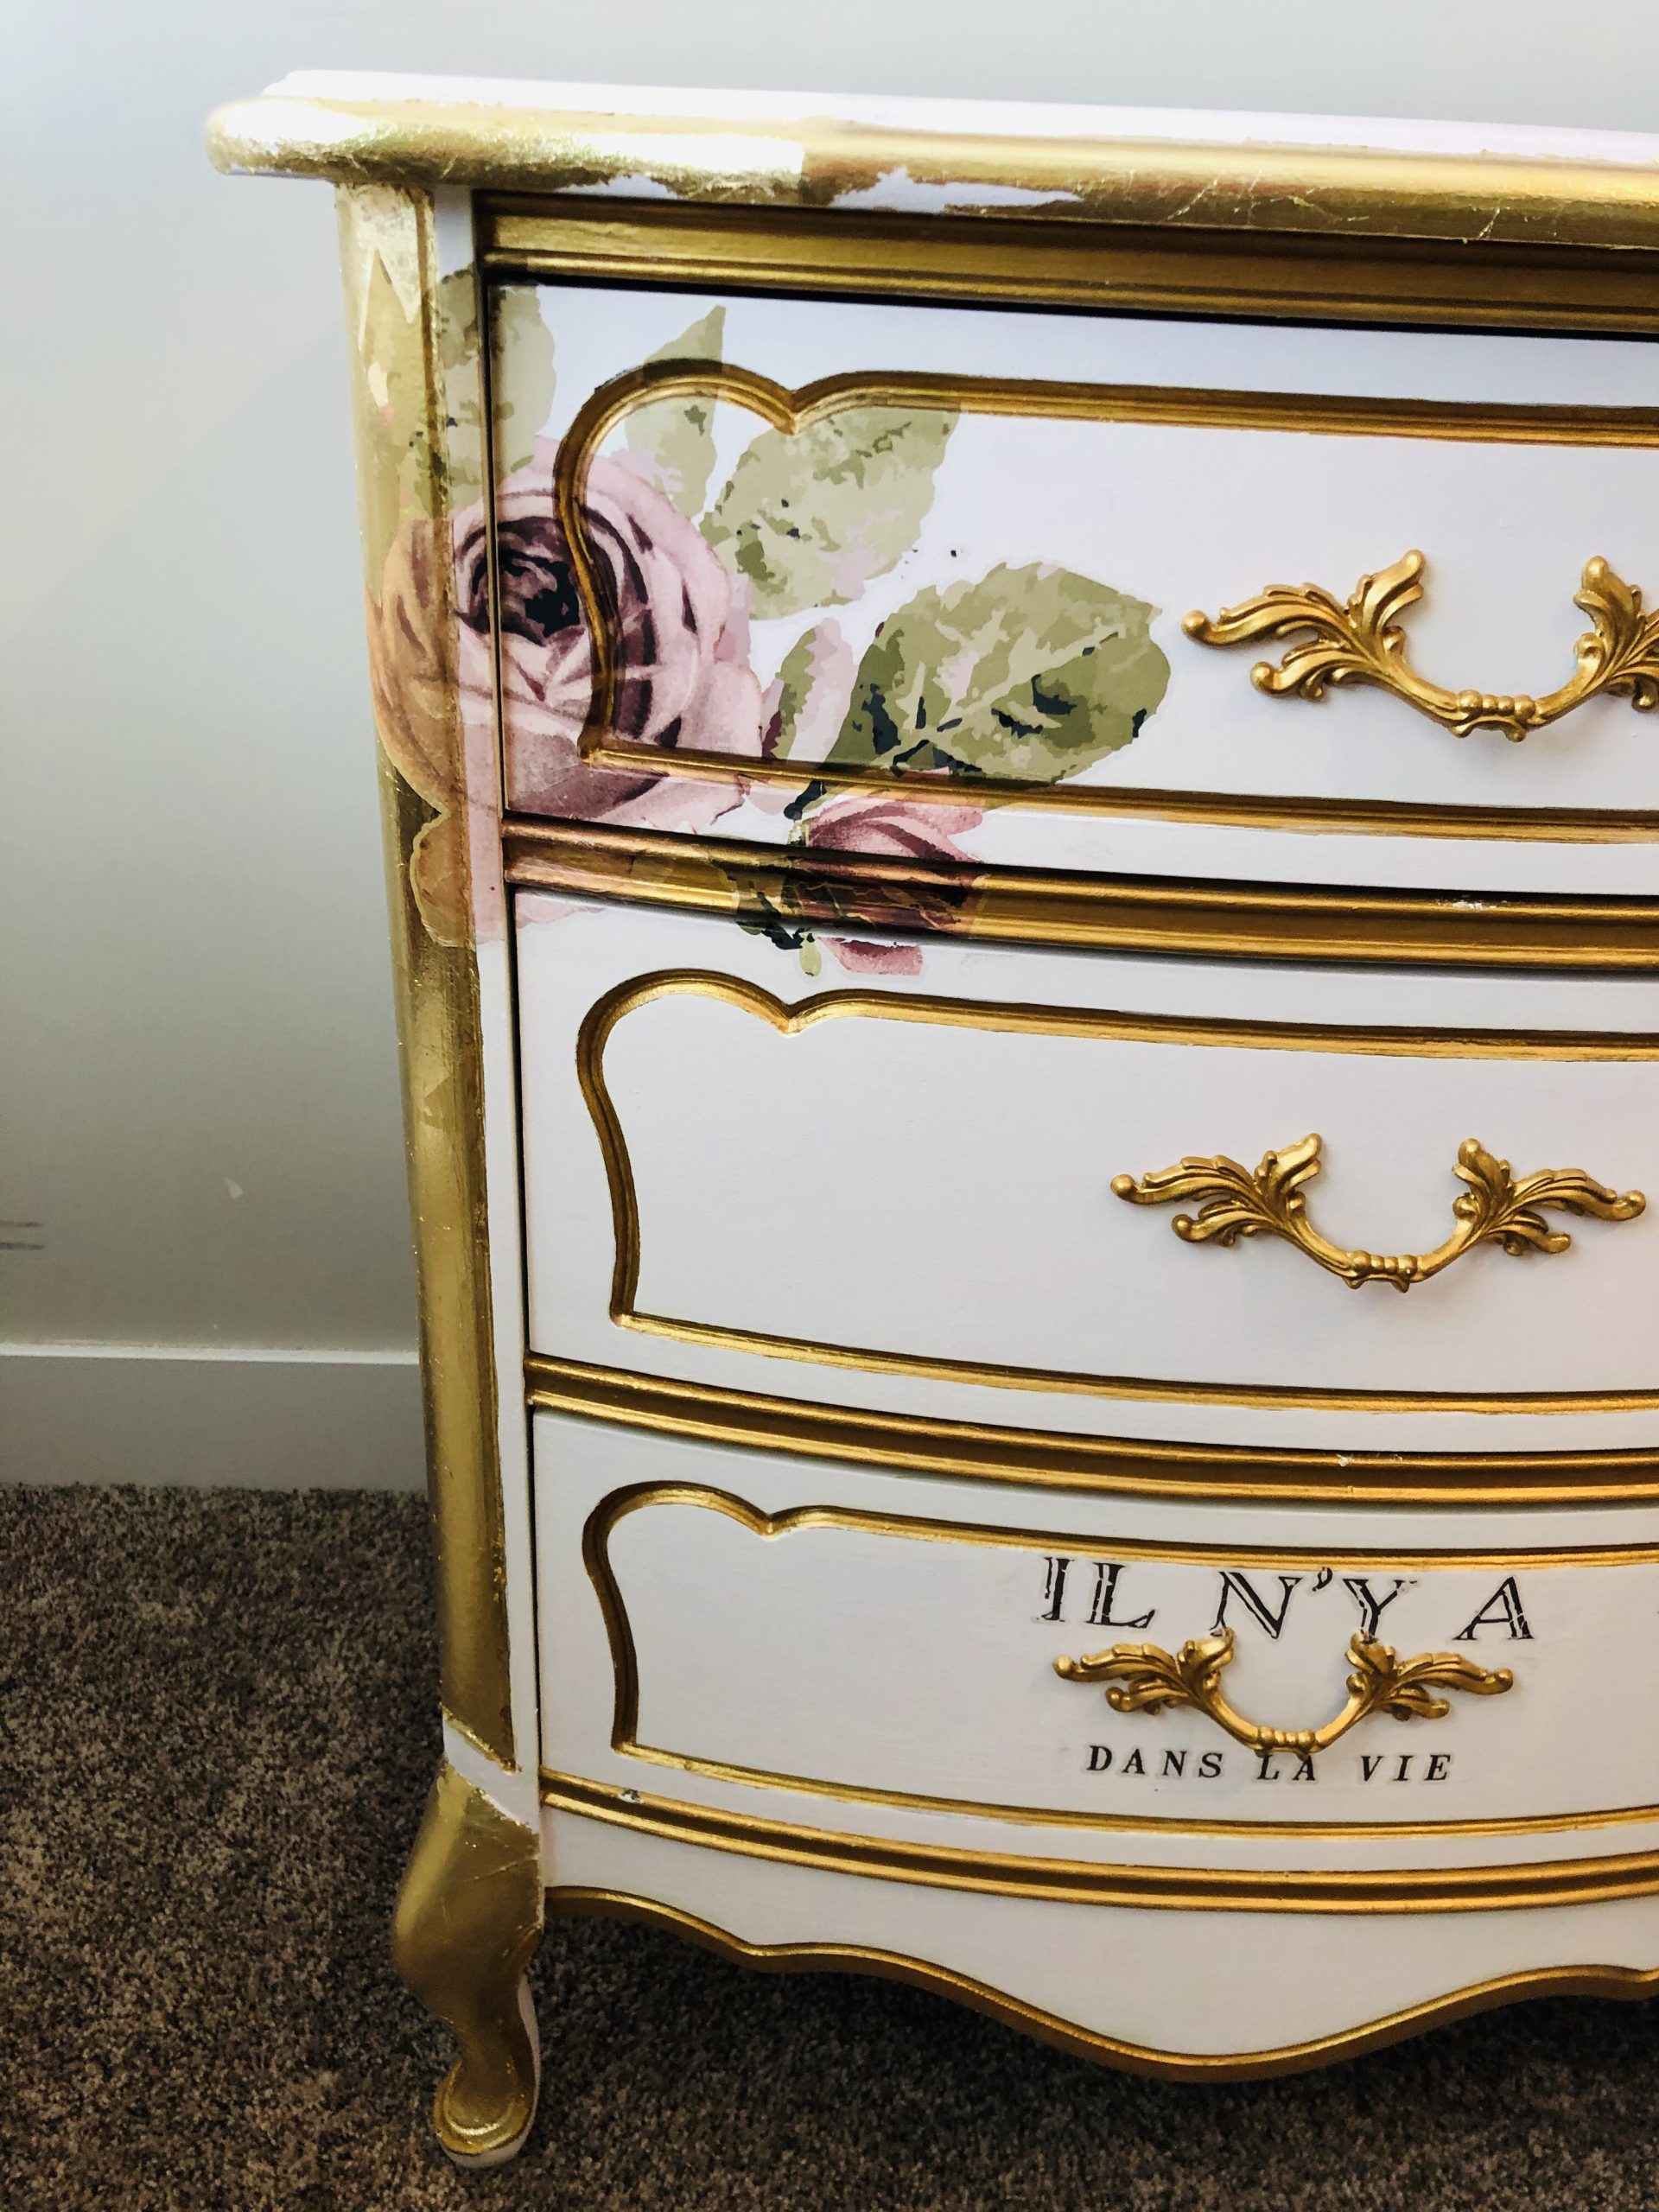
I chose to paint the dresser in a light pink chalk paint. I painted out the dresser in 3 coats of pink chalk paint. Here is a link to a similar baby pink chalk paint I used for this project if you are looking for a nice pink color!
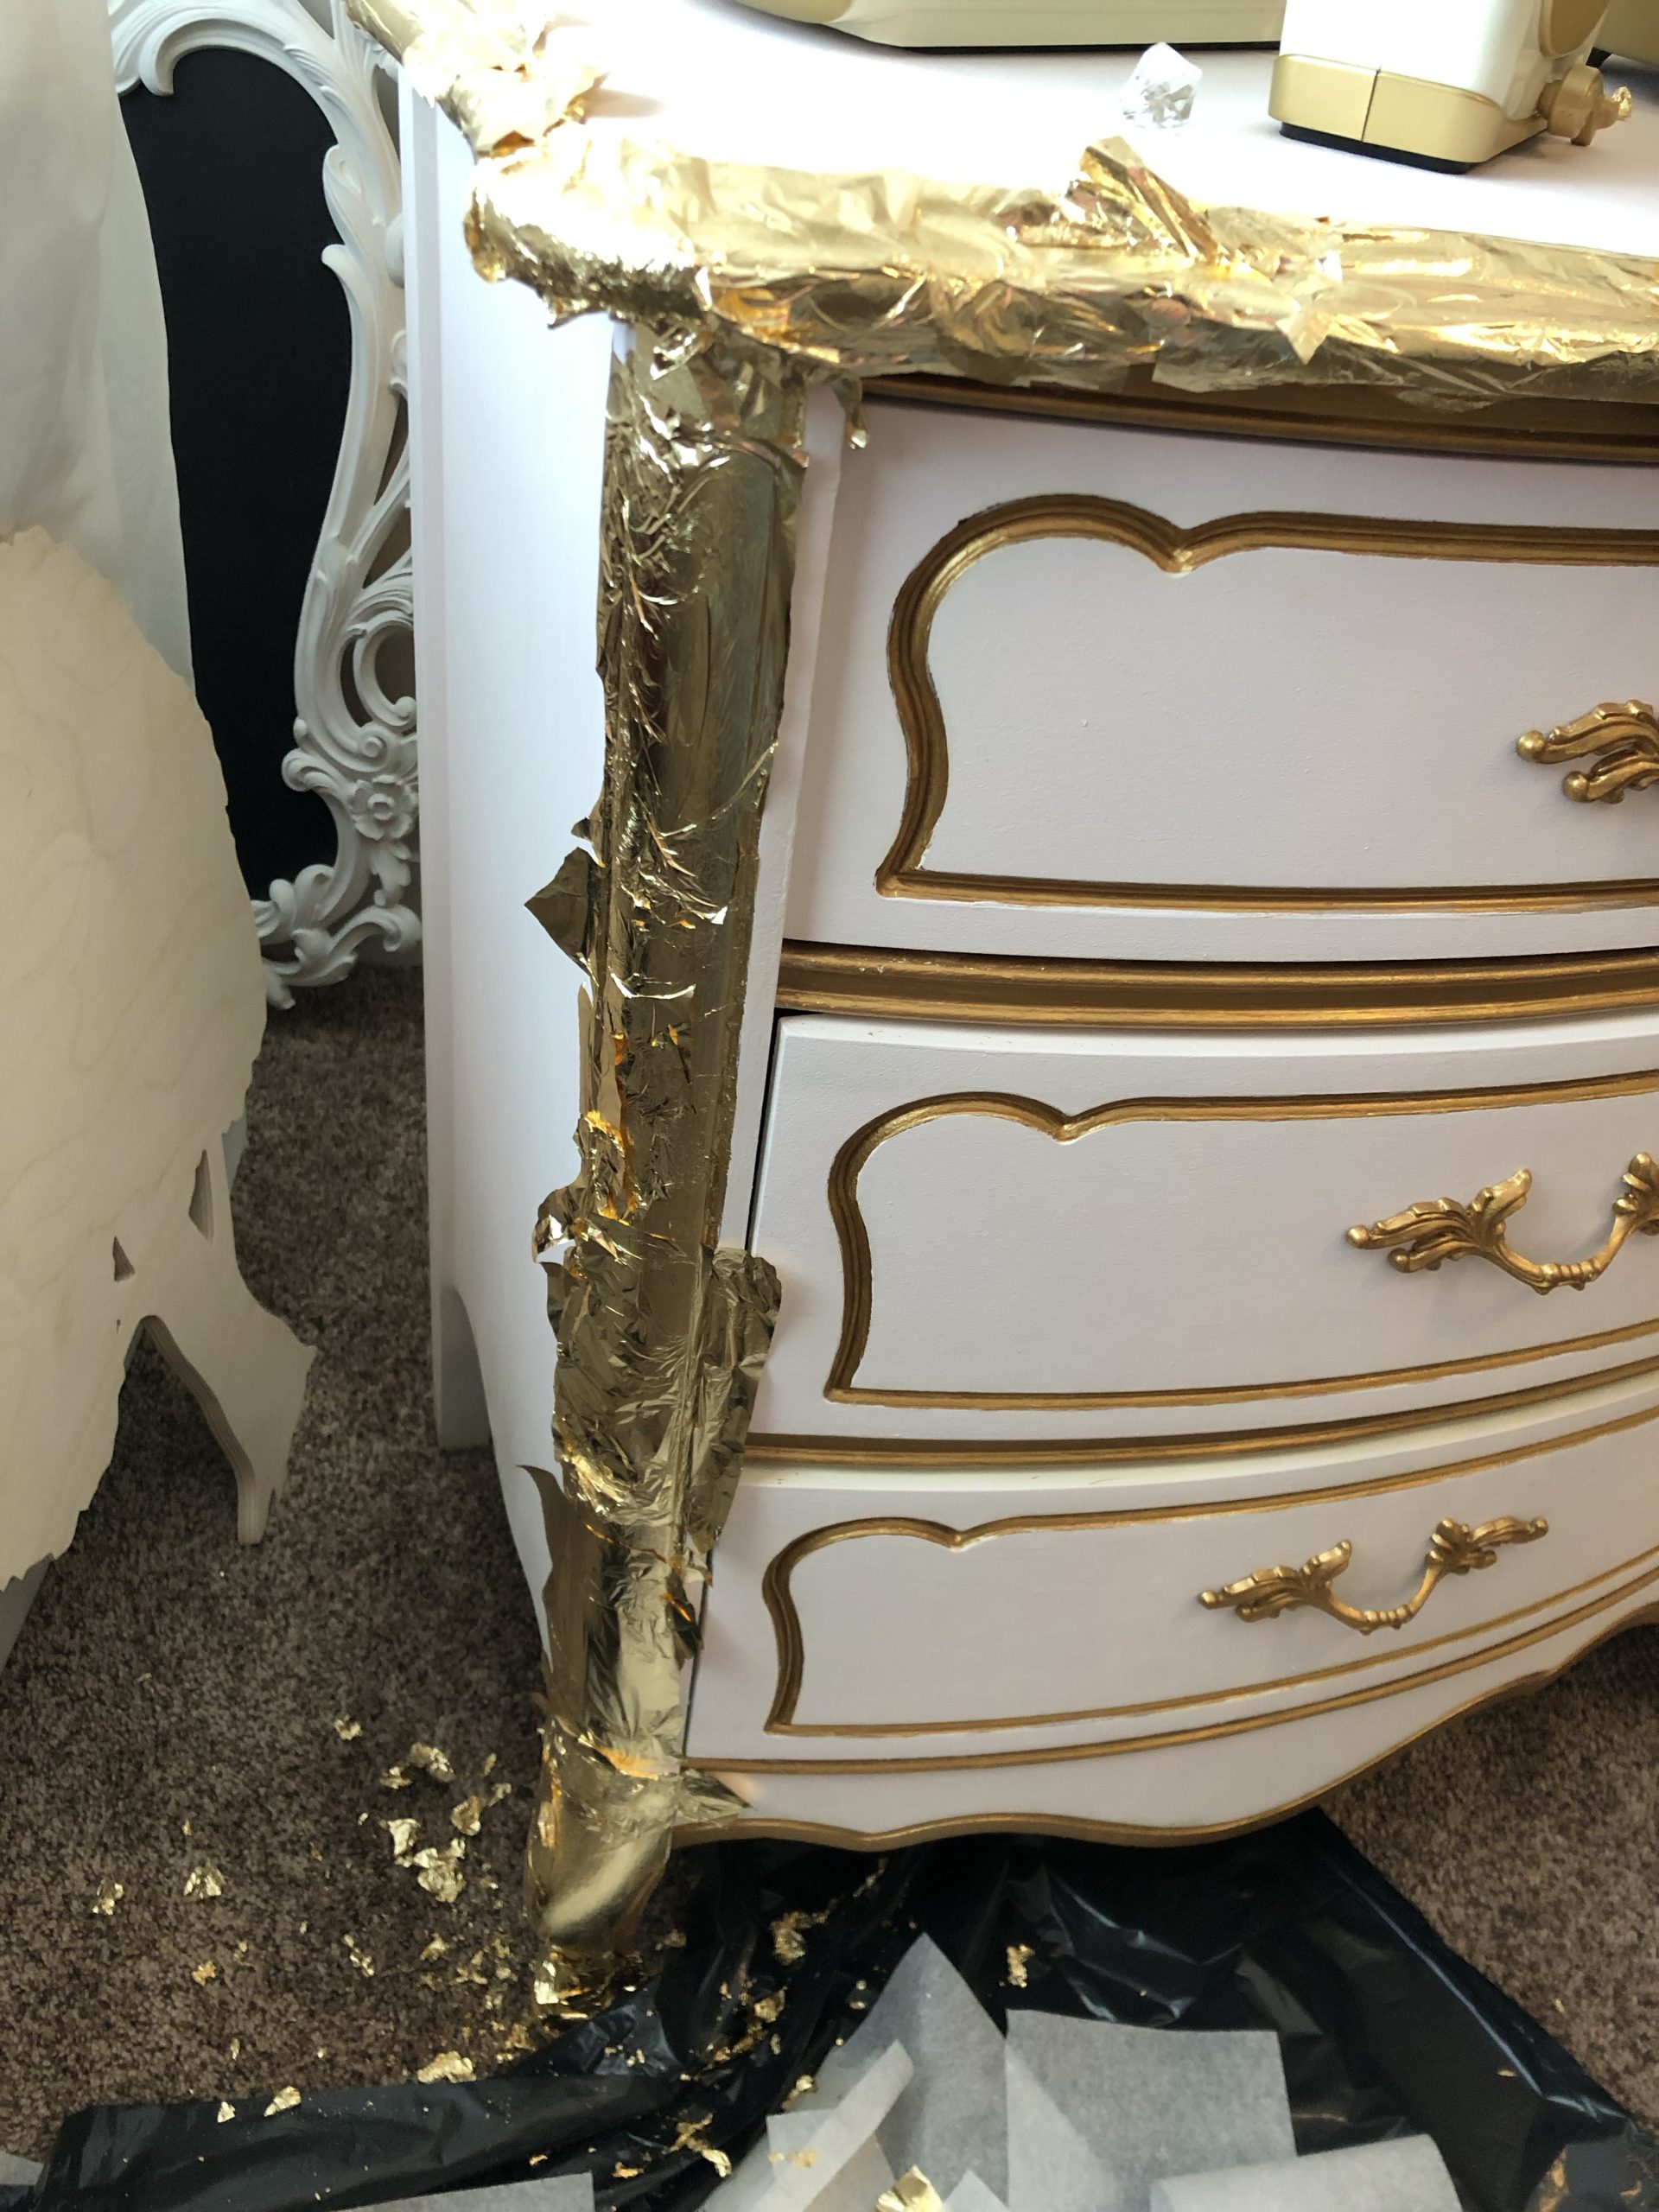
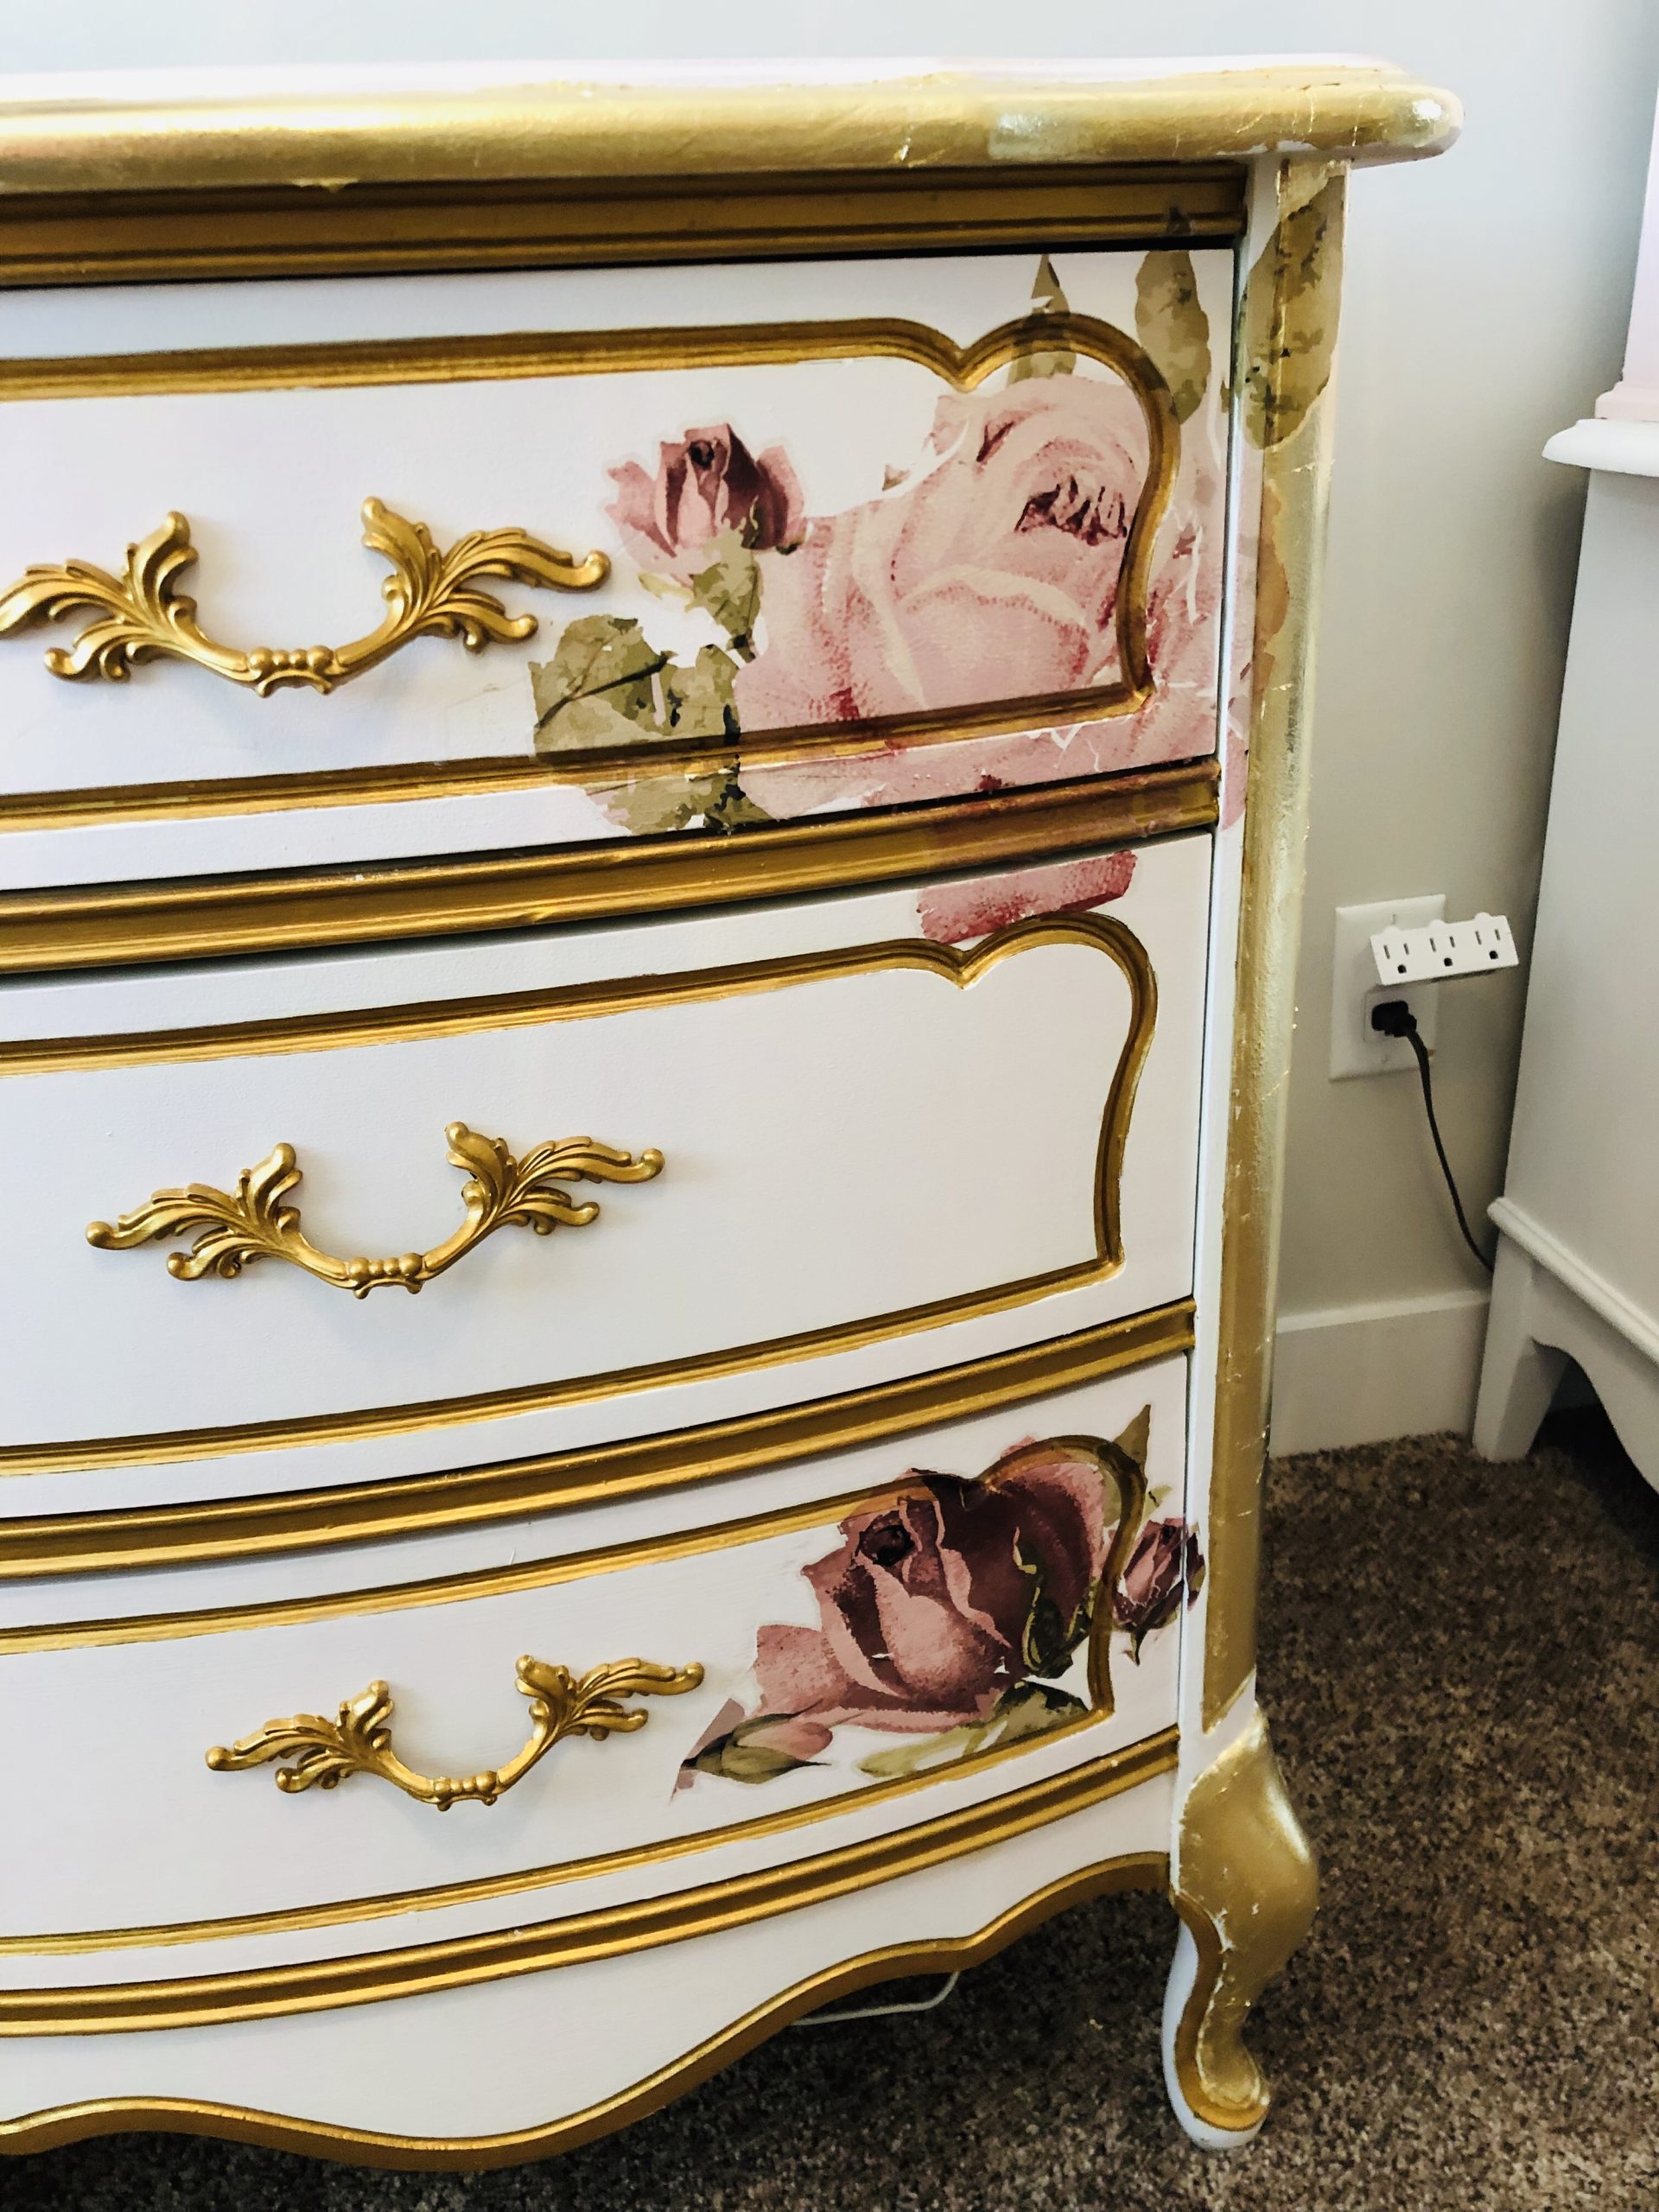
Gold Leaf Application
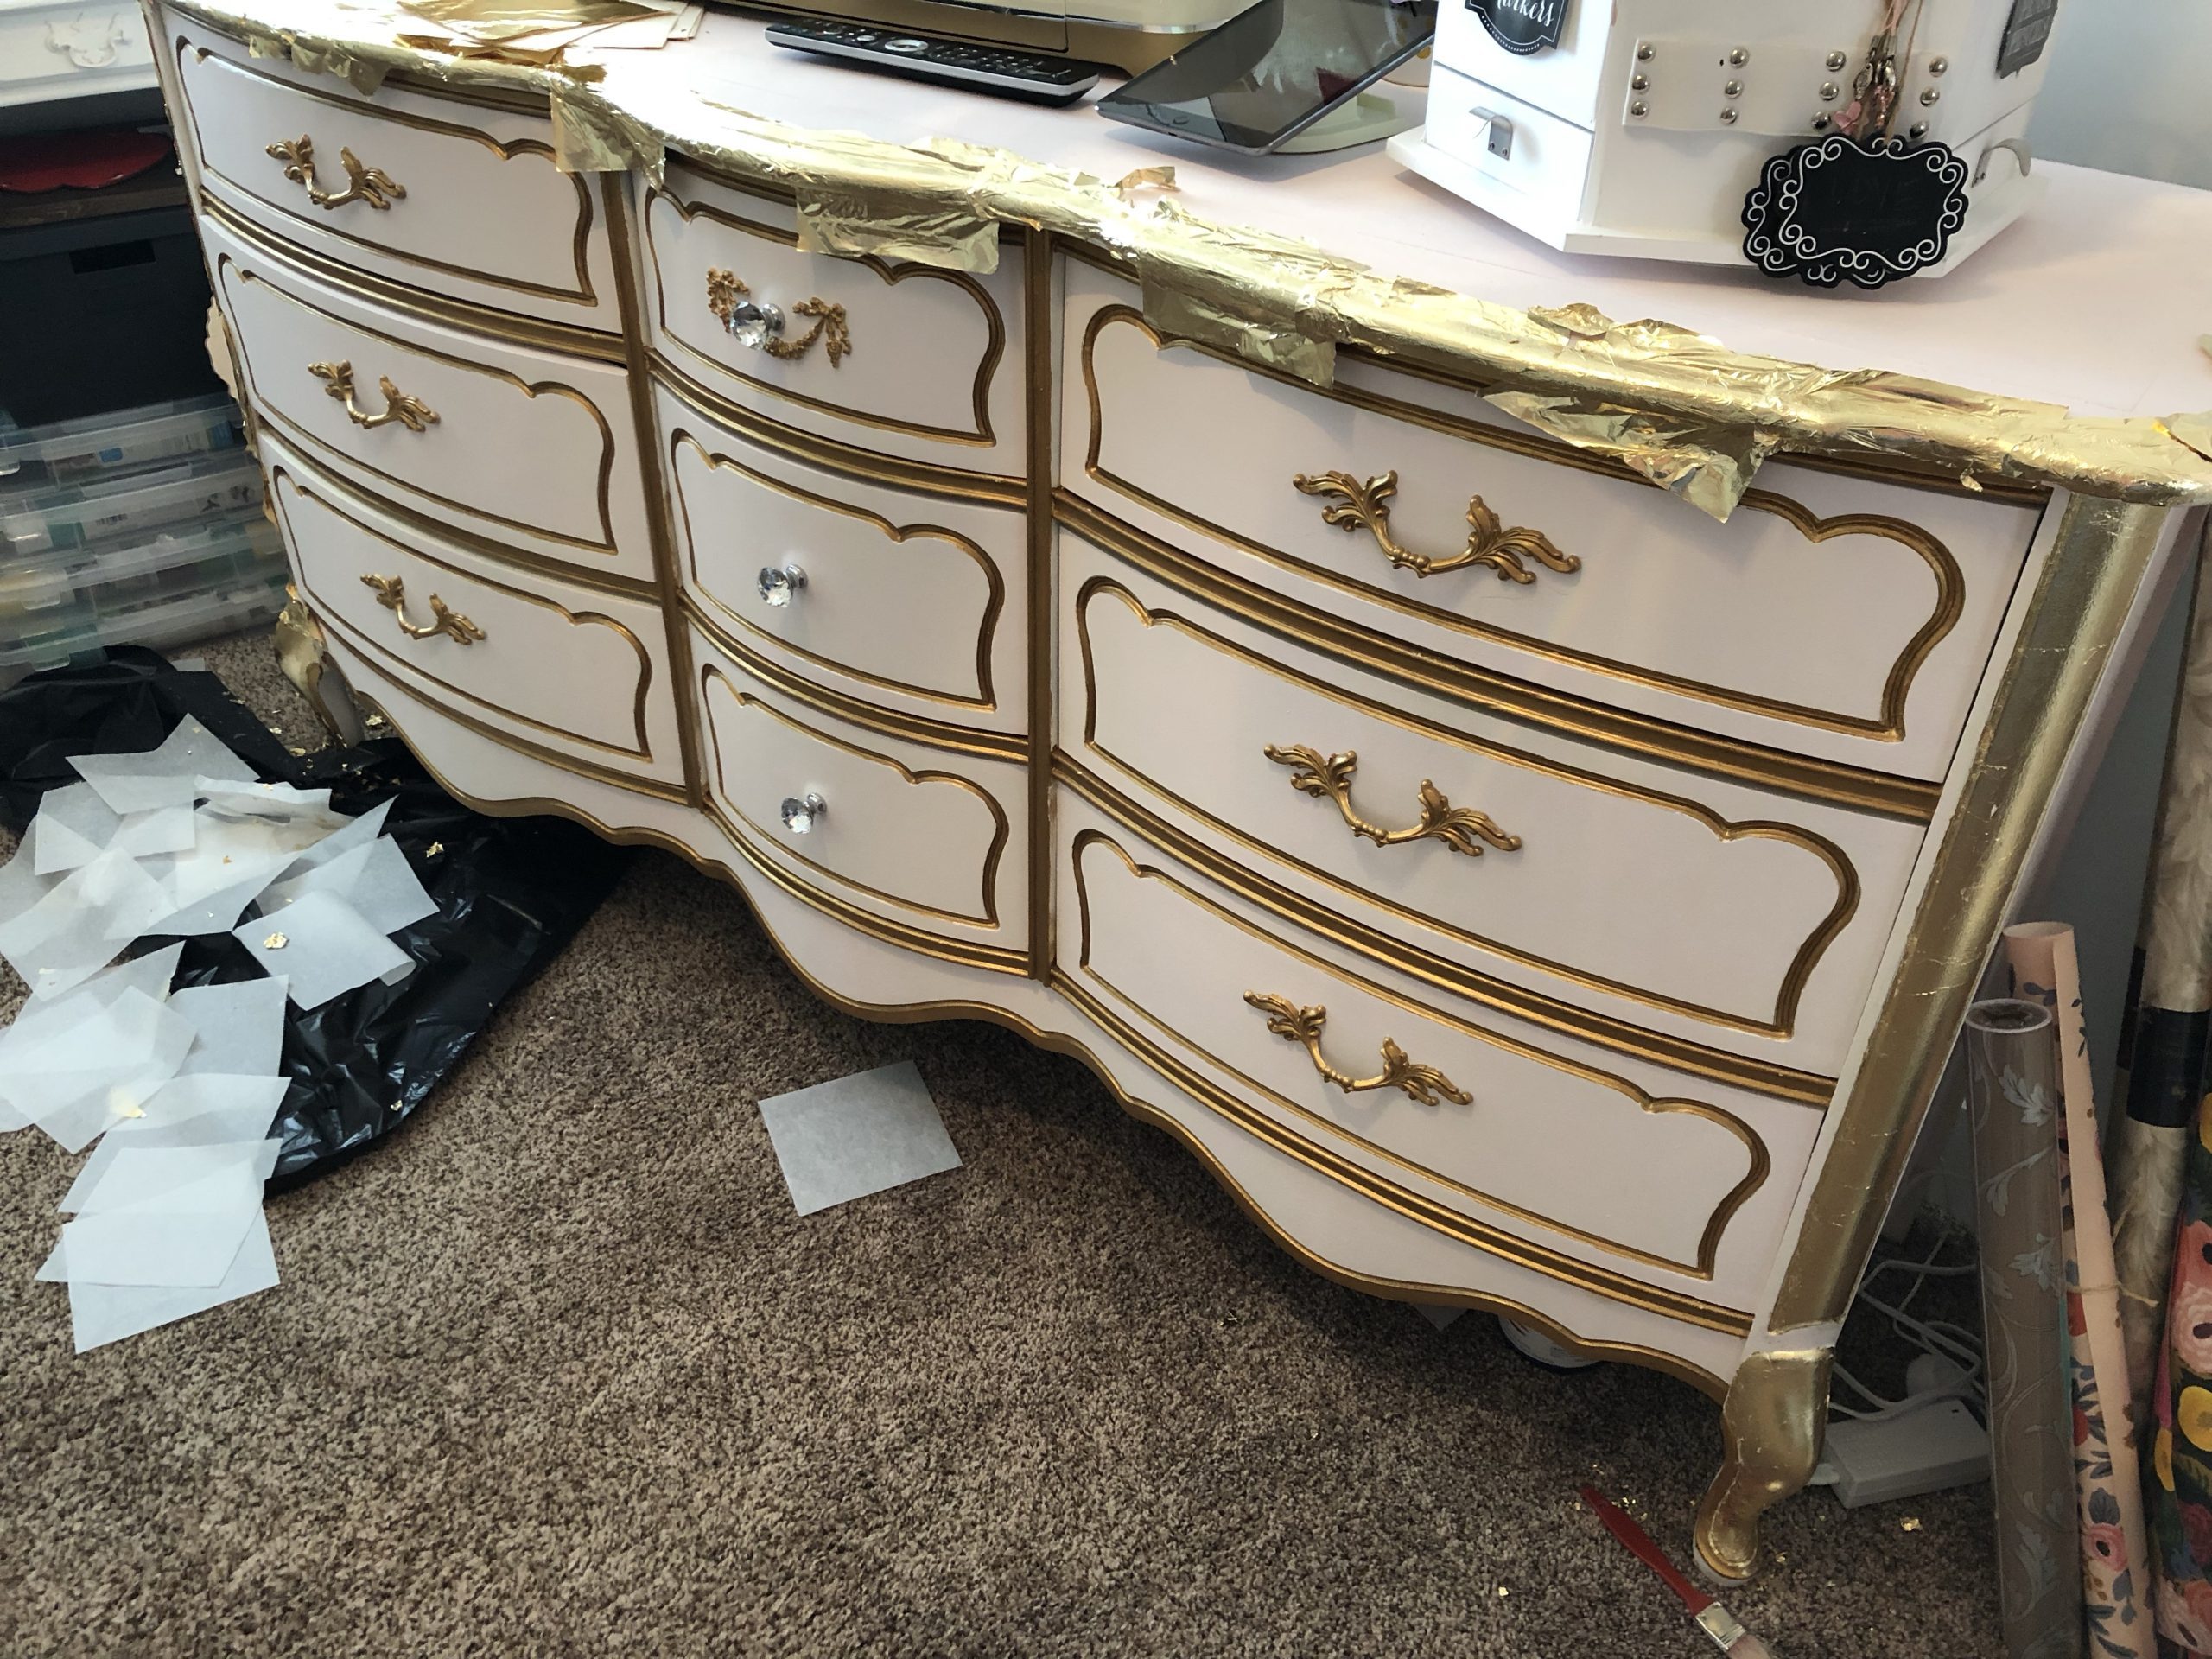
You will be happy to know that gold leaf is super inexpensive! Each sheet goes a long way! I had so much fun with my gold leaf sheets with this project. Here is a link to the sheets I purchased for this project!
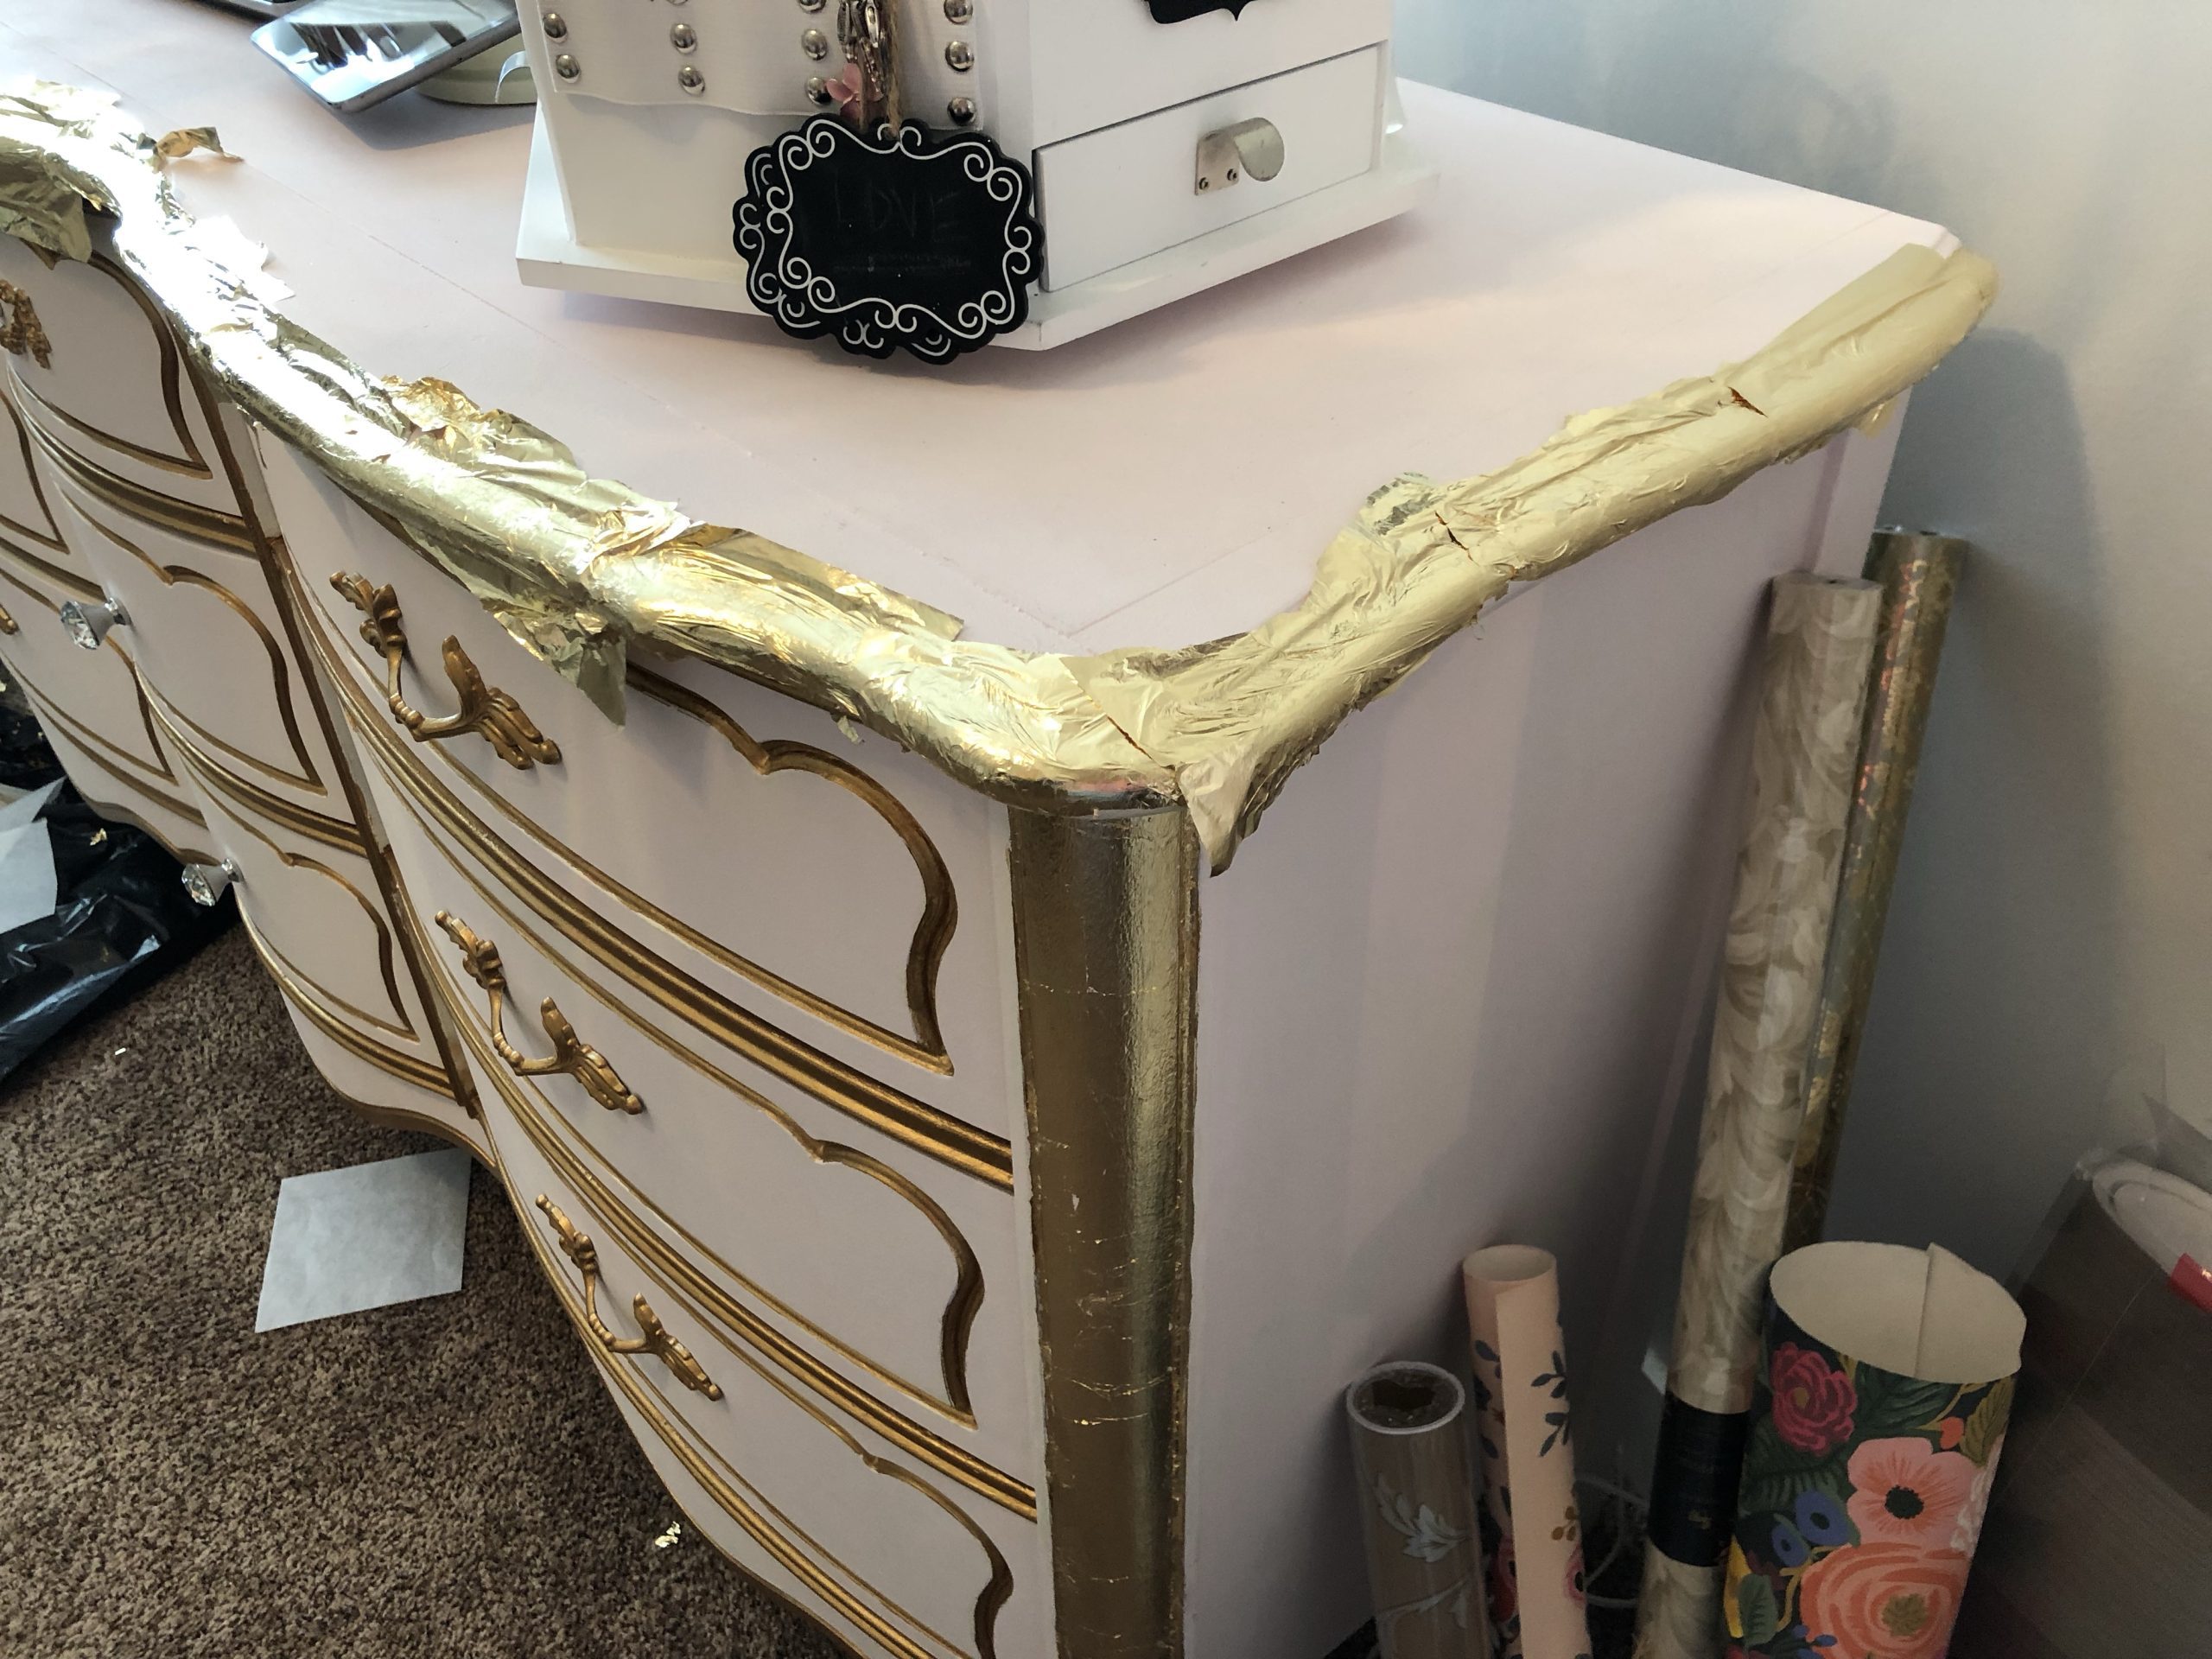
You will want to start your project with a small paint brush and some gold leaf glue. This glue should be applied right on the area you are wanting to put down the gold leaf. You will apply it with a brush and wait a few seconds until the surface becomes tacky and then apply your sheet over it.
Then you will take a small clean craft brush and remove all of the excess leaf which you will notice is all over my floor ha!
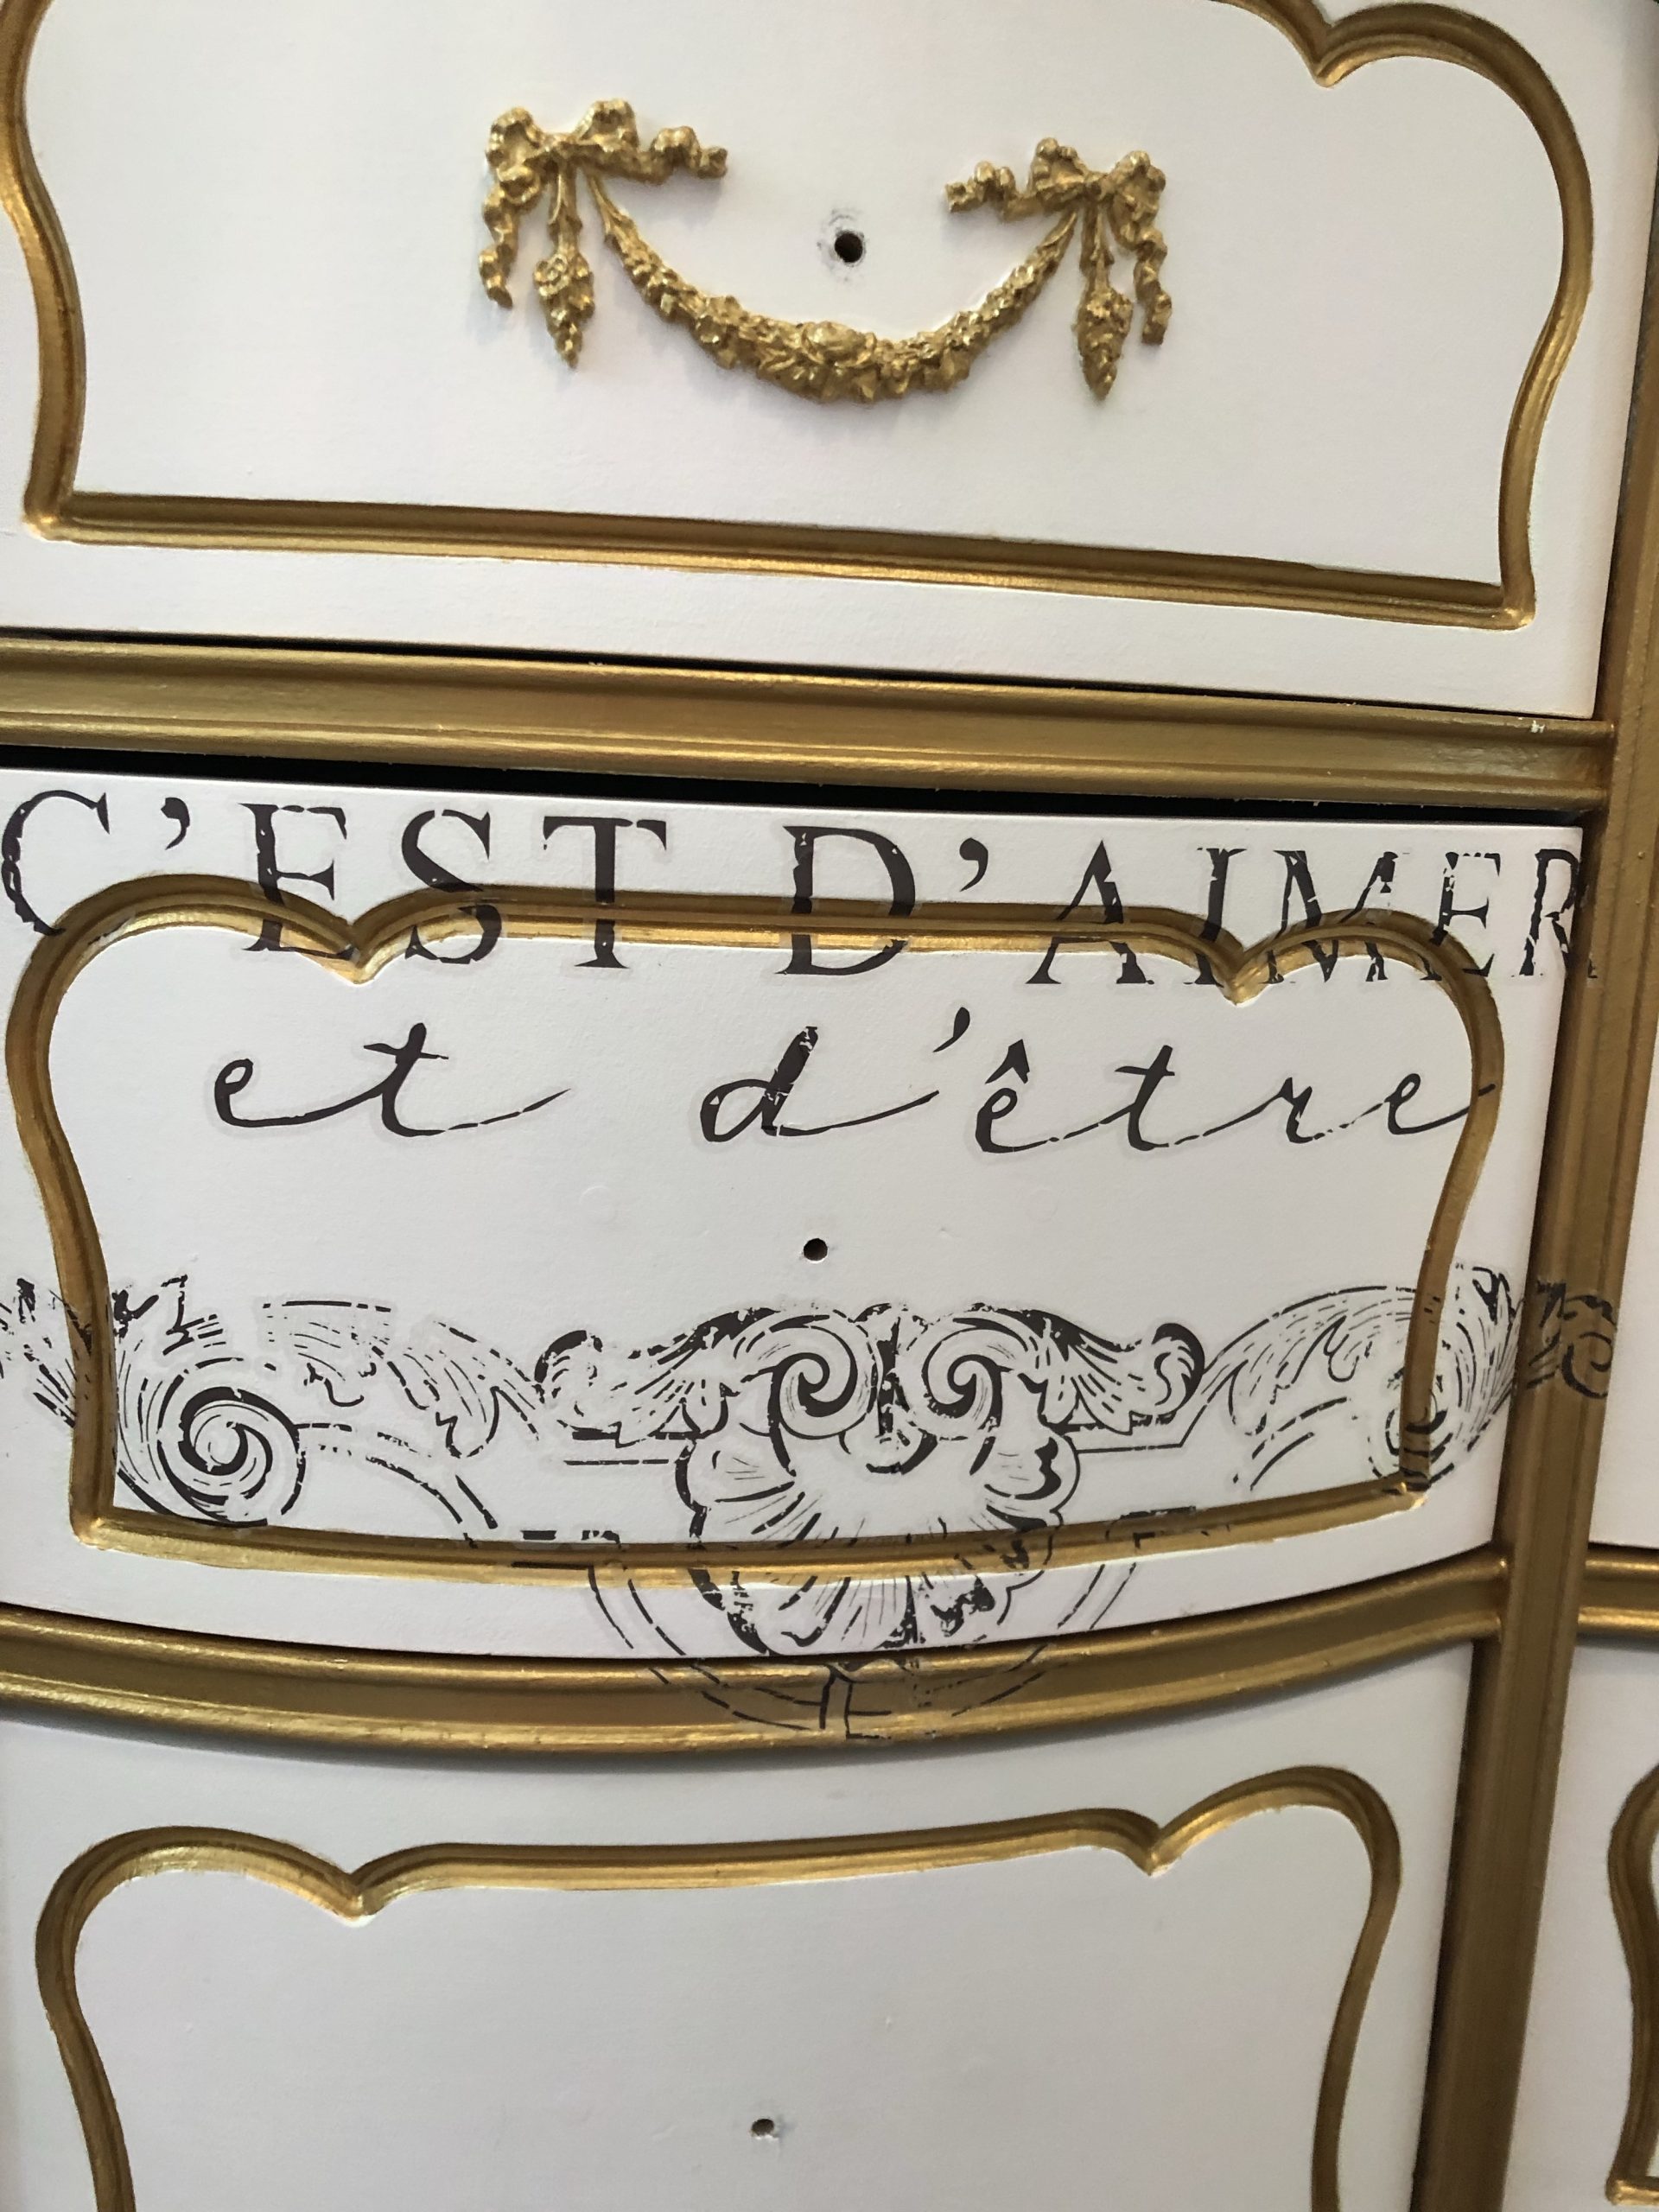
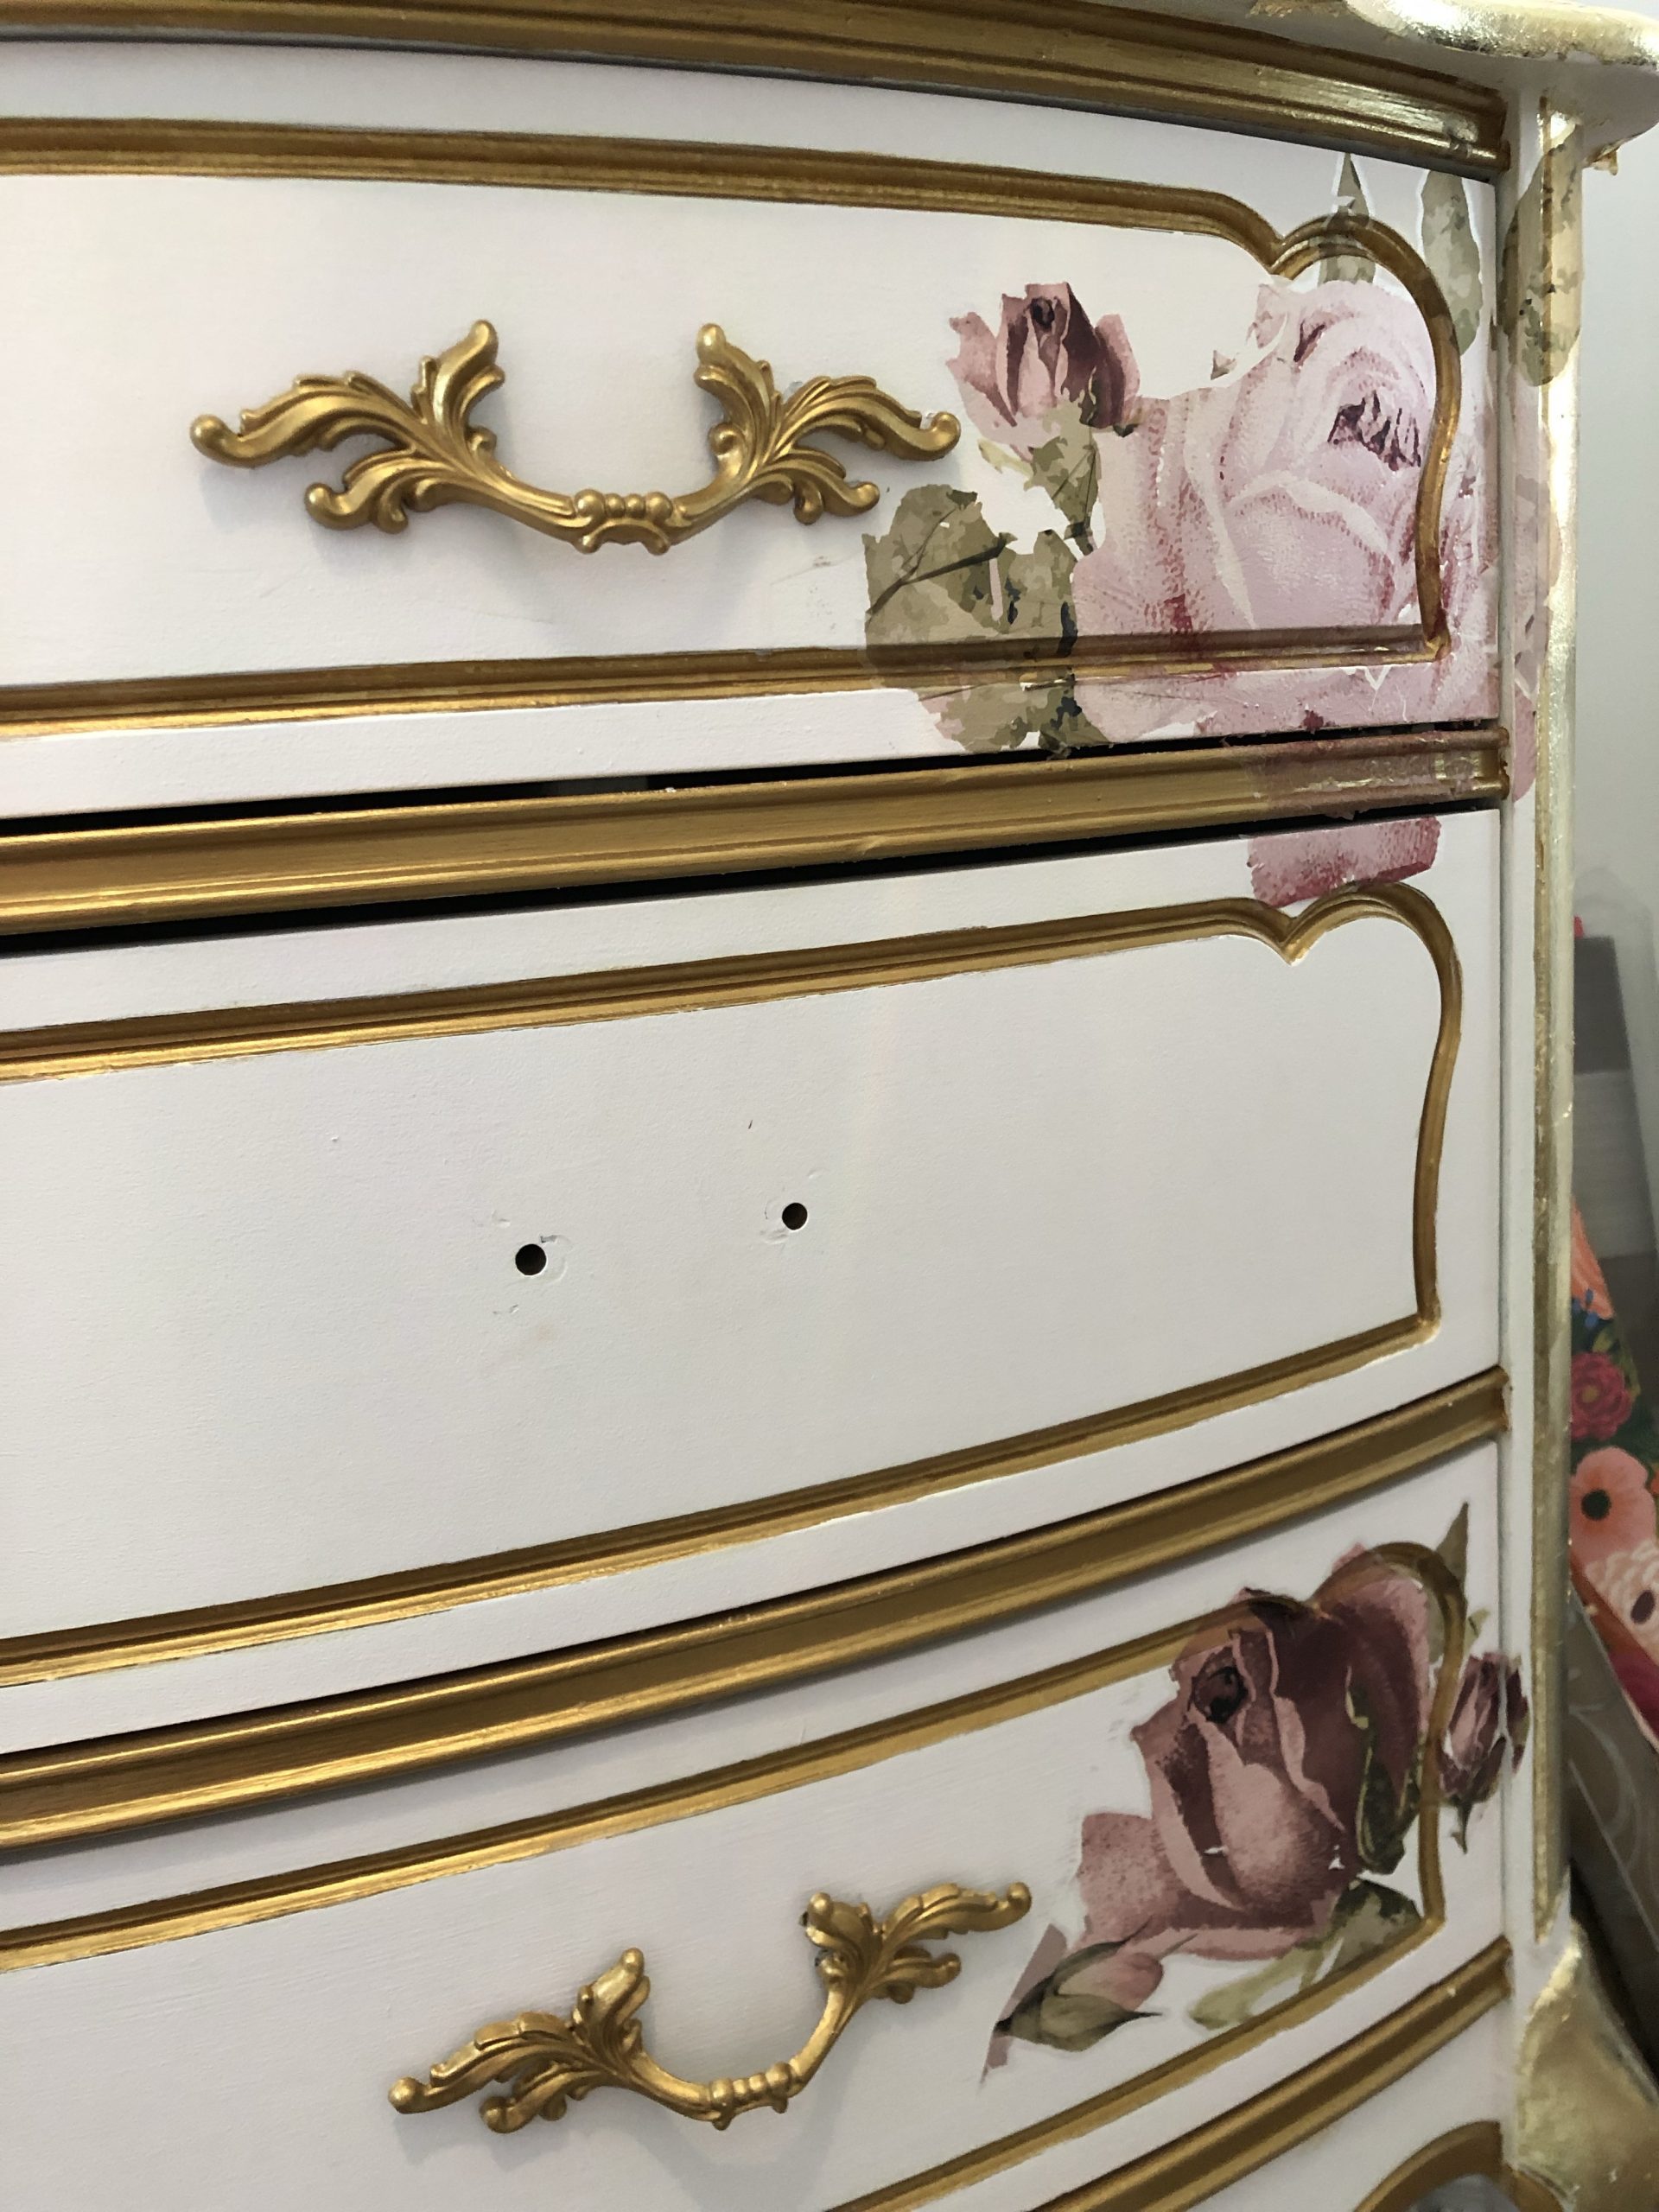
Transfer Application
I recommend when attempting to add furniture transfers to your project, that you cut your transfer out with scissors first into the pieces you are wanting to use. I also try to cut as close as possible to the design so there is no extra on the outside of the transfer.
I like to take painters tape and tape the pieces of the transfer onto the furniture to play around with the placement of the transfer. This way nothing has been permanently placed until I am pleased with the placement.
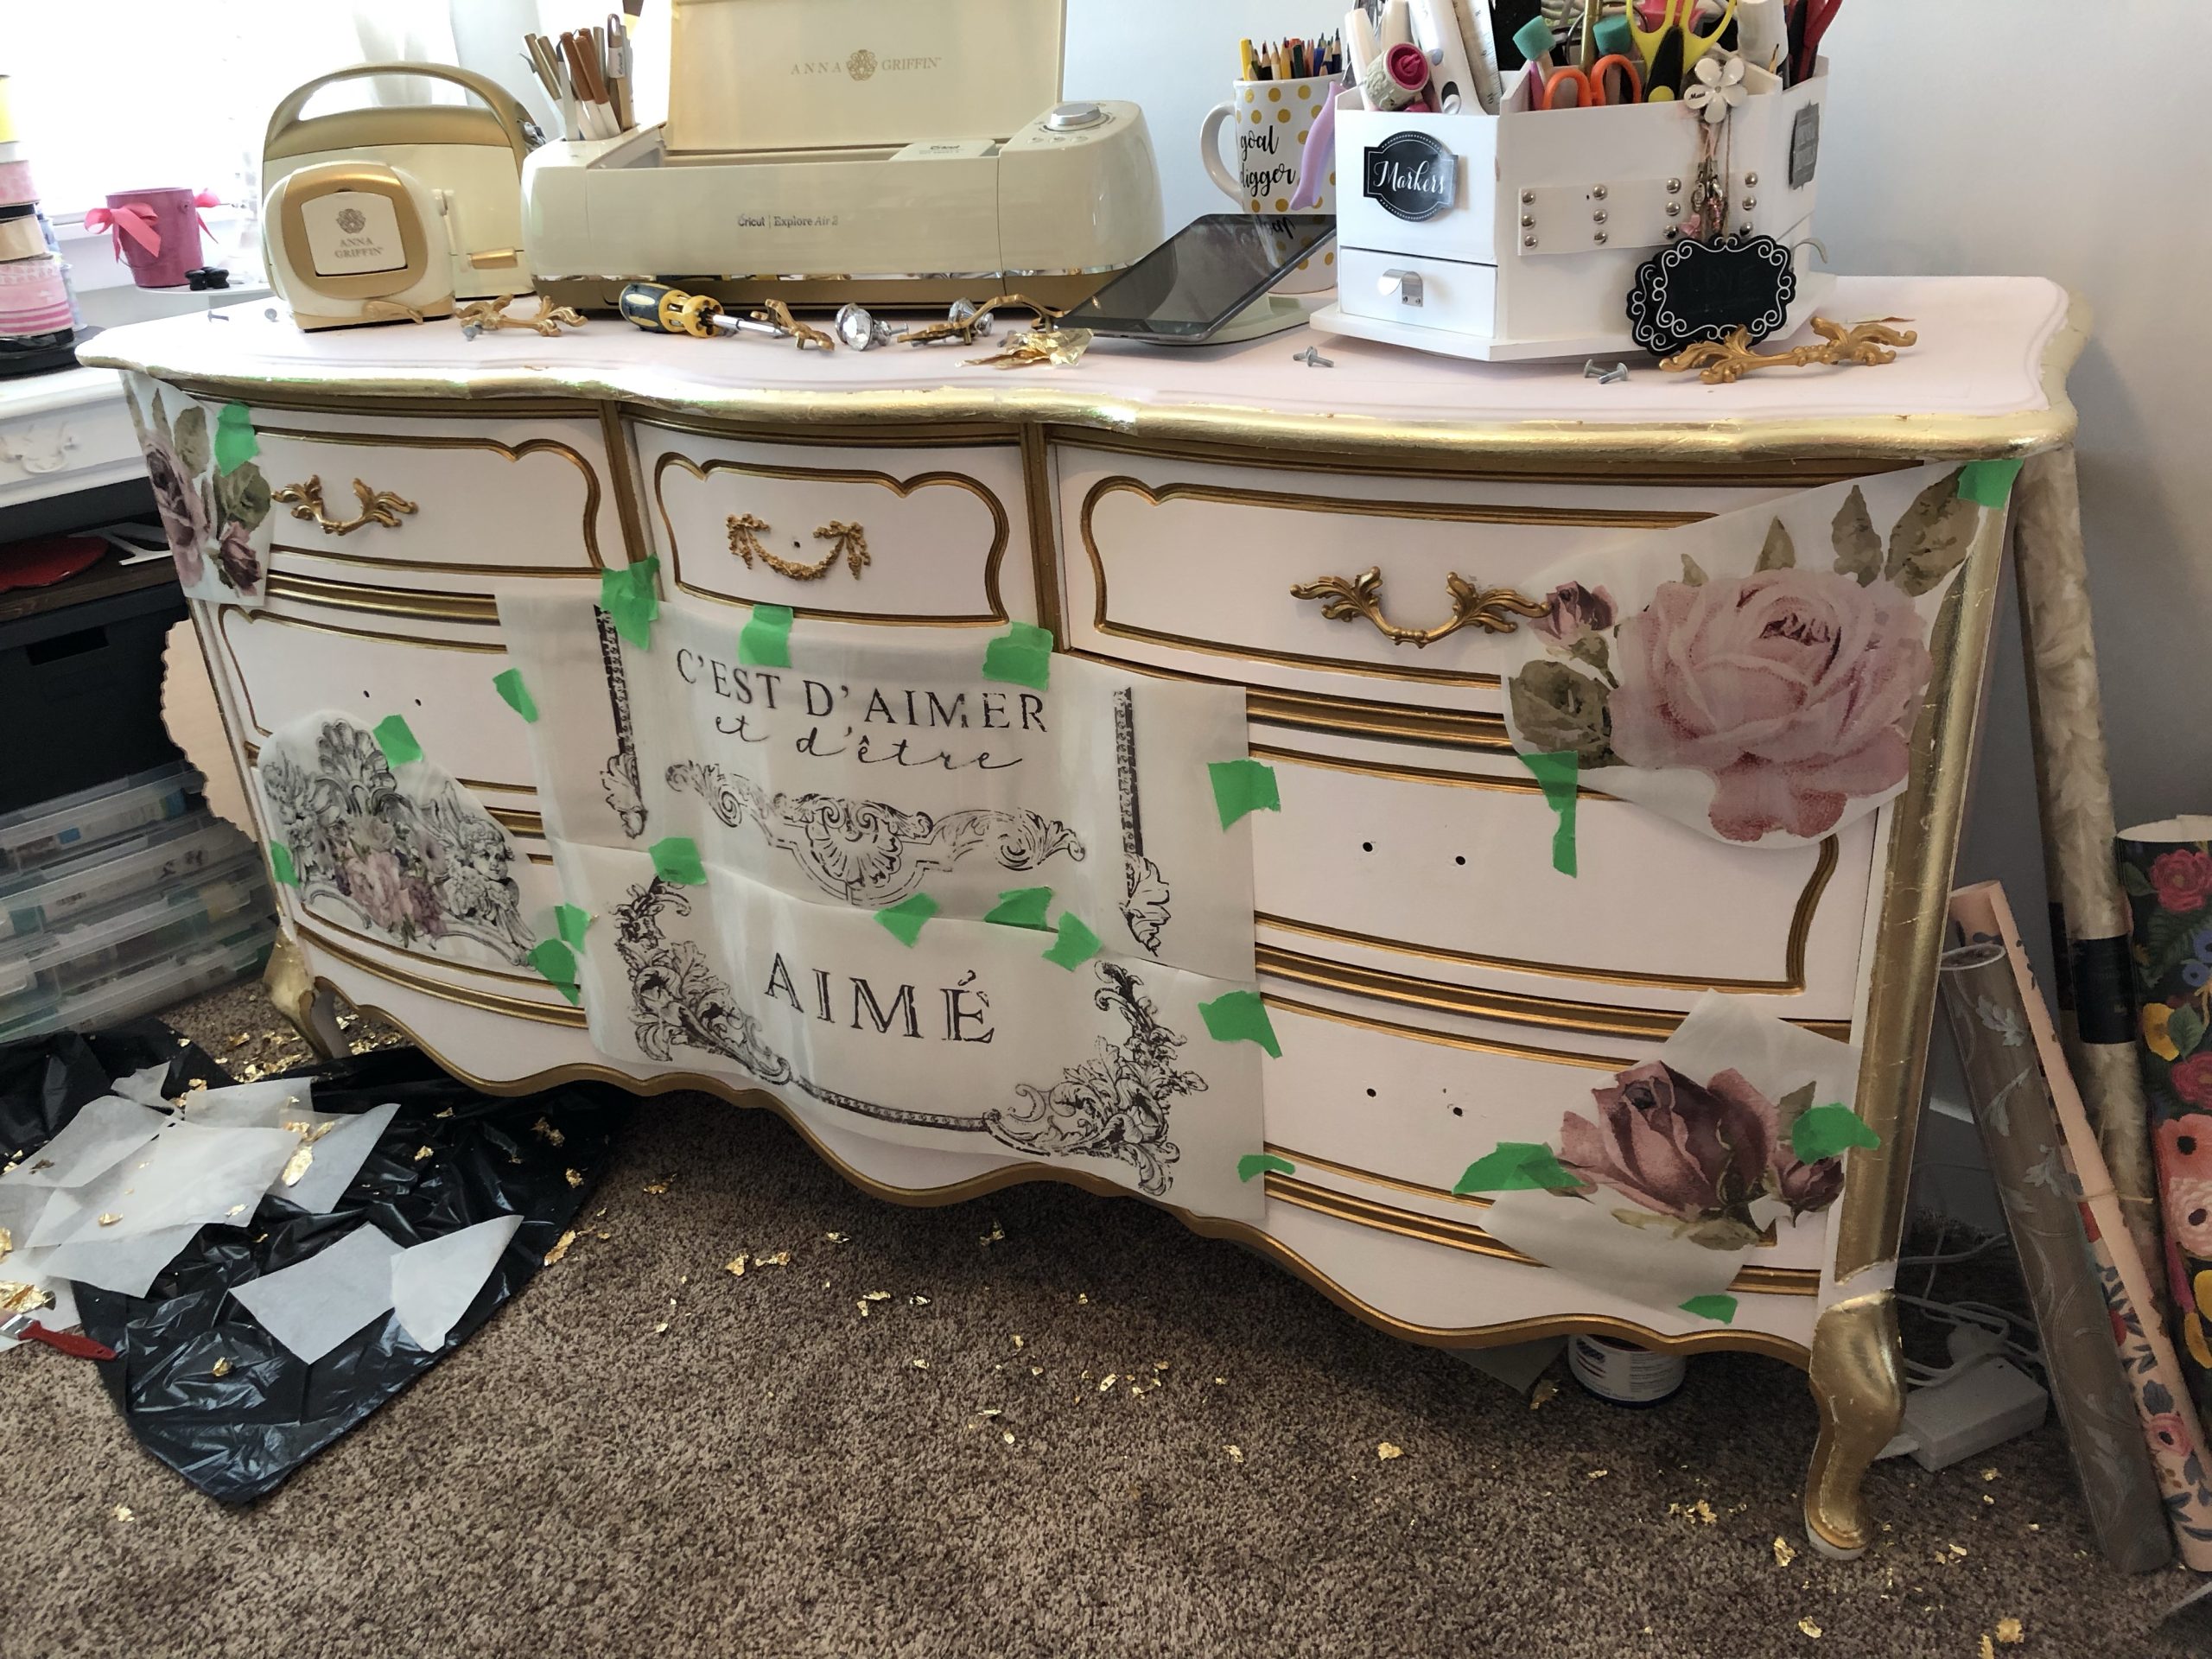
If you are interested in the specific furniture transfer I used on this project, I have linked the transfer here for ease of finding it!
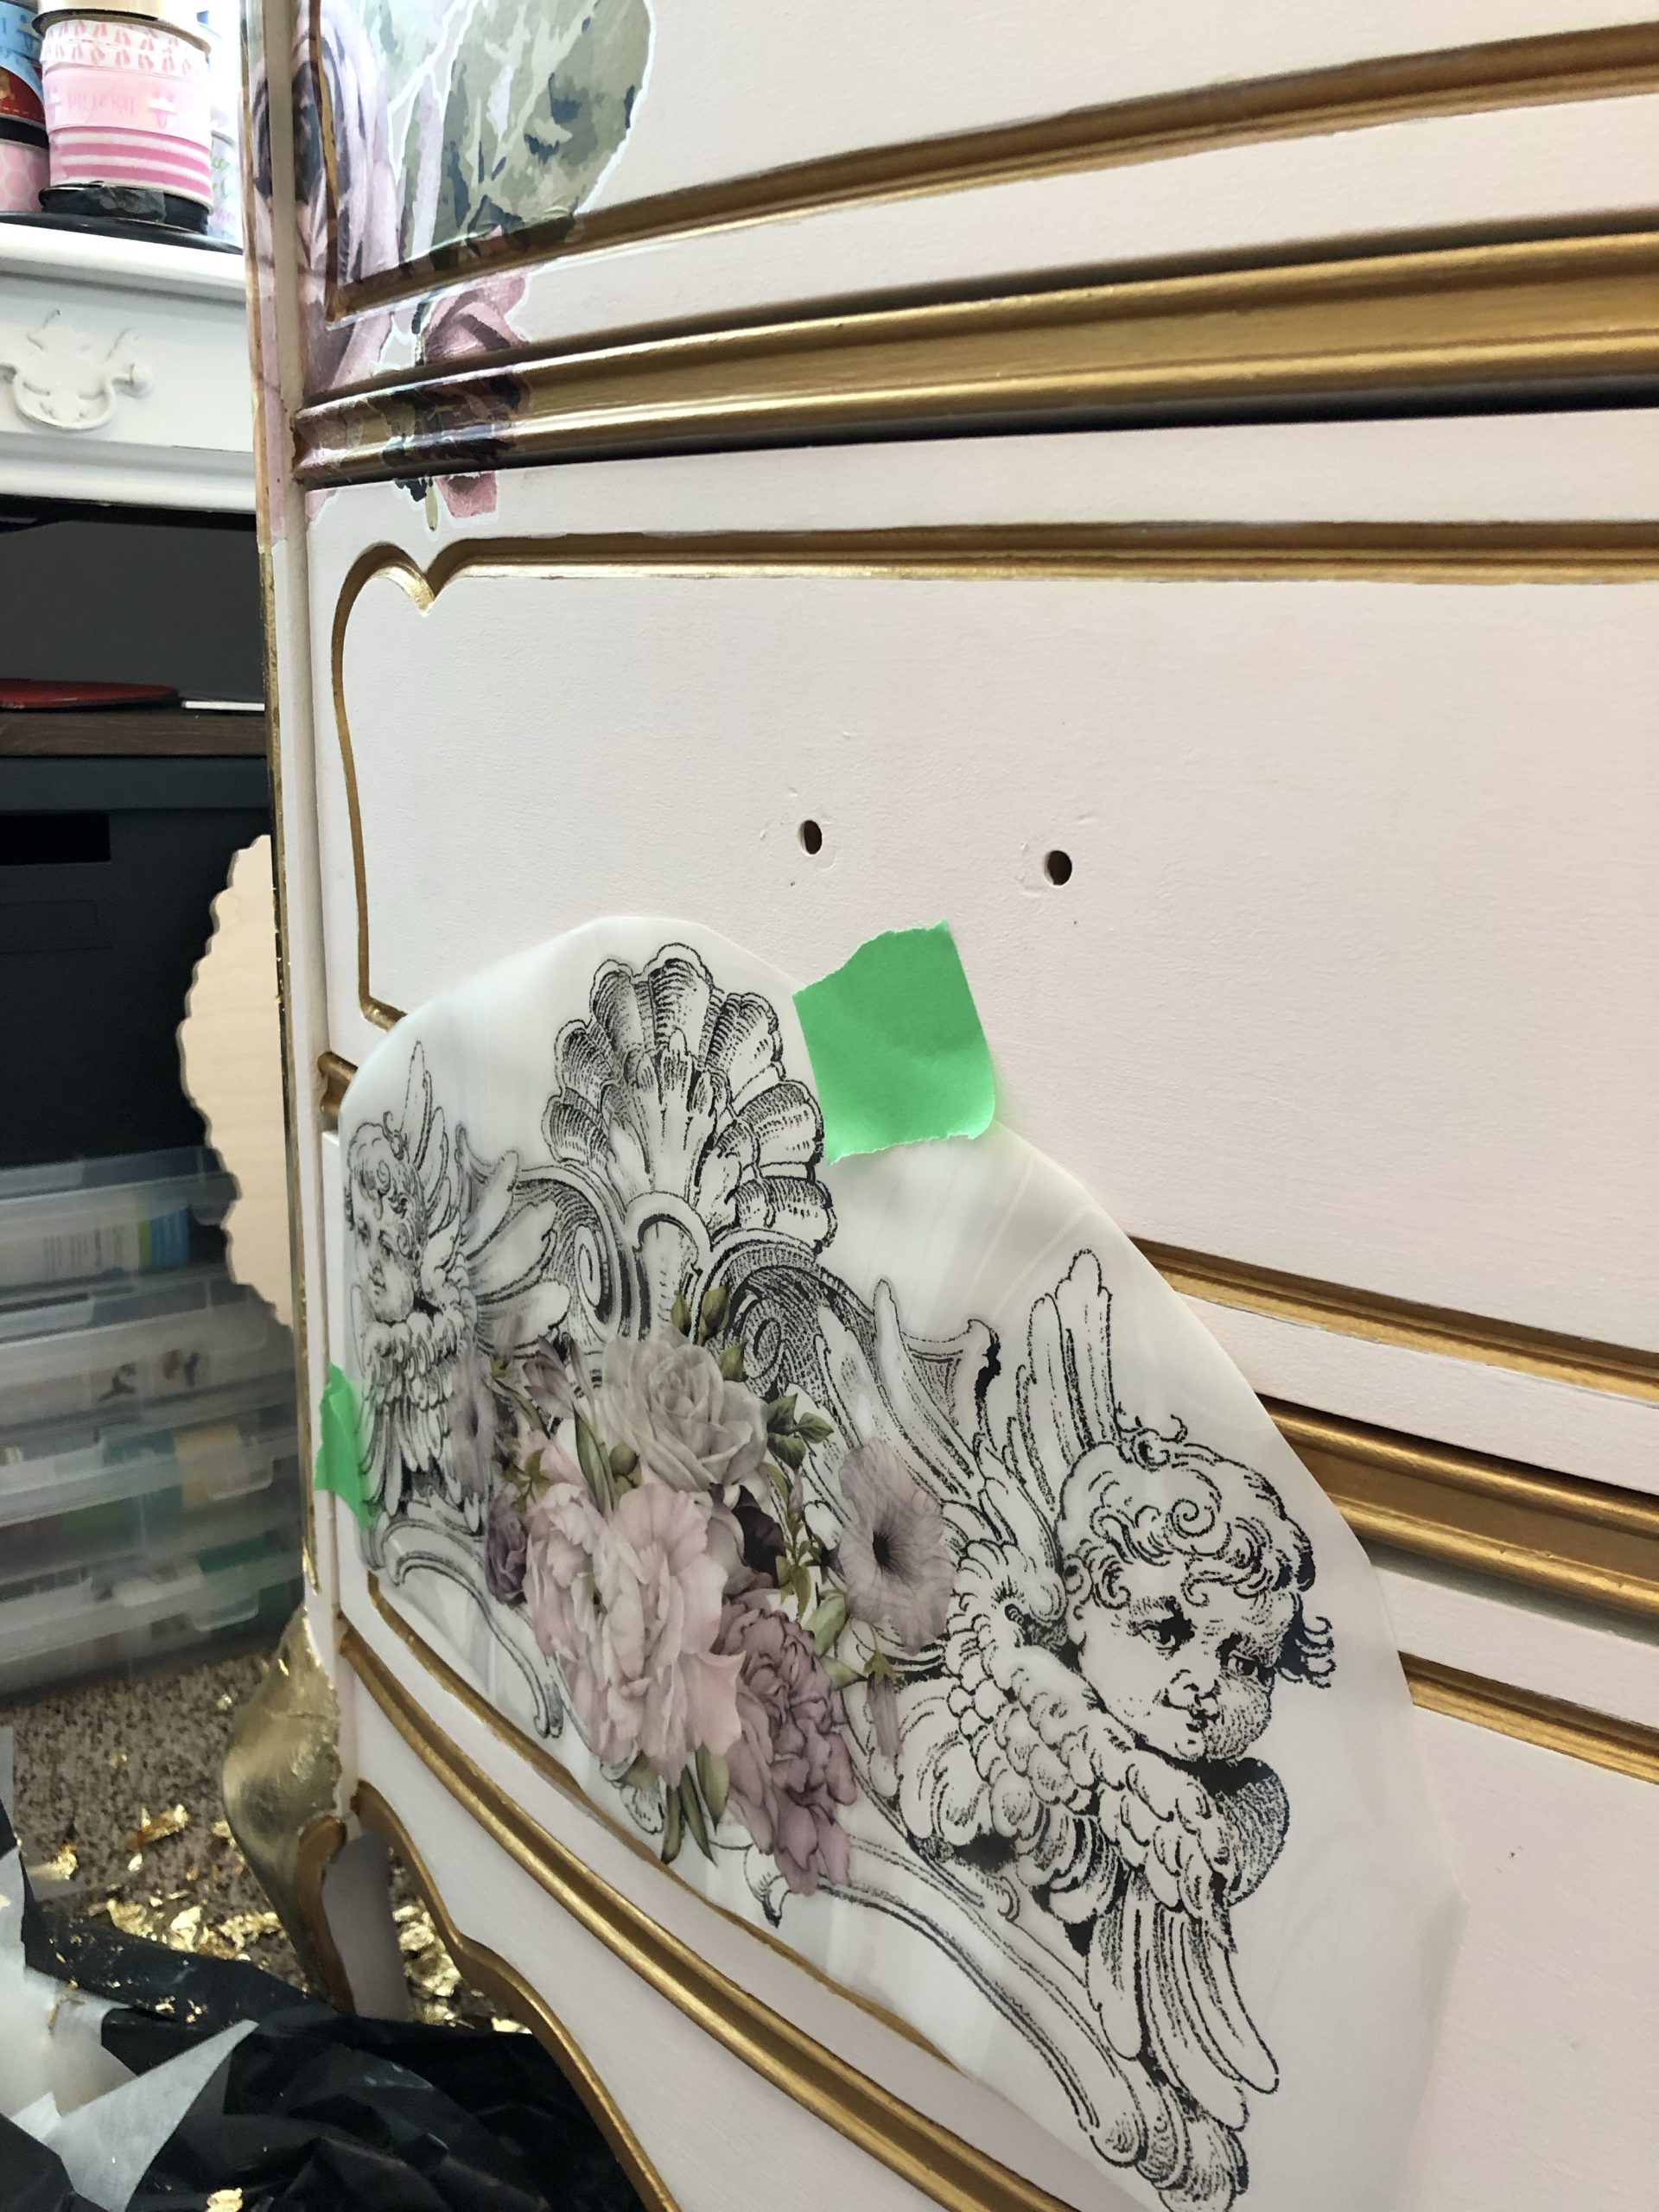
I also recommend removing hardware until after you have burnished the design down on your furniture and then adding it back to see how it looks.
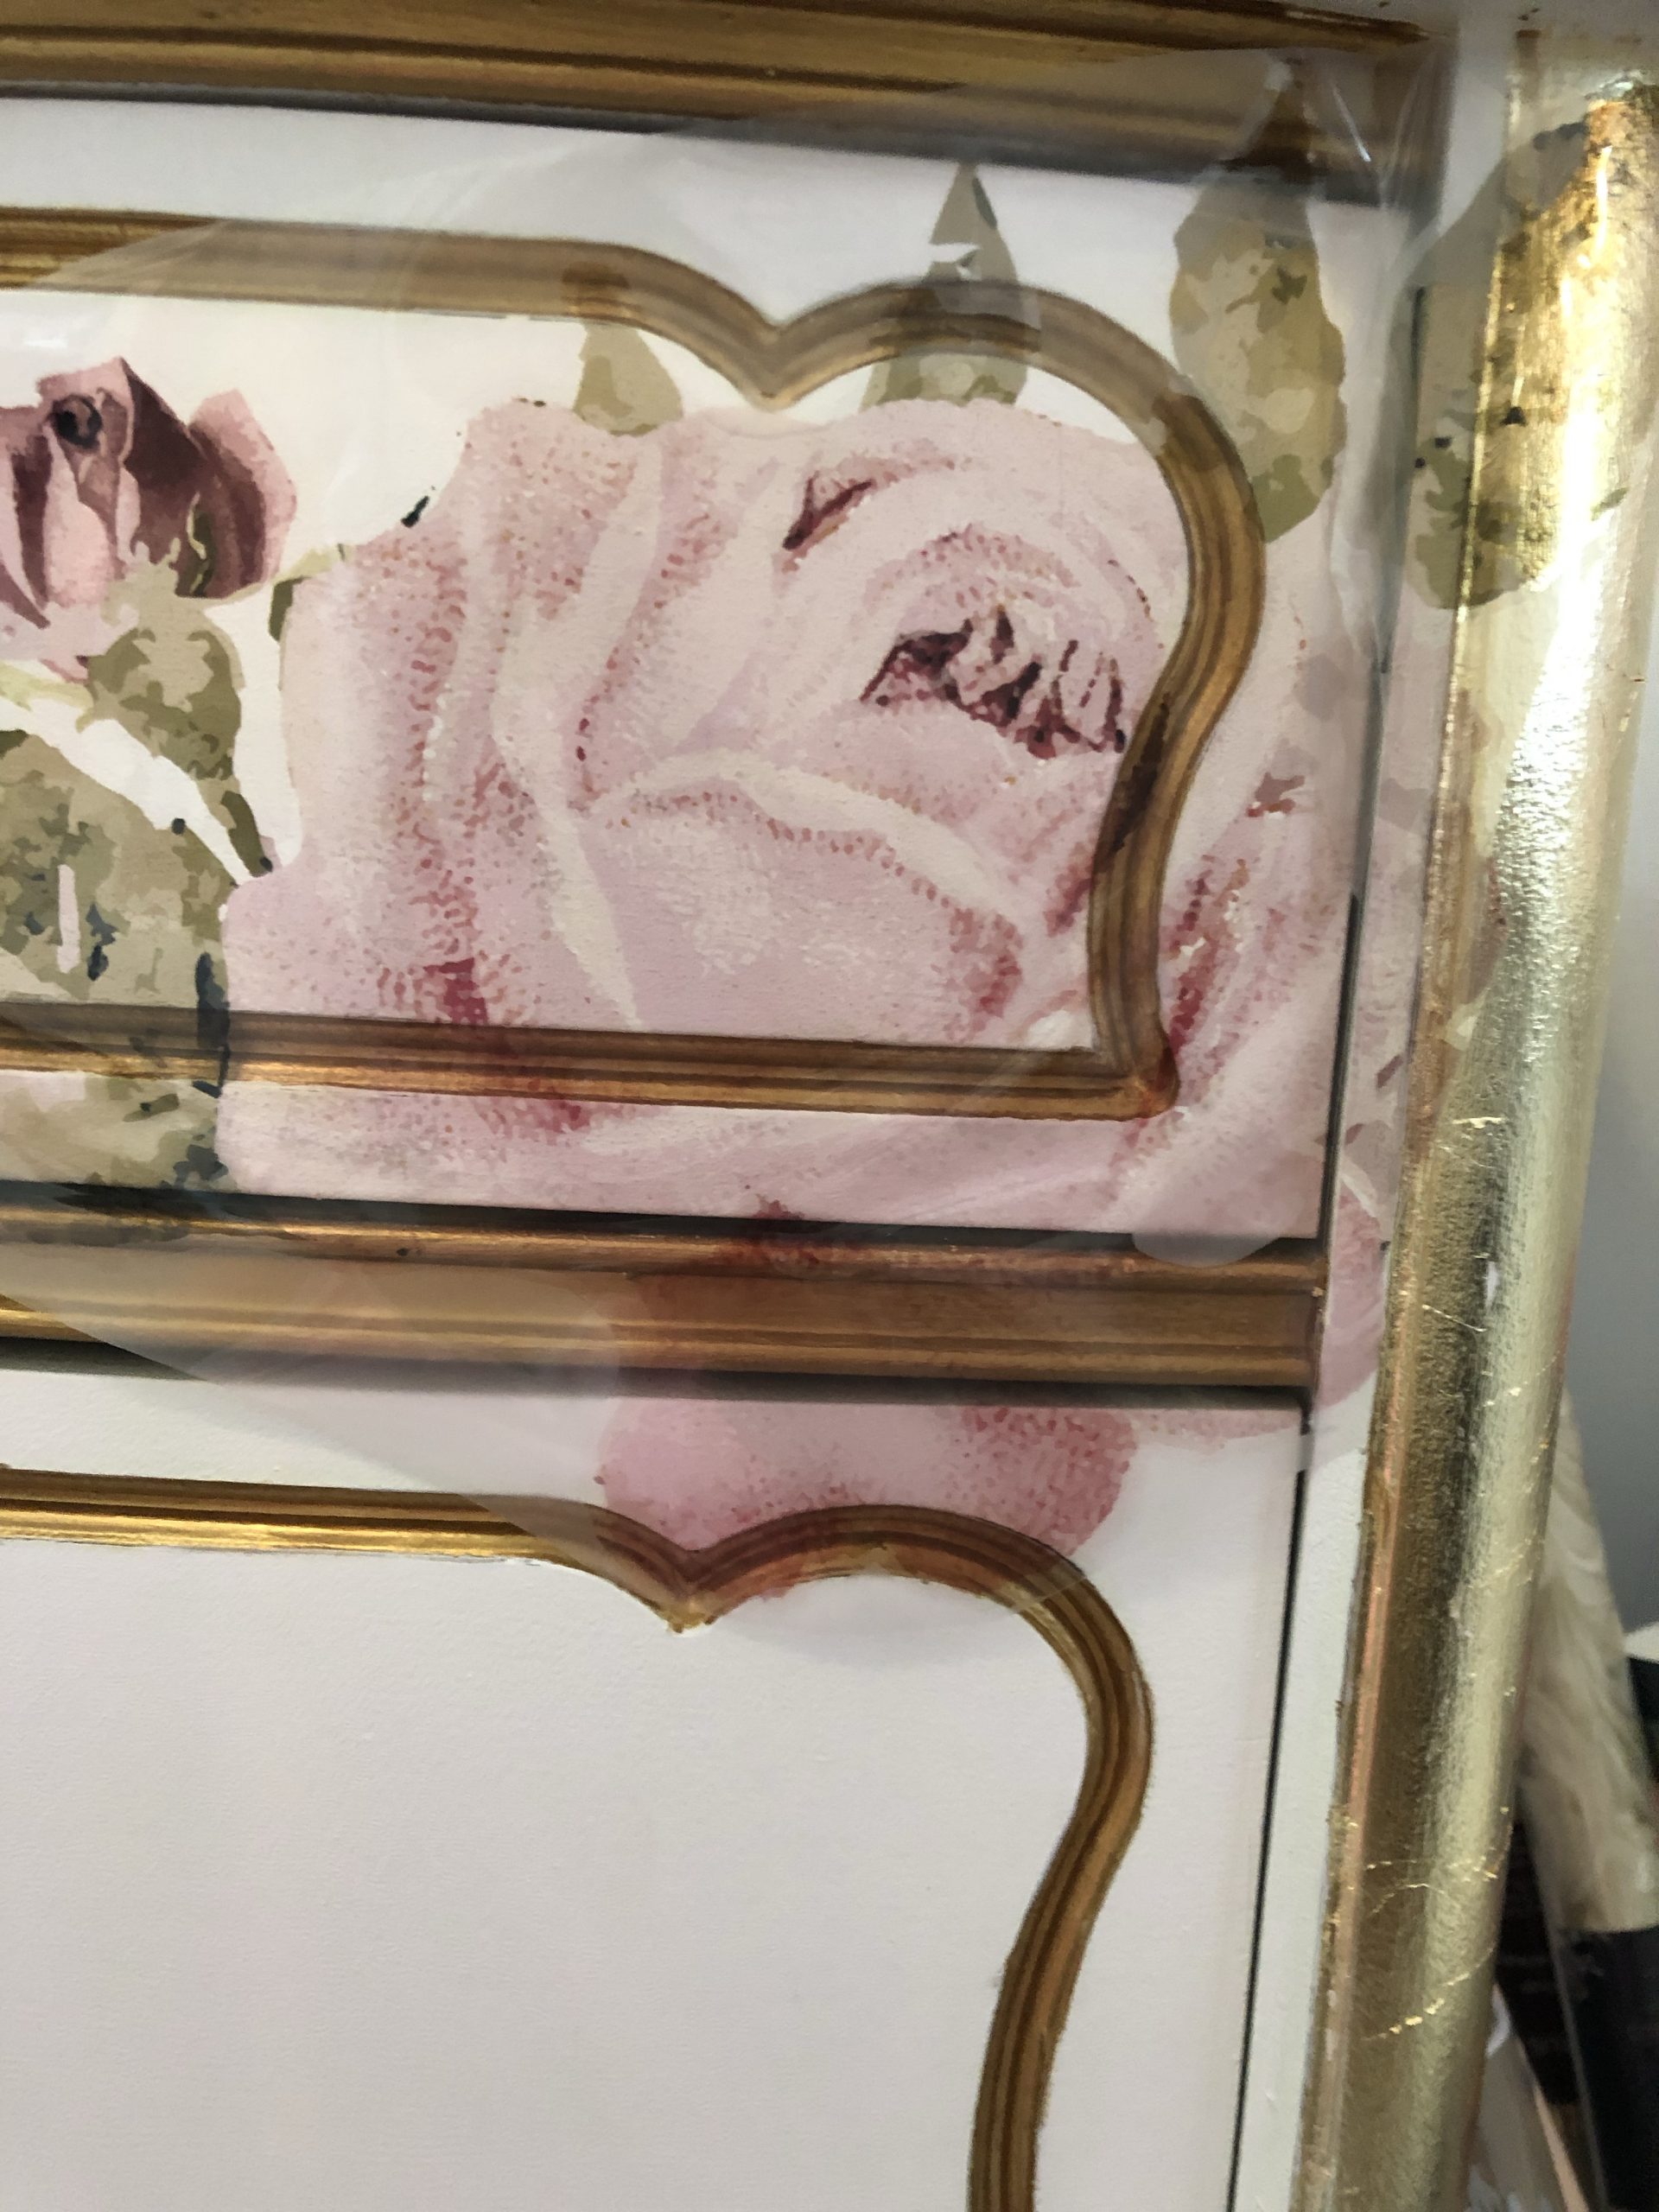
Begin burnishing the transfer down with a straight edge. This can be a credit card or a special burnishing tool until the design has been adhered to your surface. This make take quite a few tries going over with the burnishing tool.

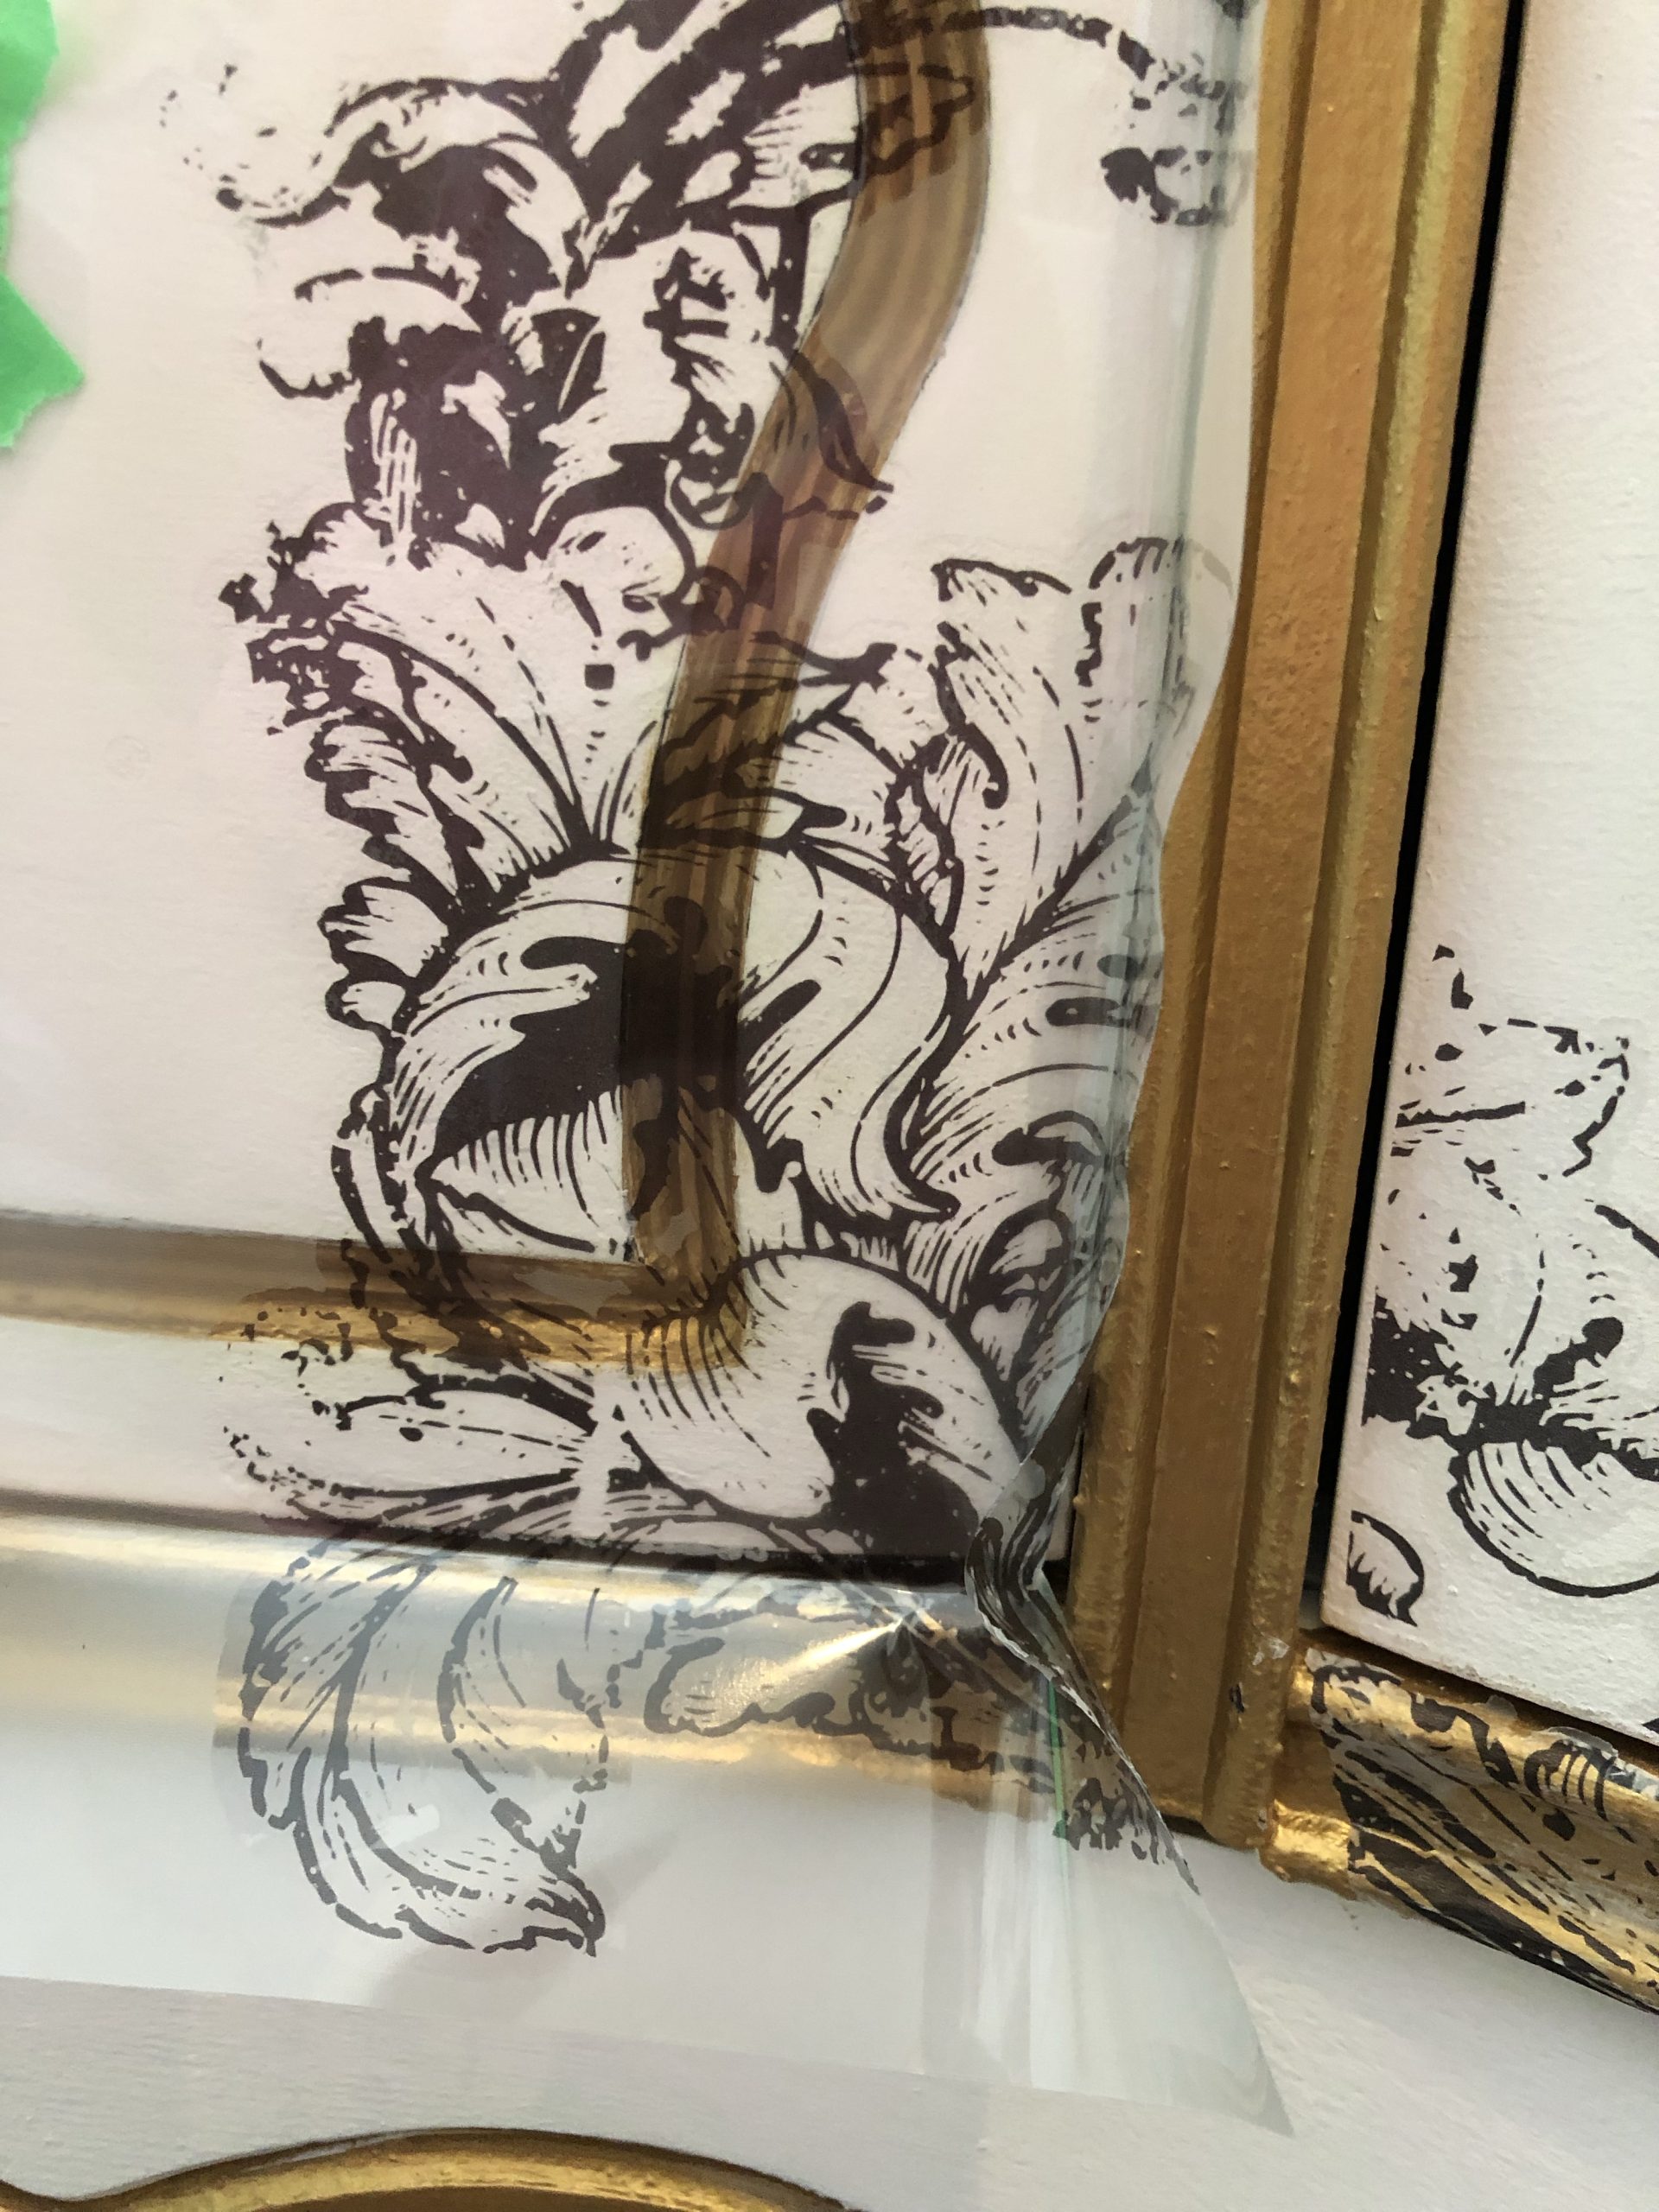
When the transfer sheet is going in the corners like this, I take an exacto knife and cut along the drawers to release the transfer paper.
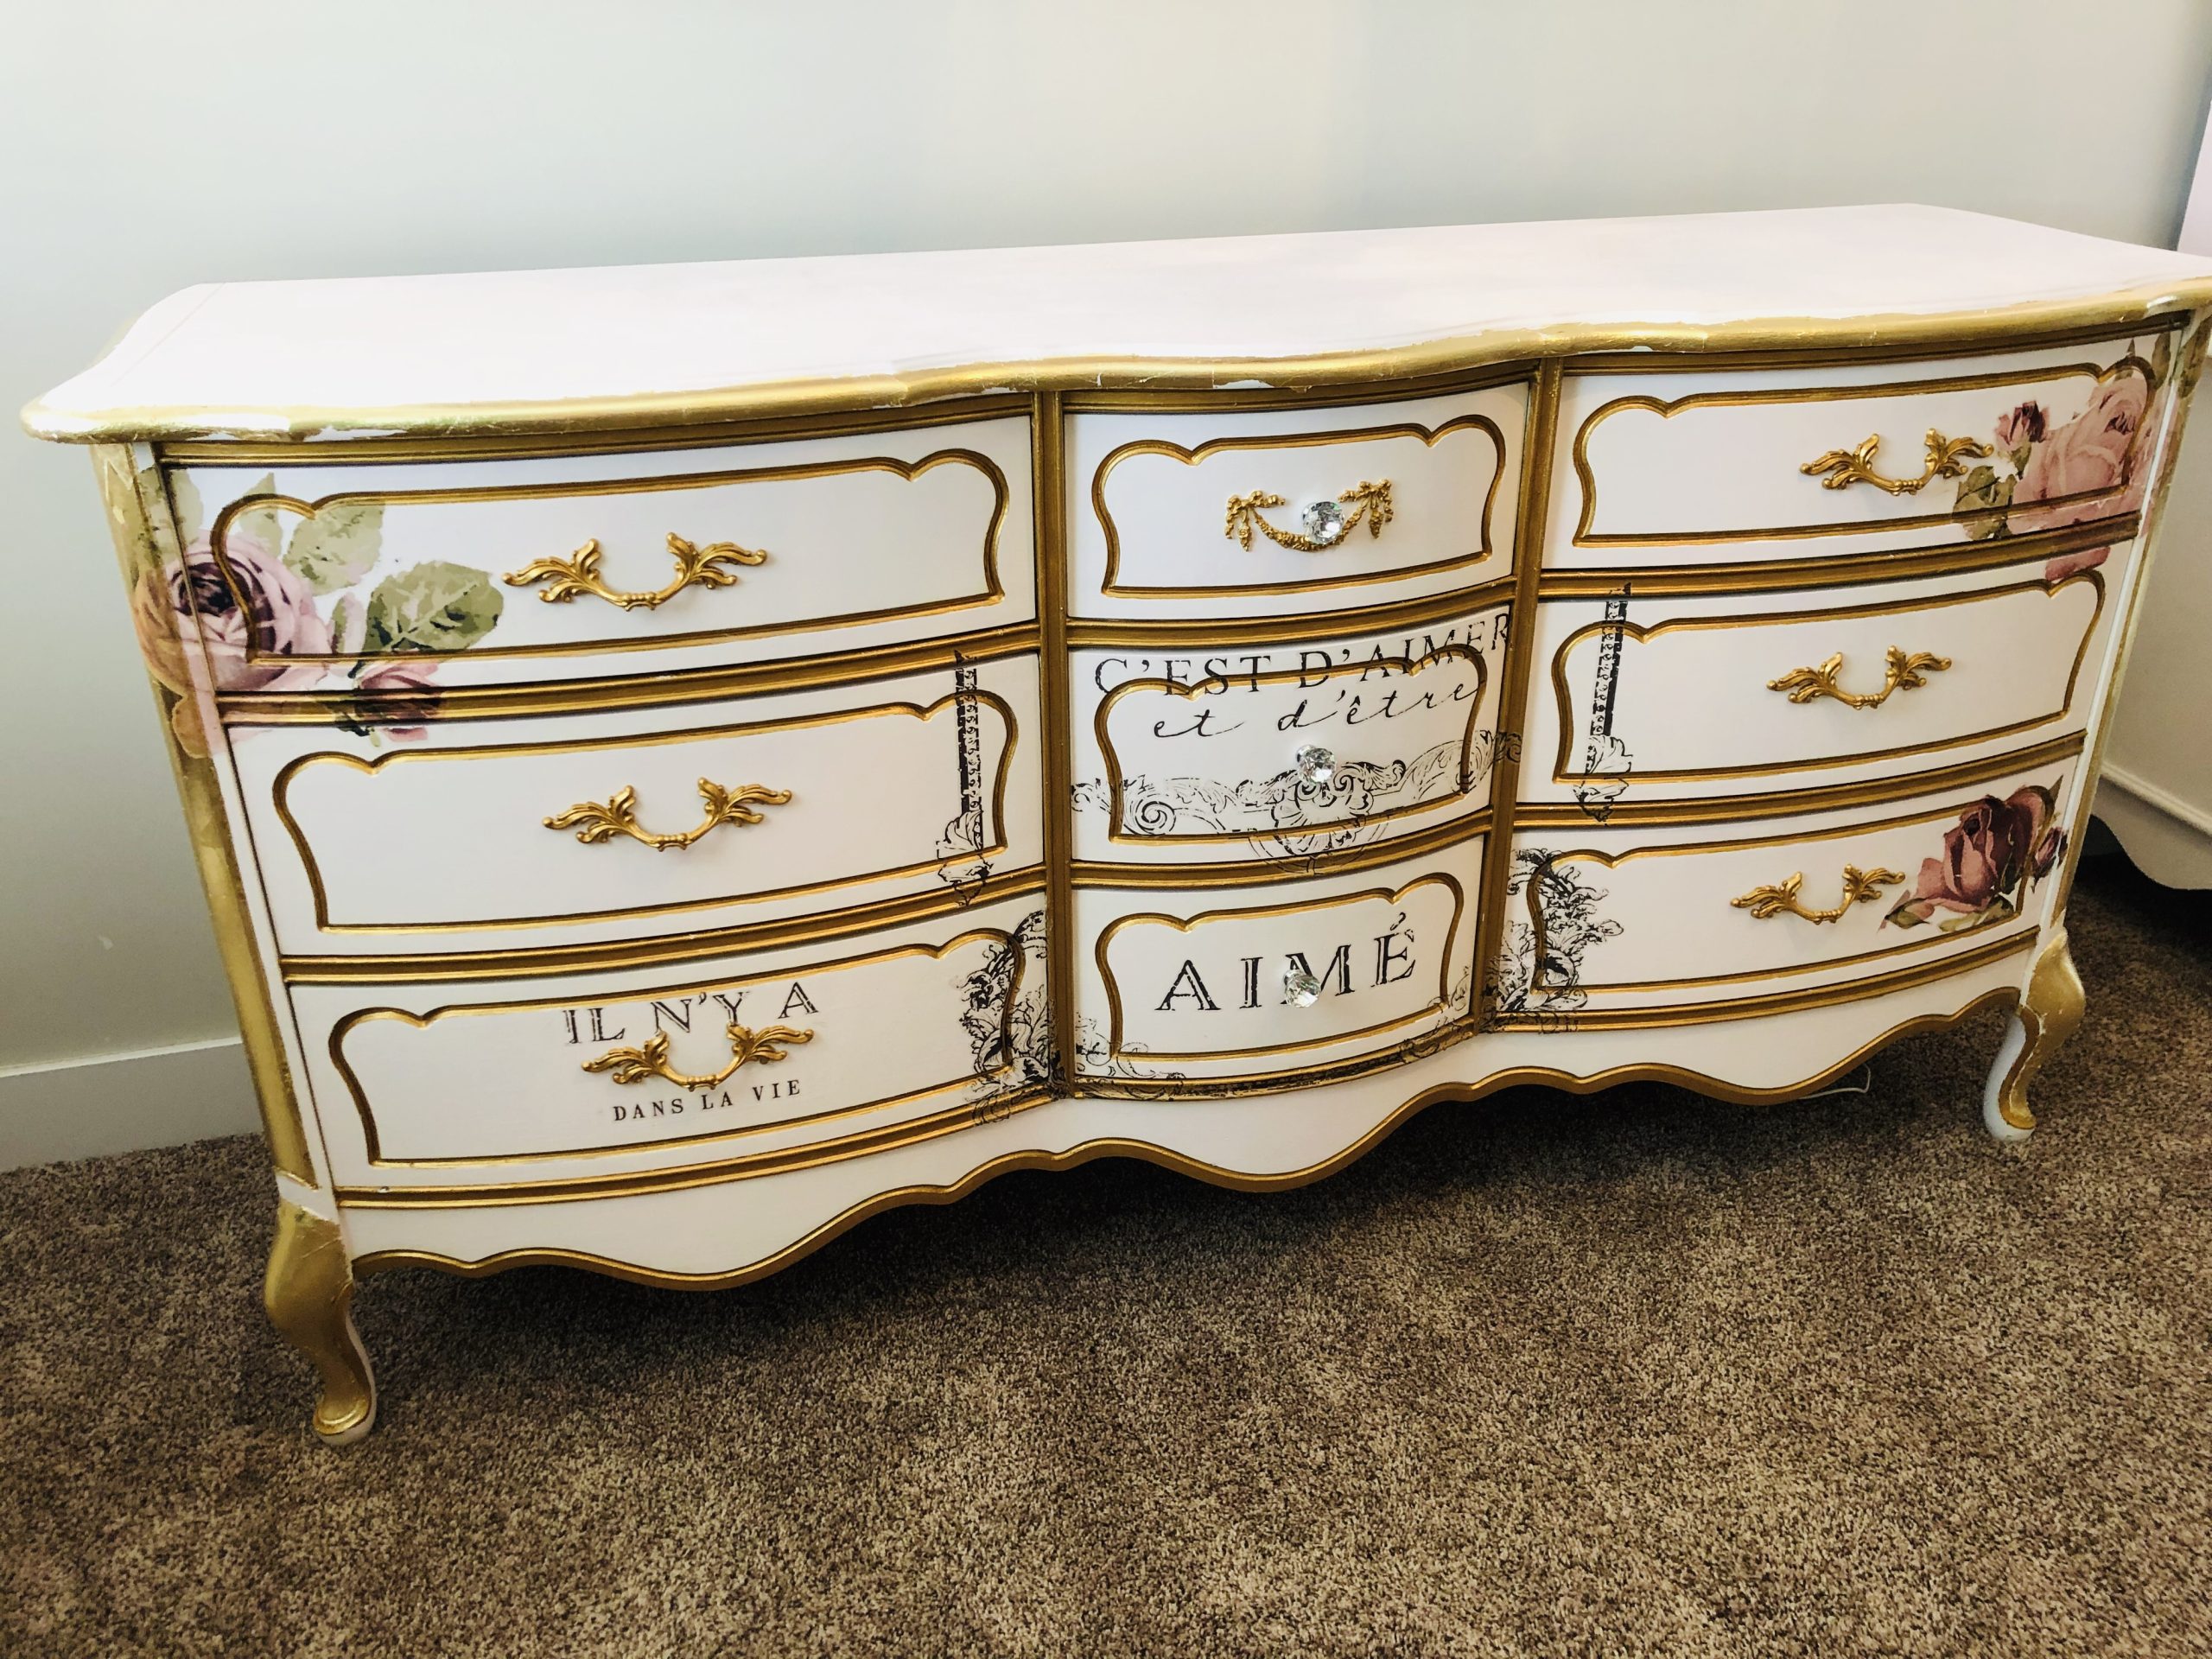
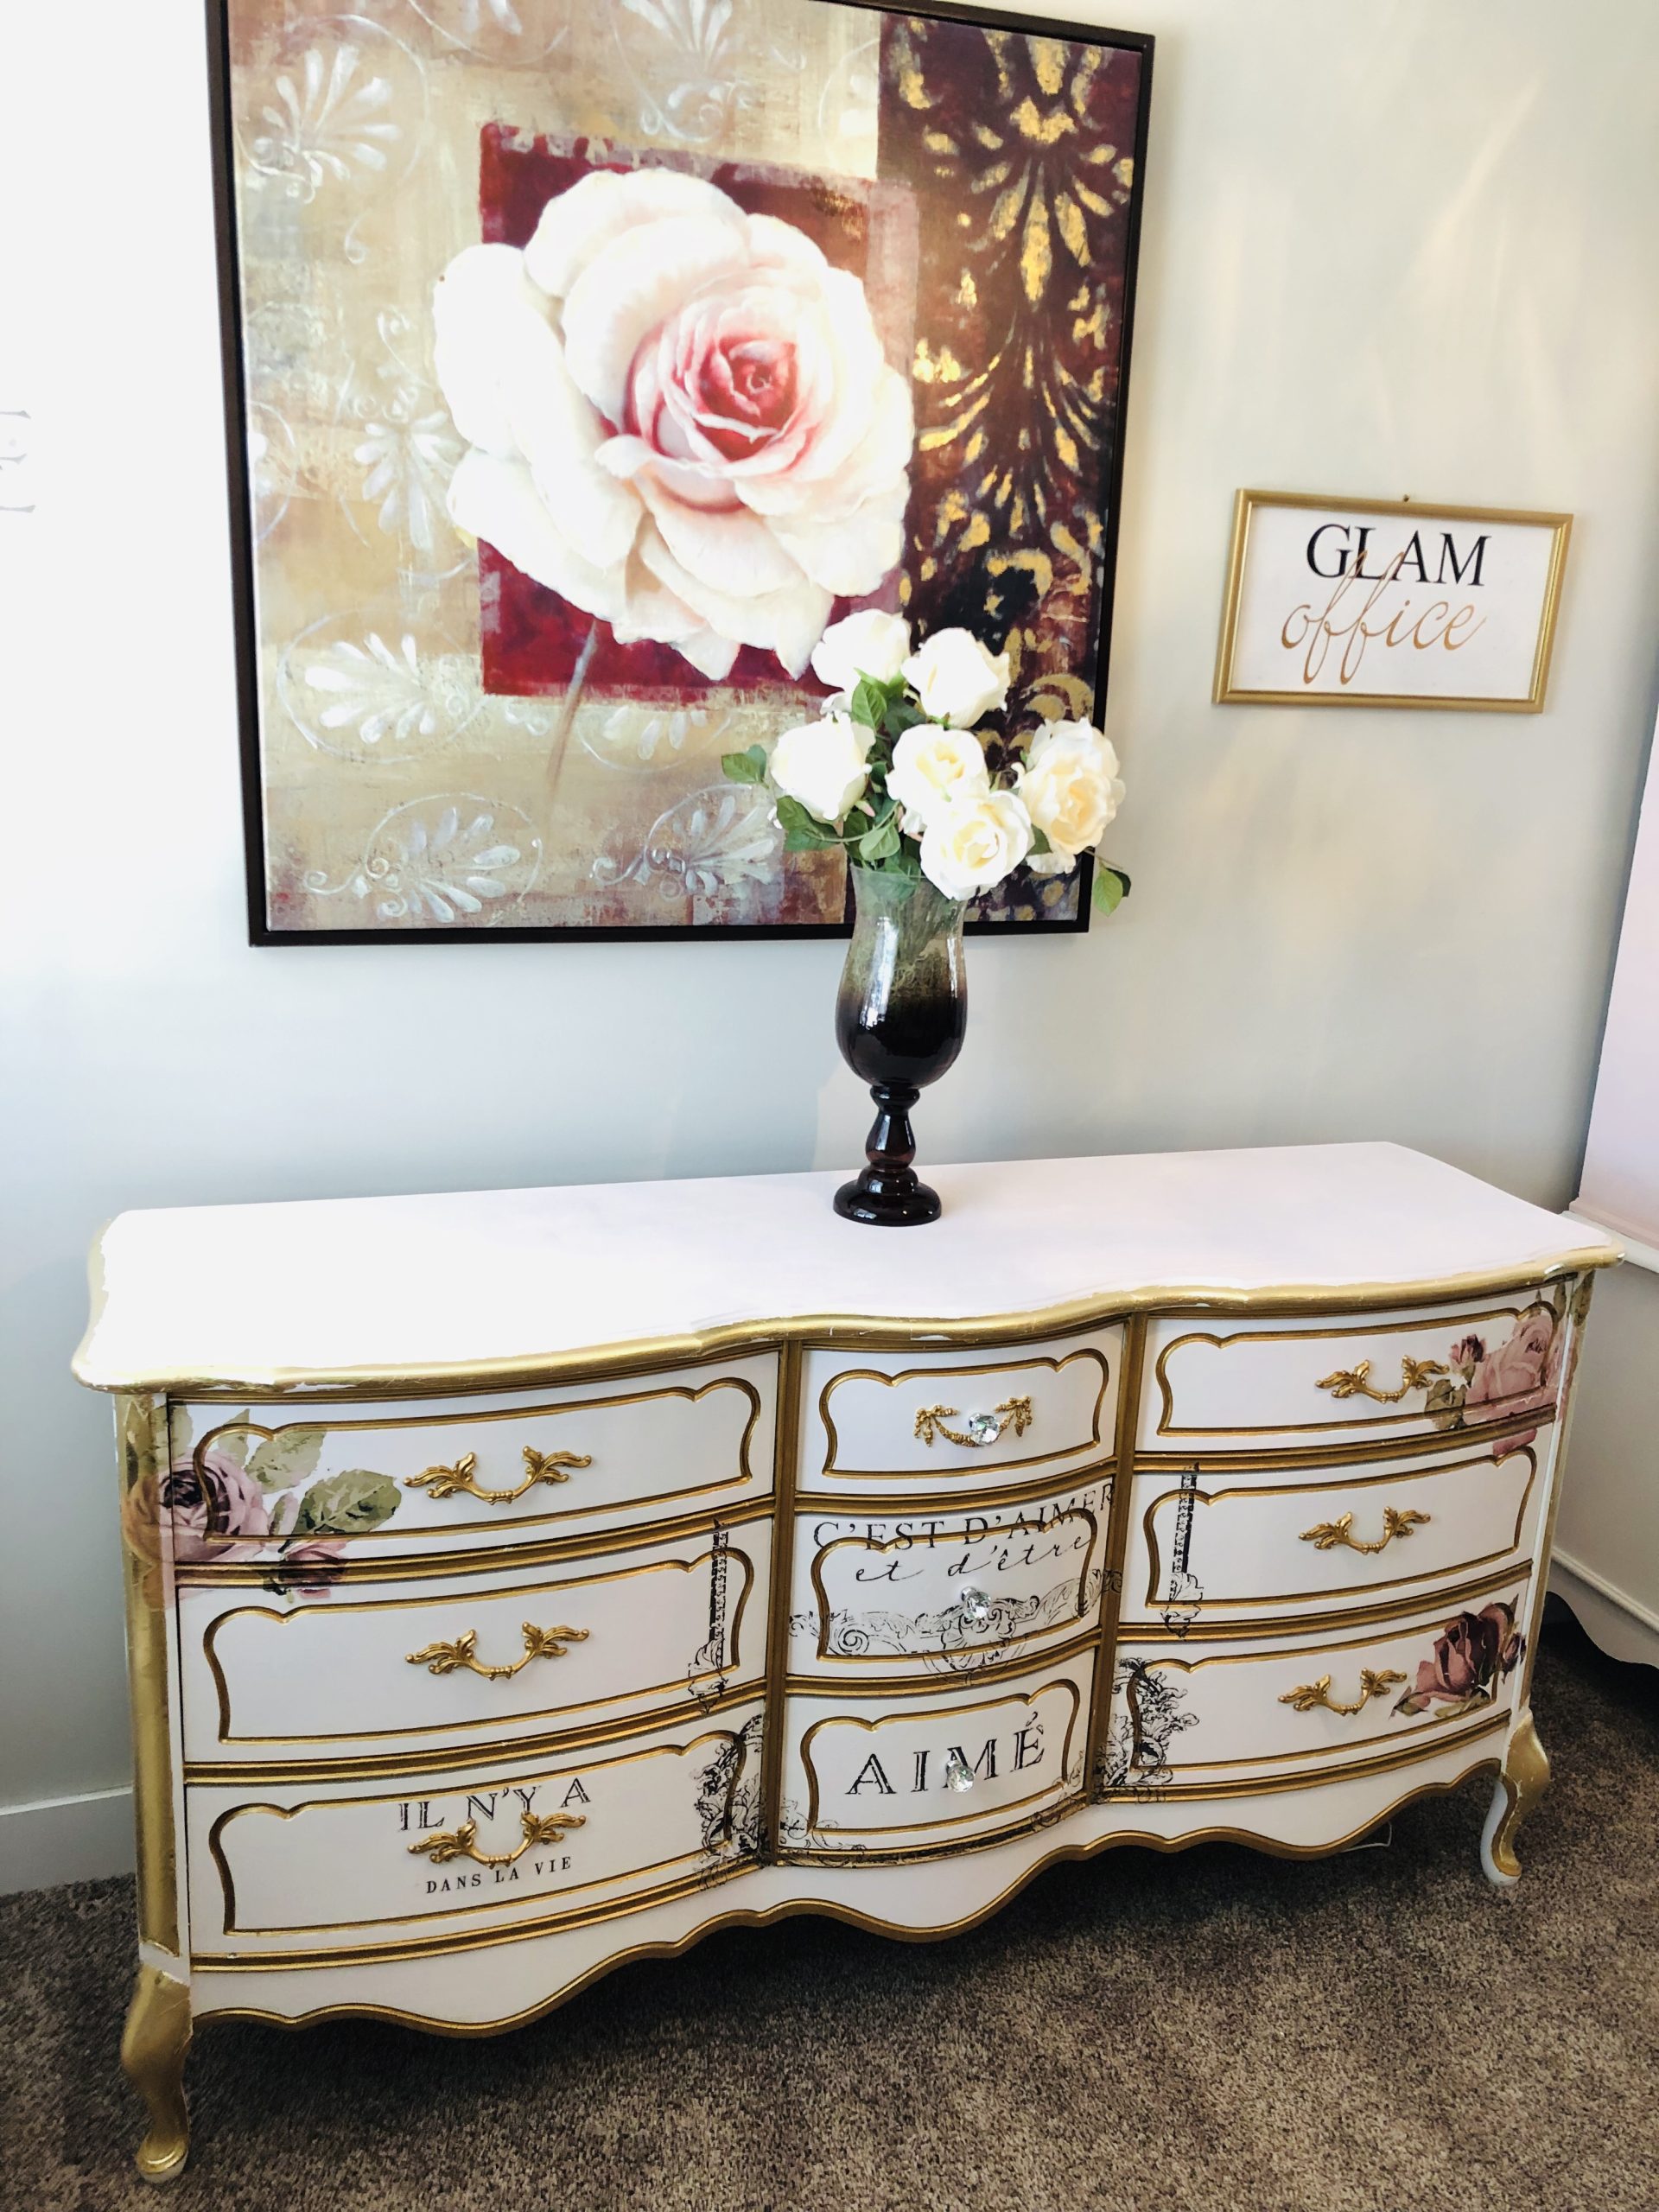

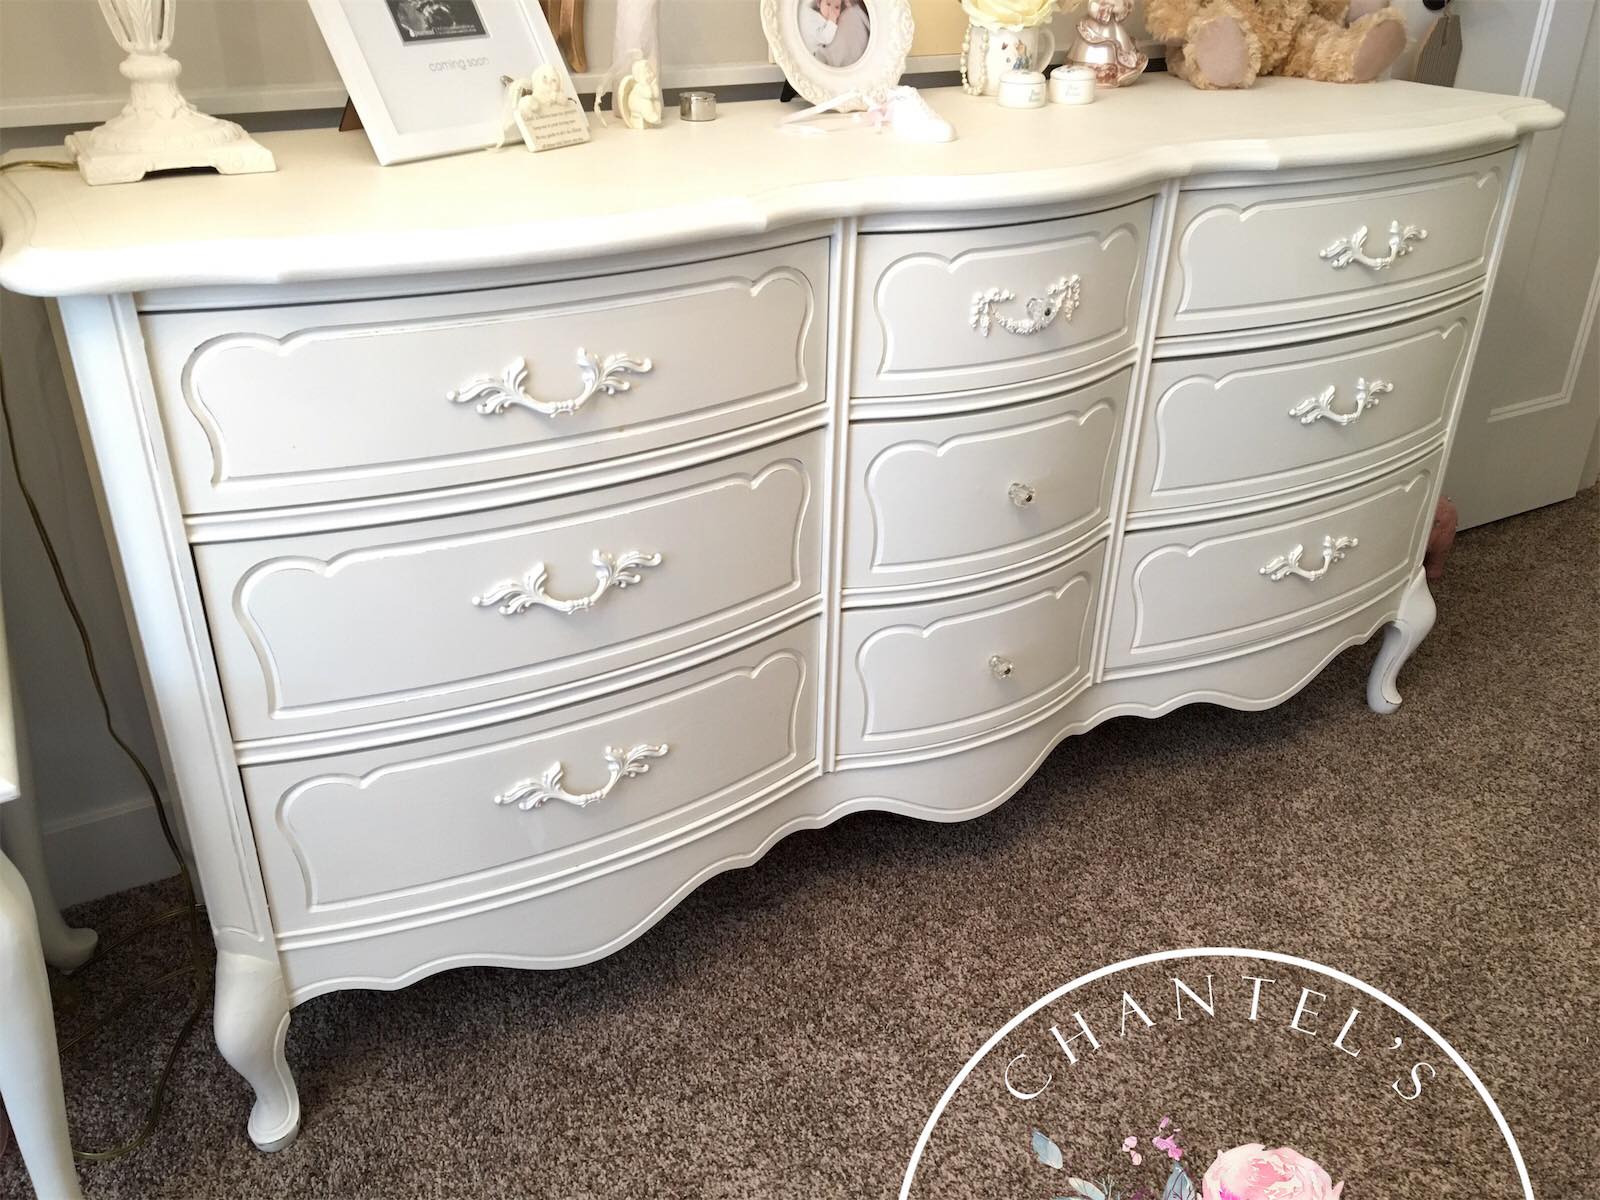
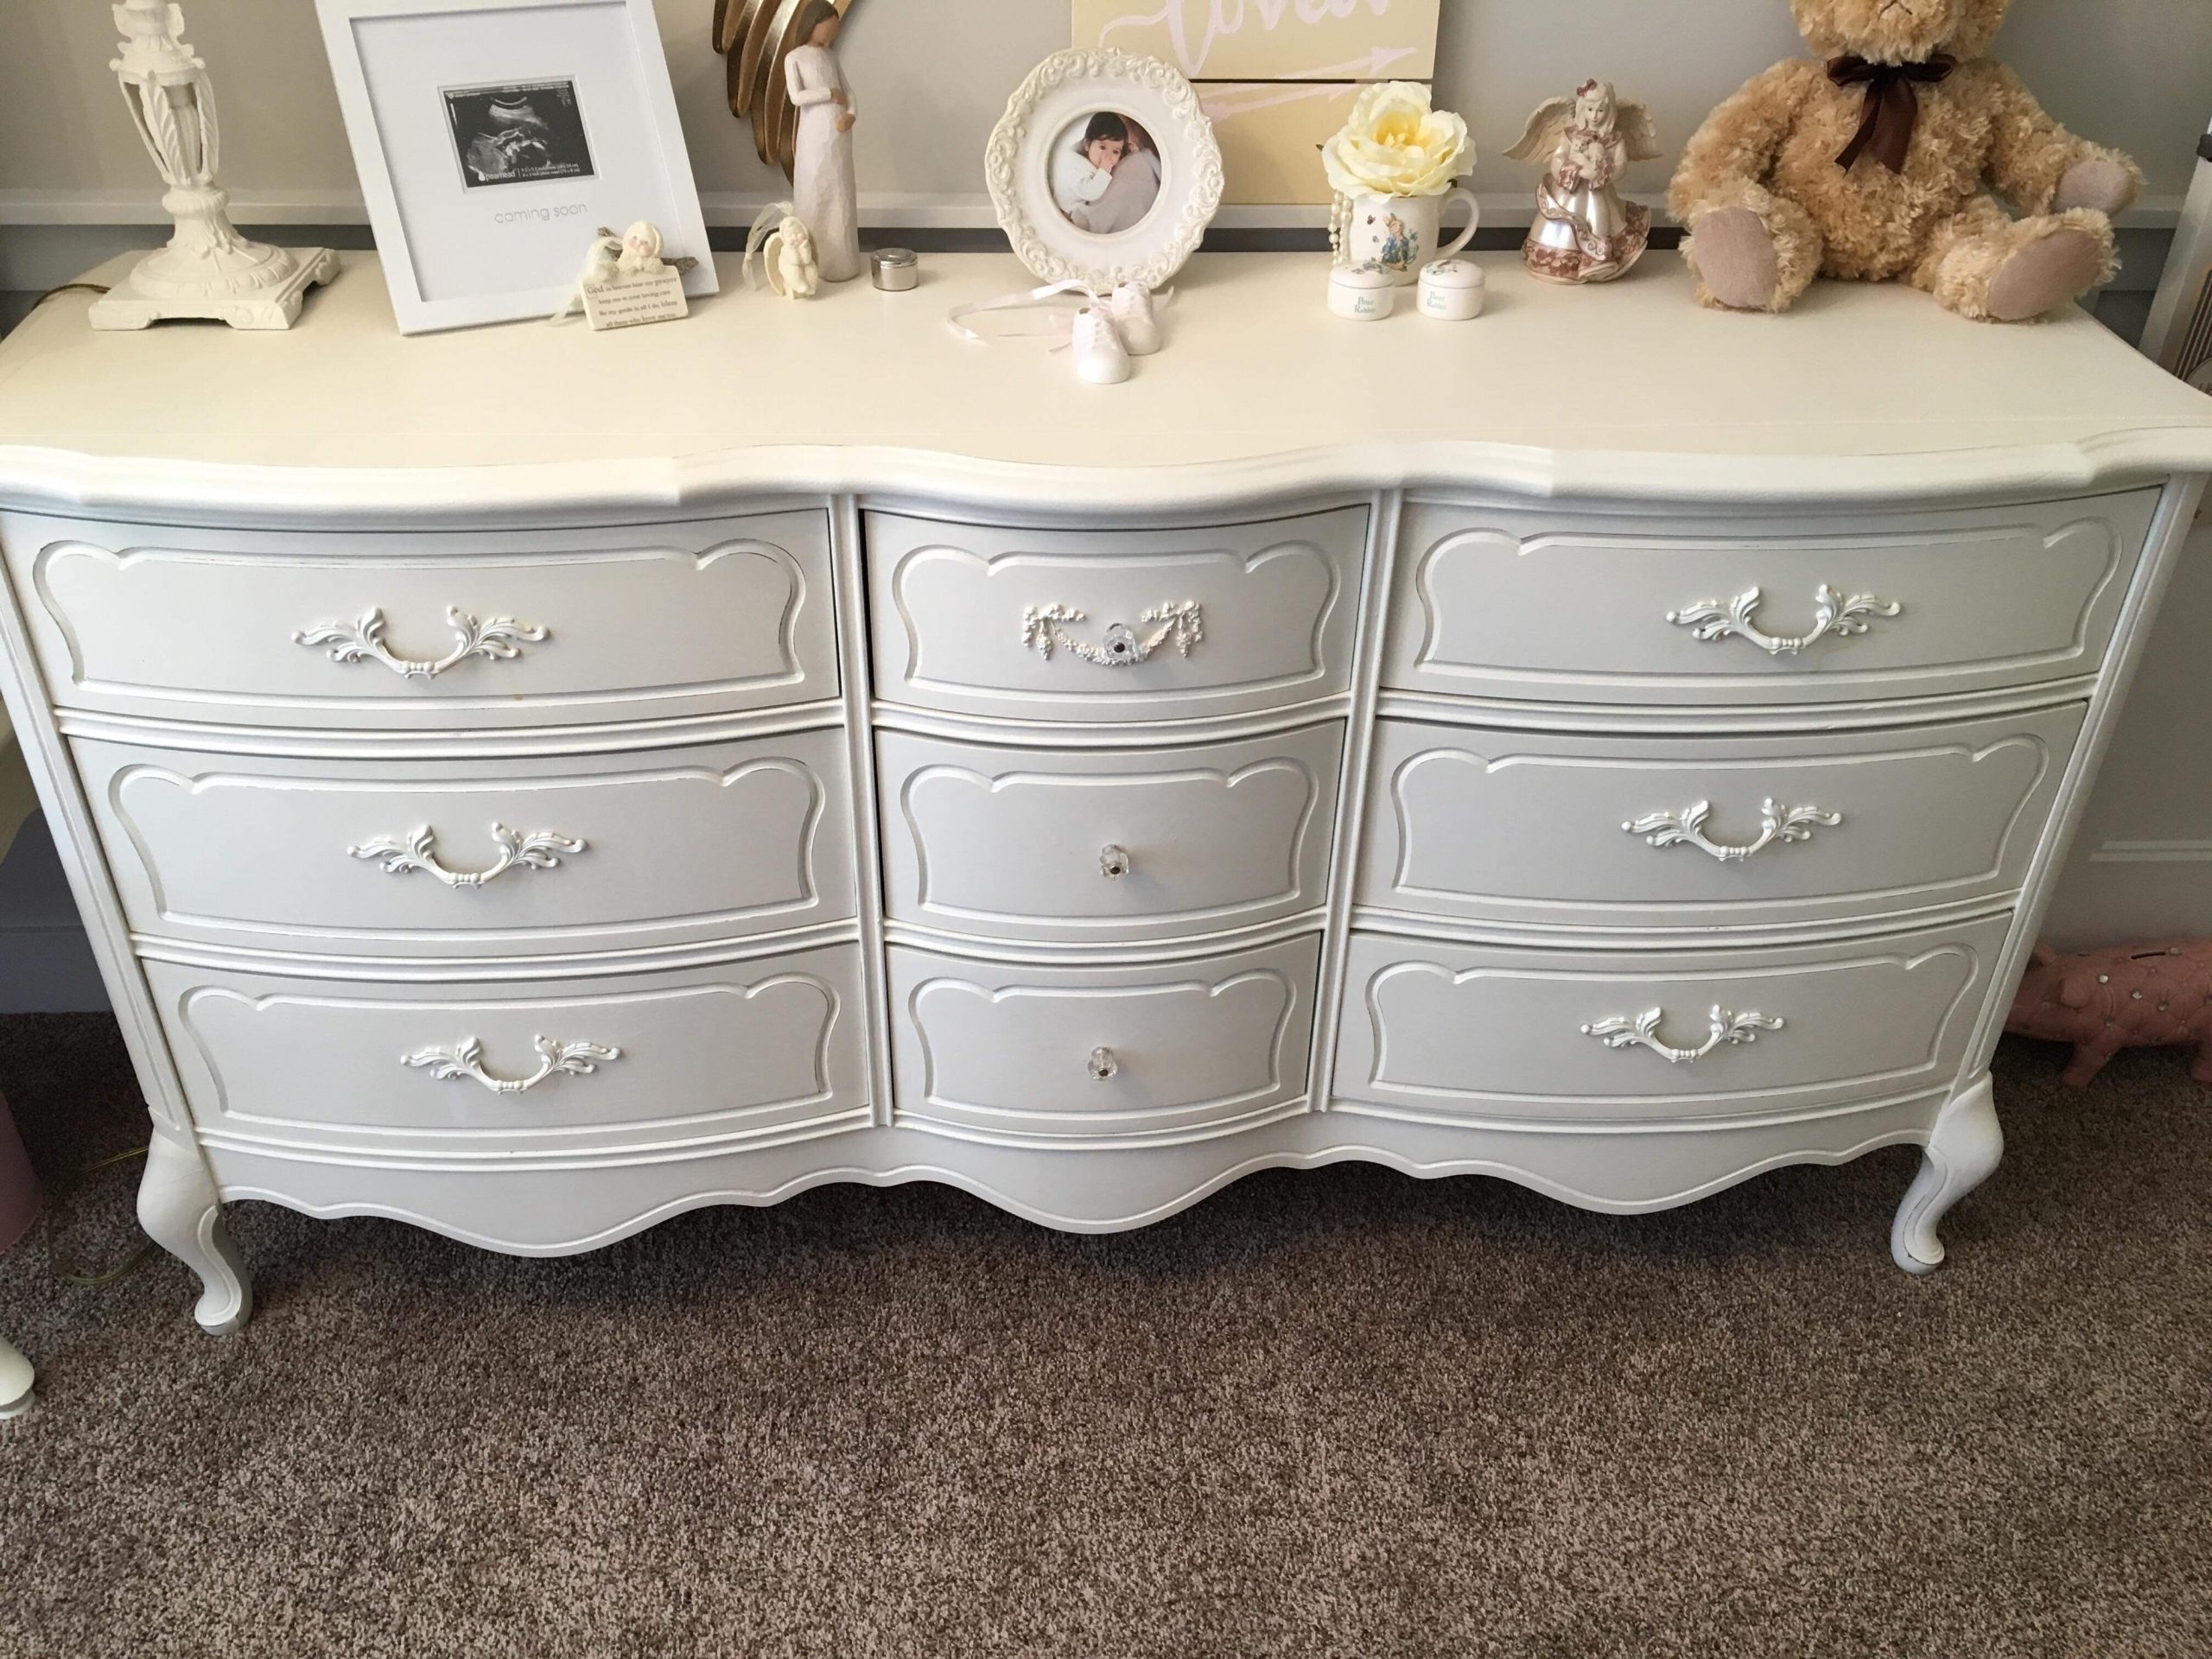
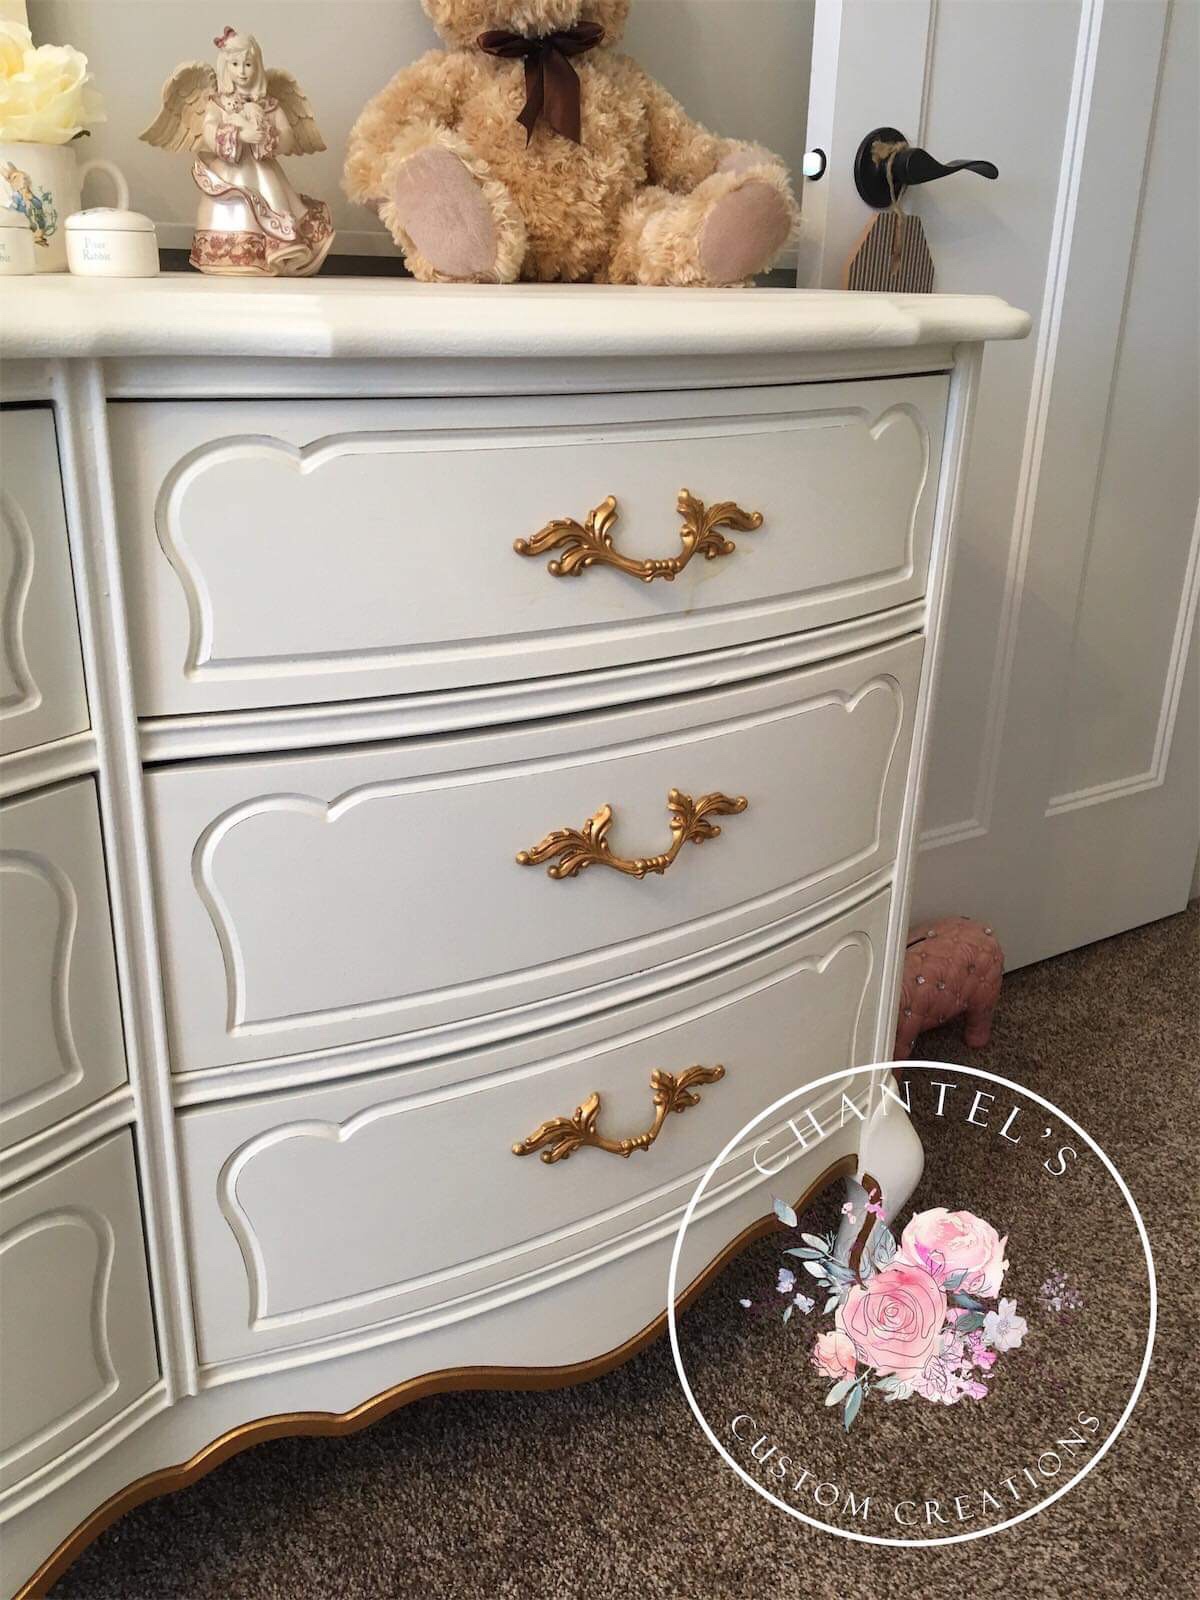
After
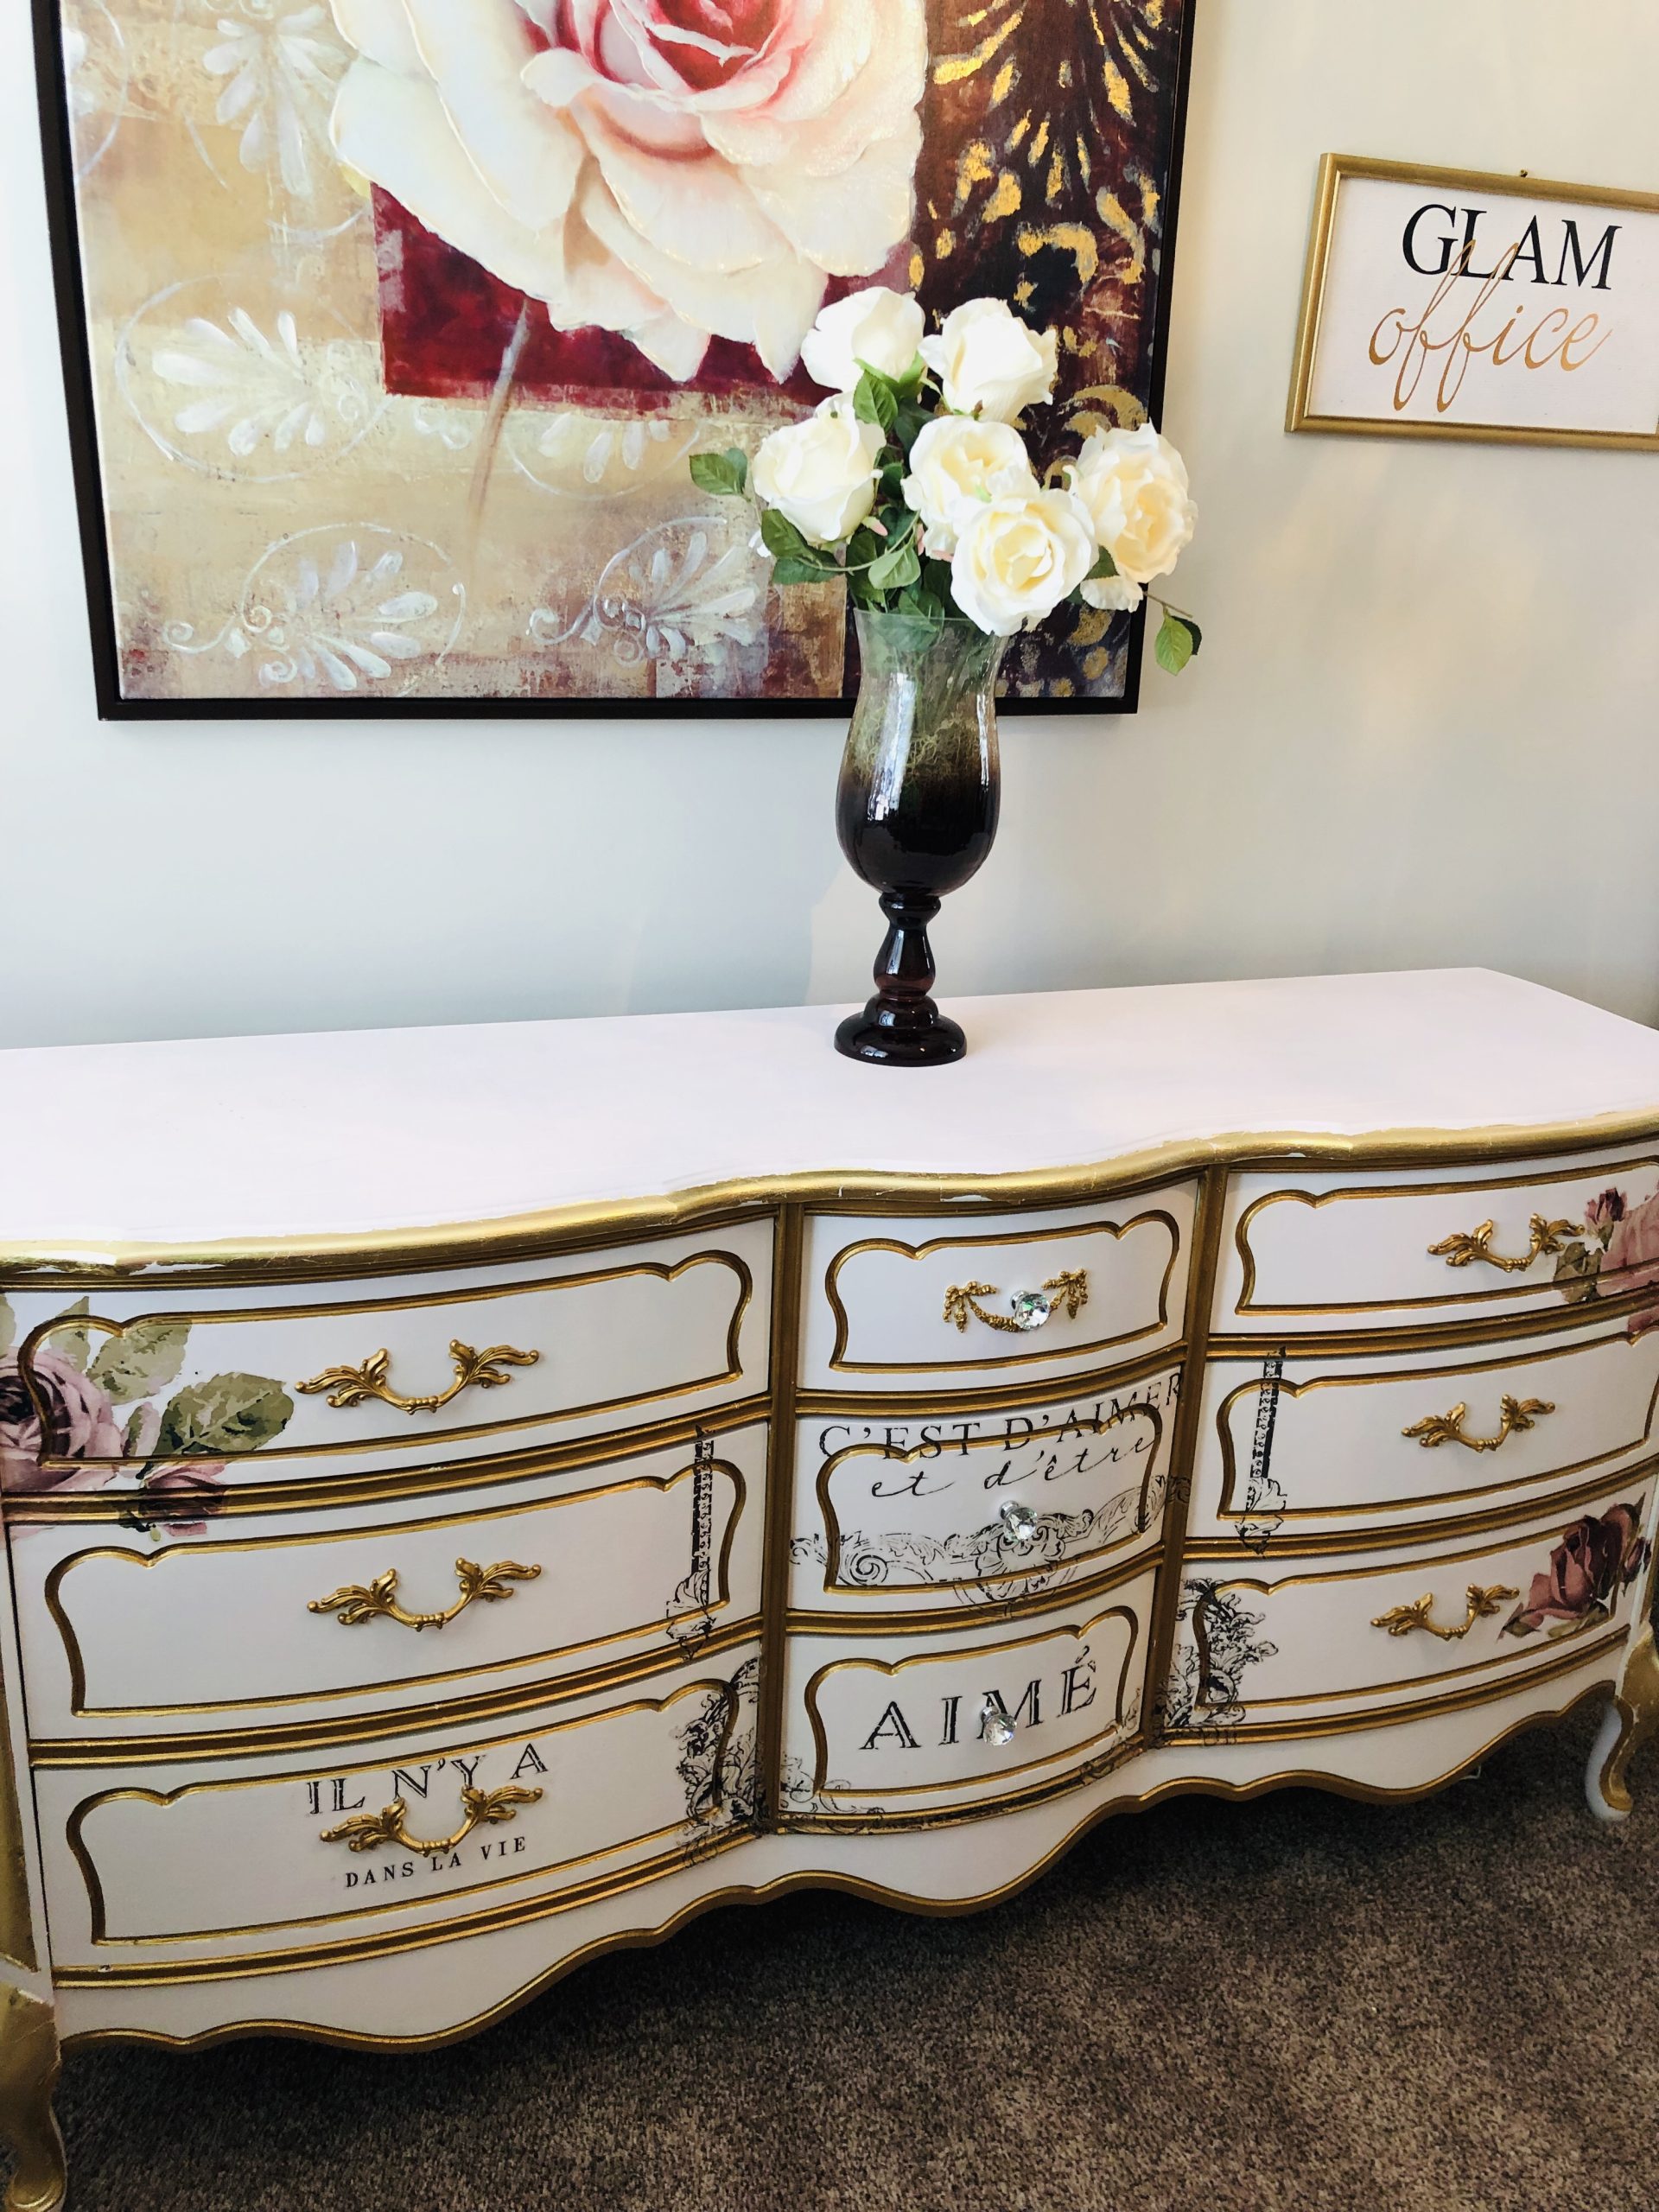
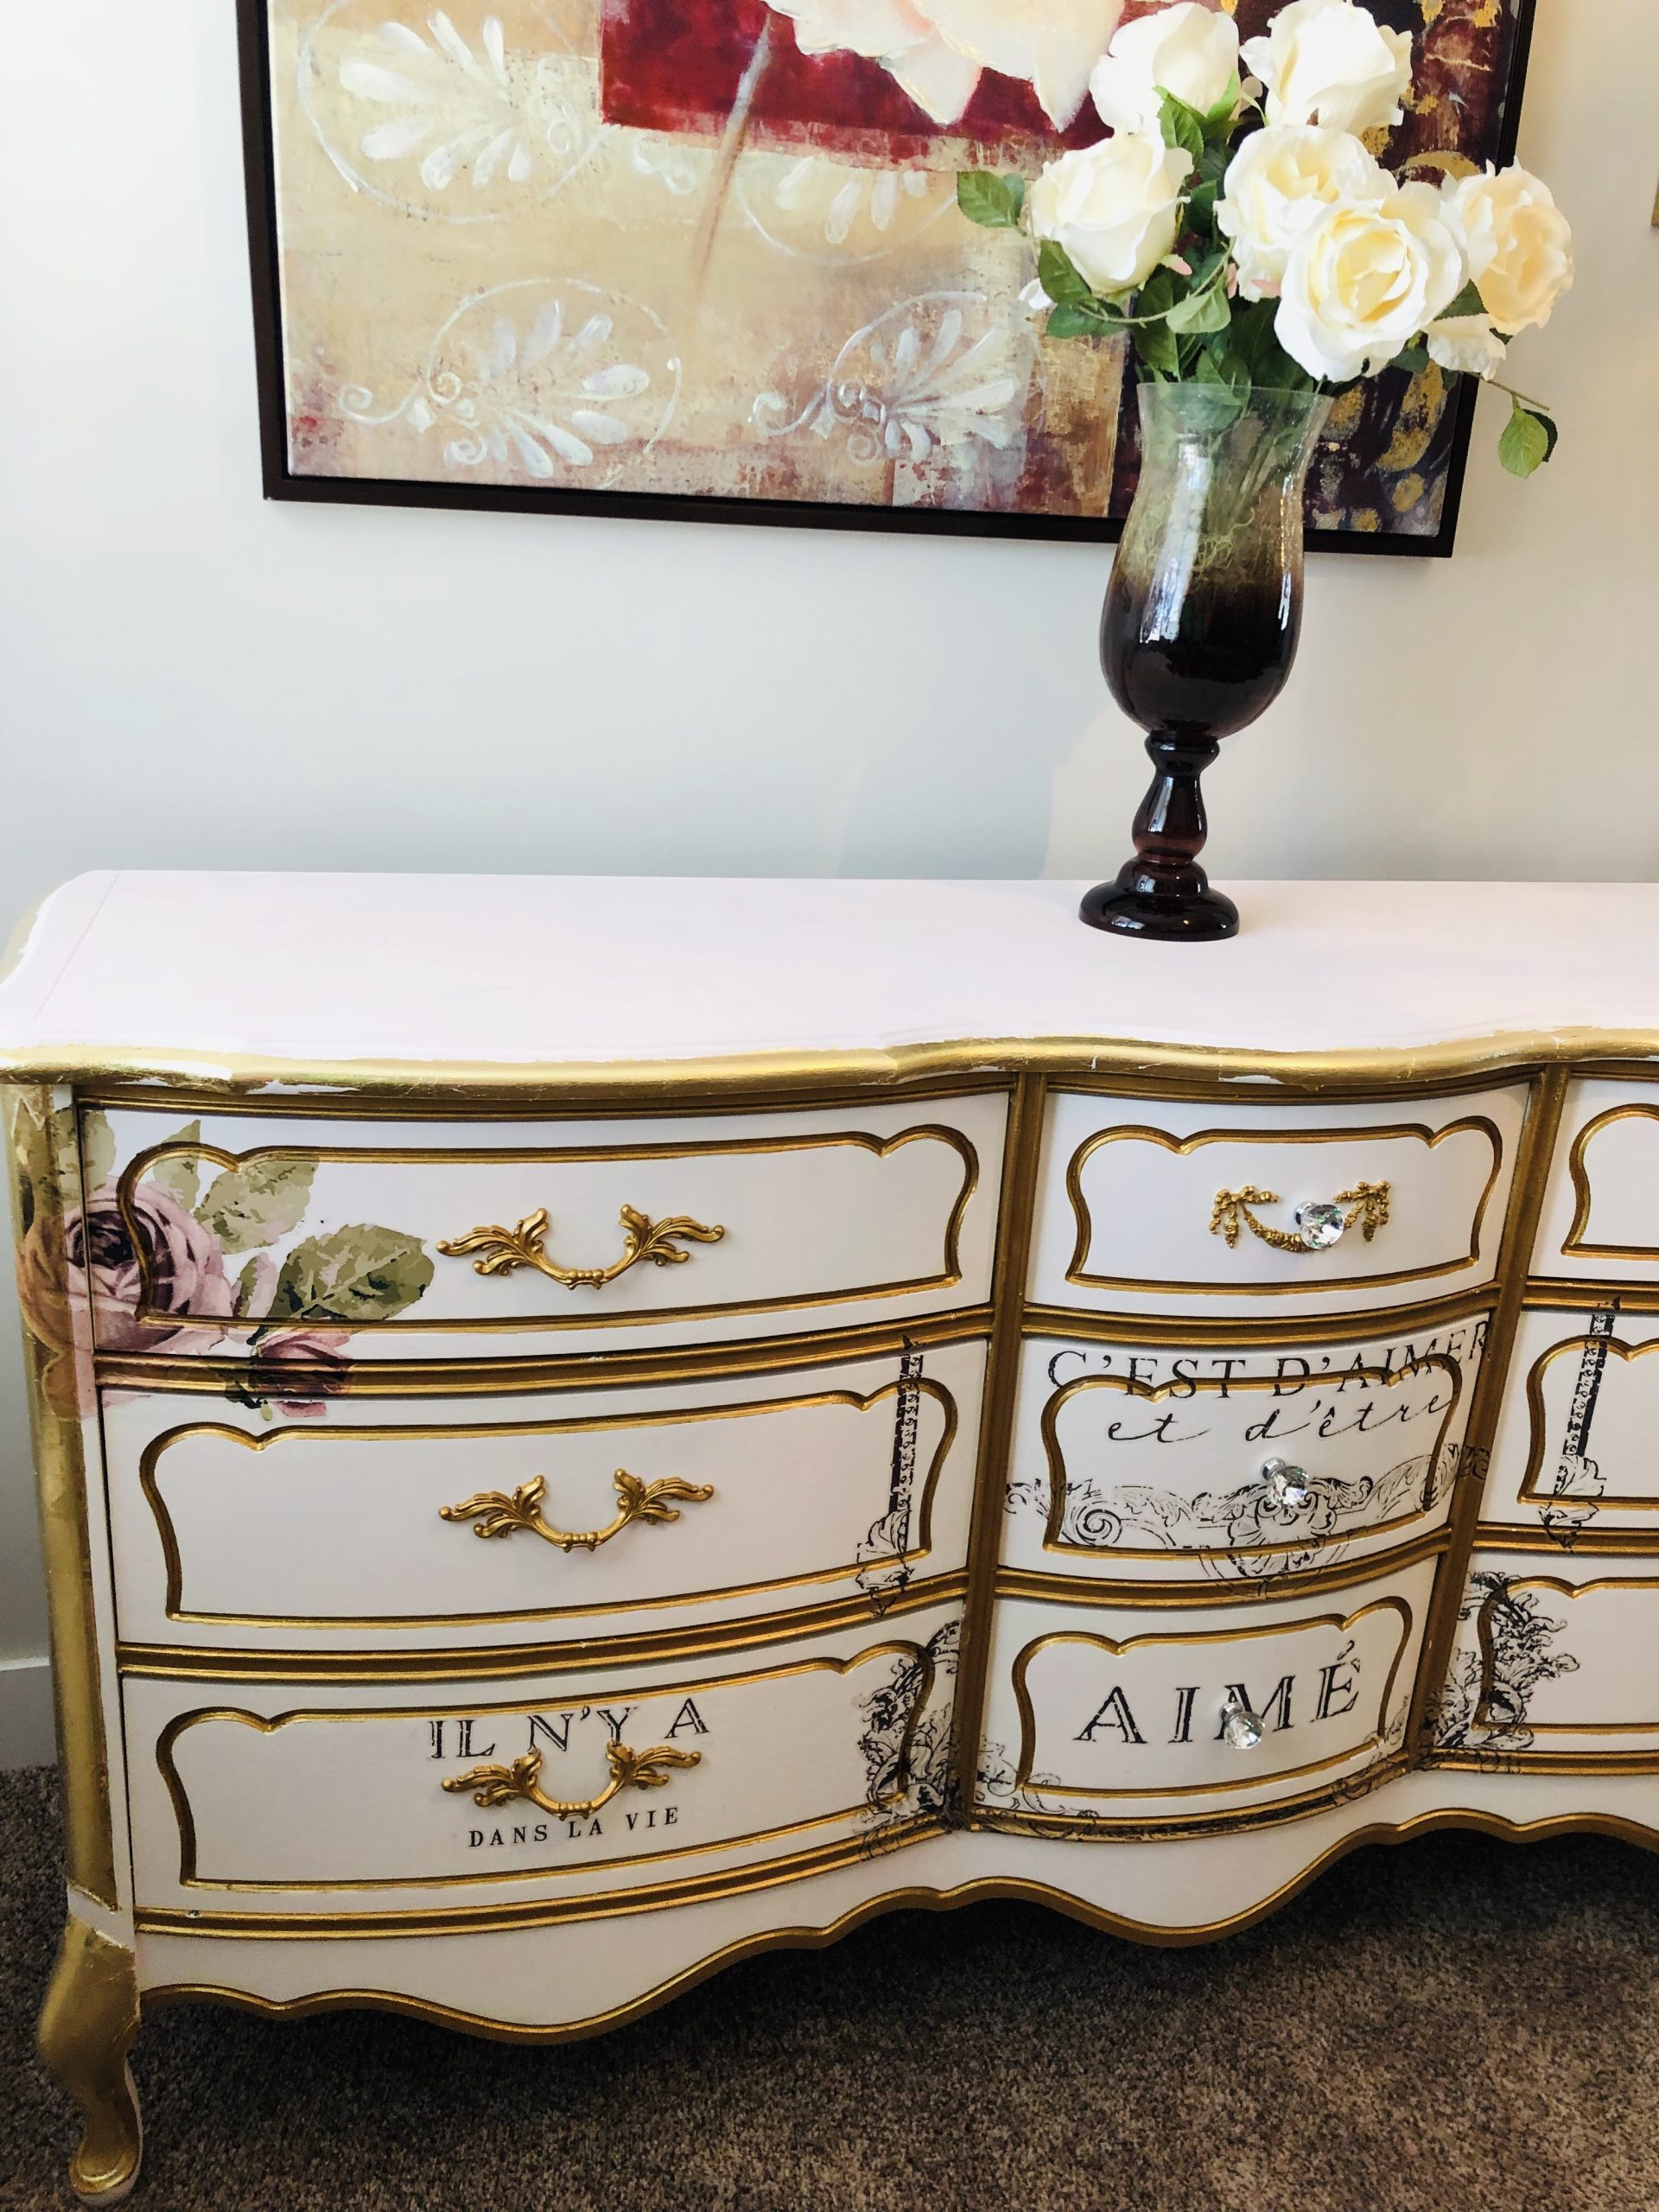
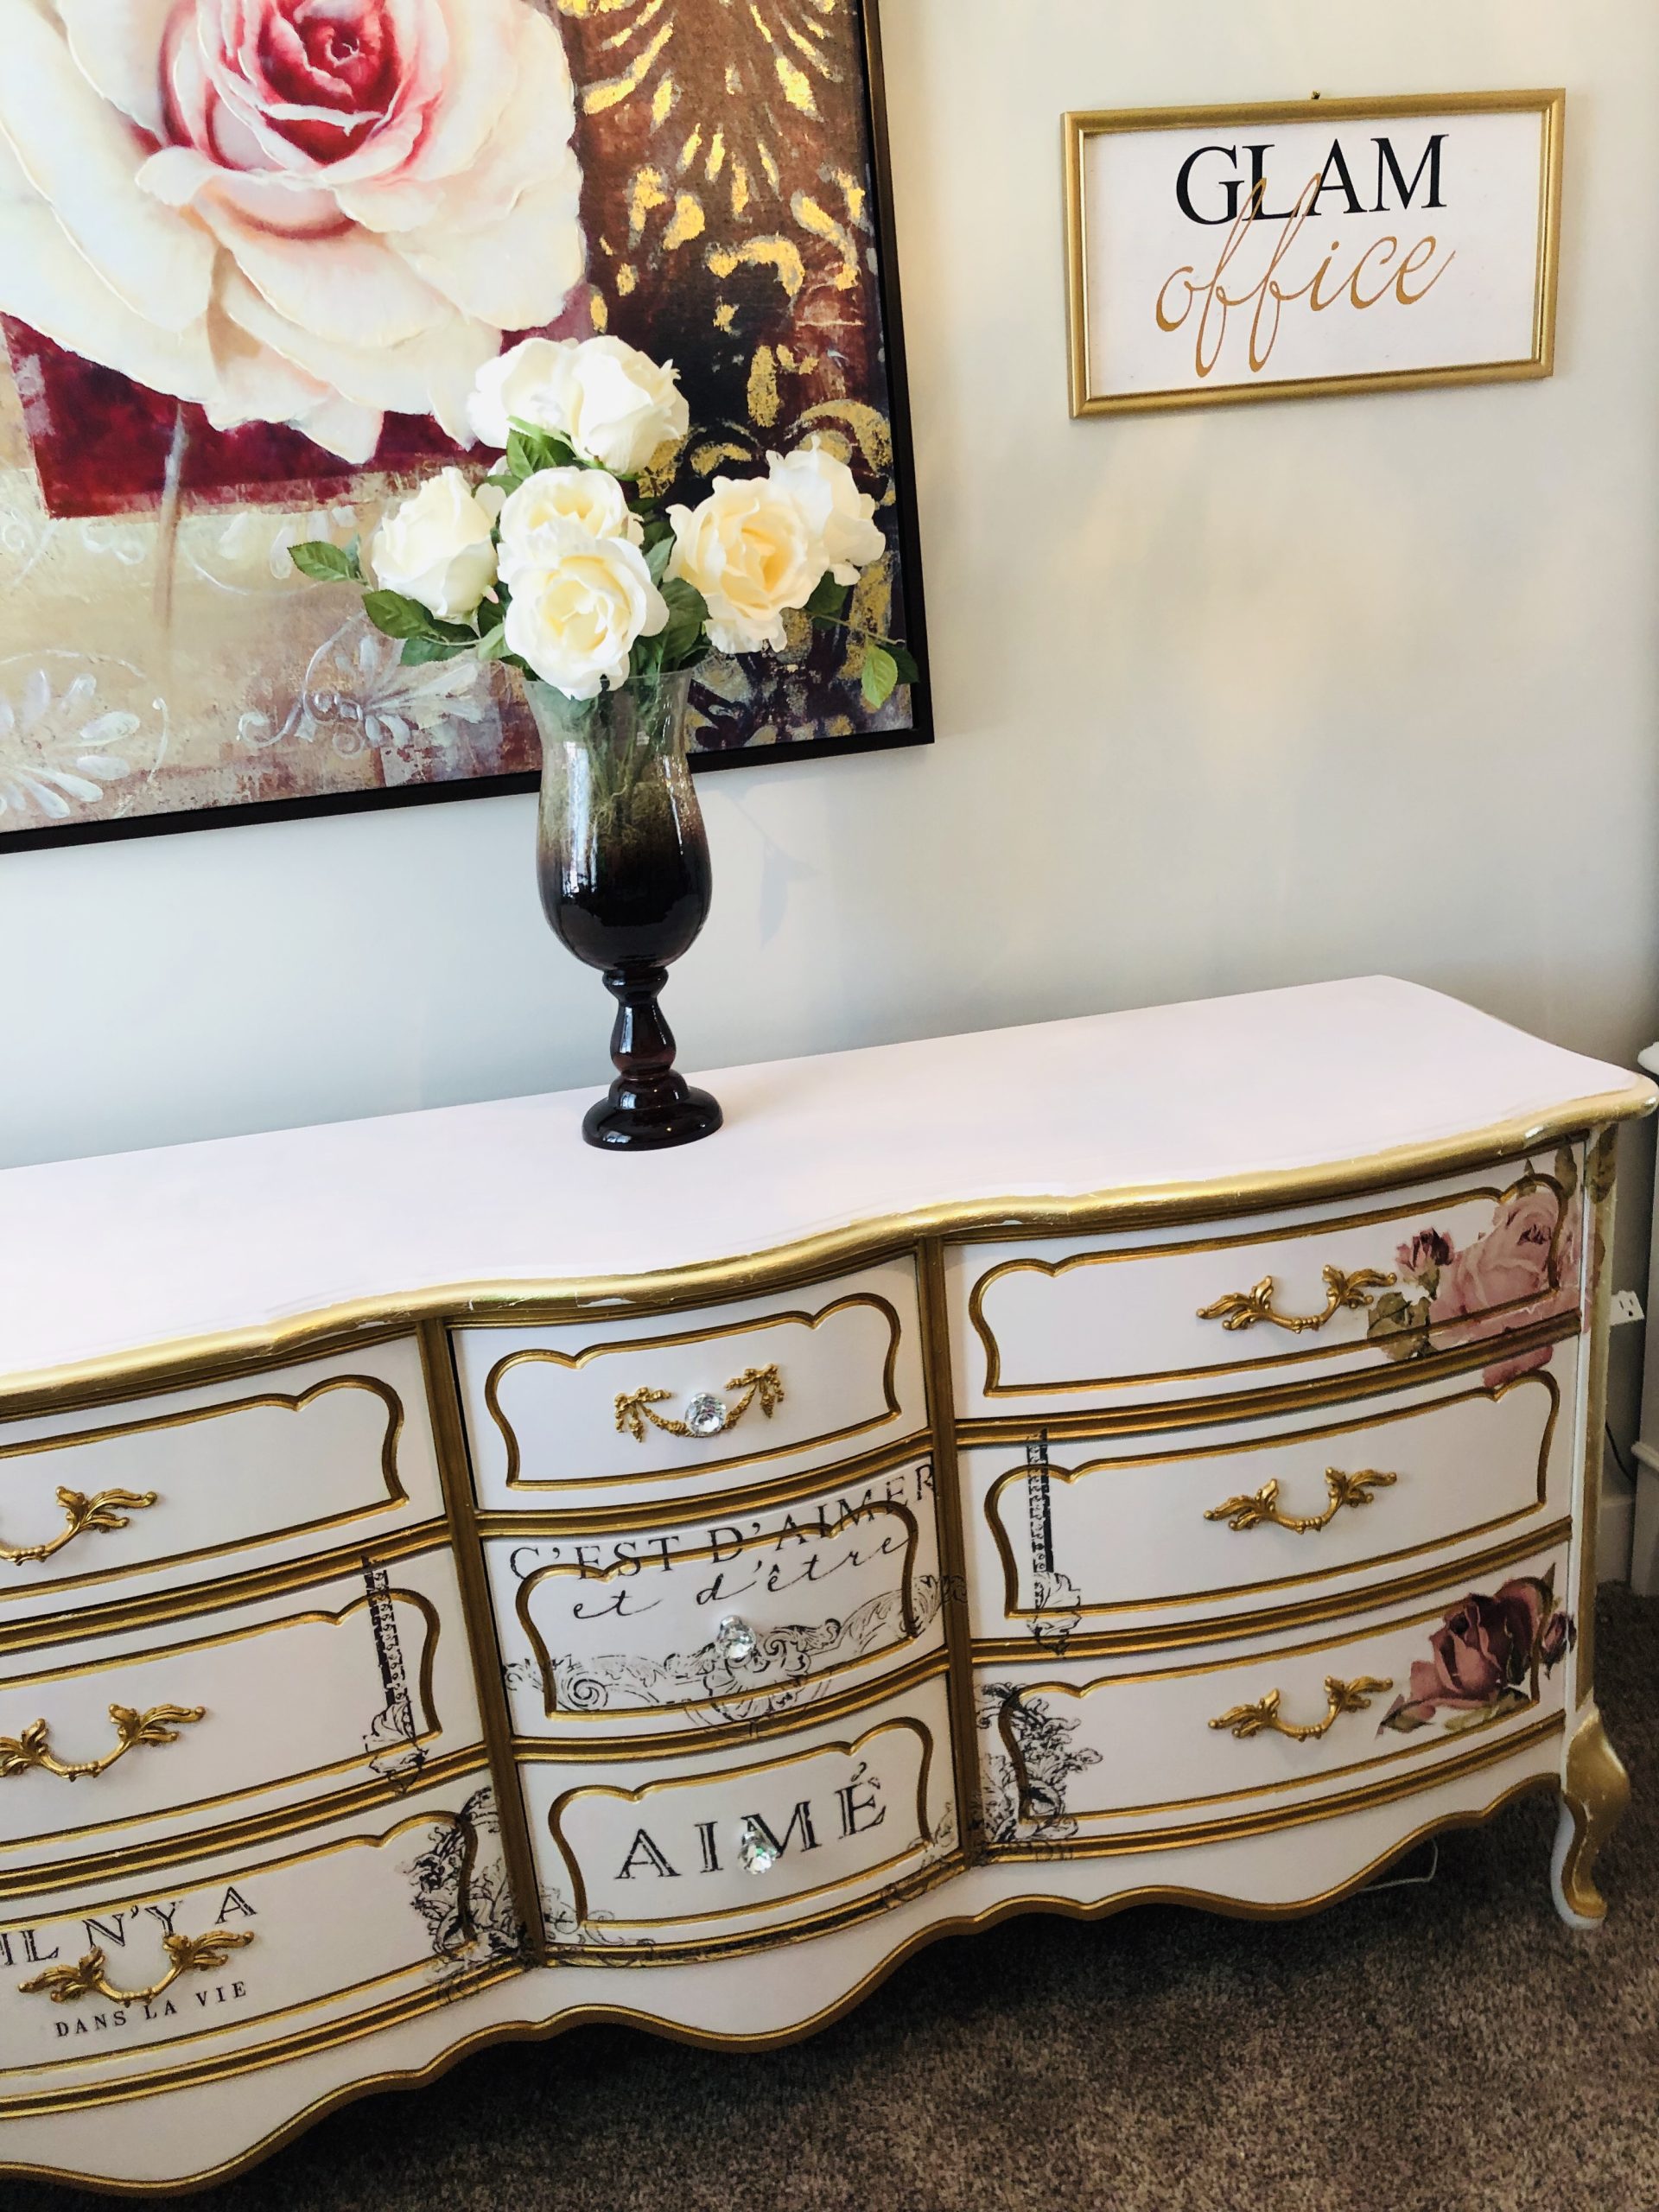
I am so in love with my vintage french provincial dresser makeover! A few elements were added here to make it a unique piece of furniture!
Looking for more painted furniture with gold leaf and transfers?:
pin for later!


Leave a Reply