Well truth be told, I looove jewelry and I wanted an armoire to hold all my pieces but this jewelry armoire was not a match to my new bedroom colors.
Chalk paint to the rescue!
This post may contain affiliate links; see Disclosure Policy HERE
Before
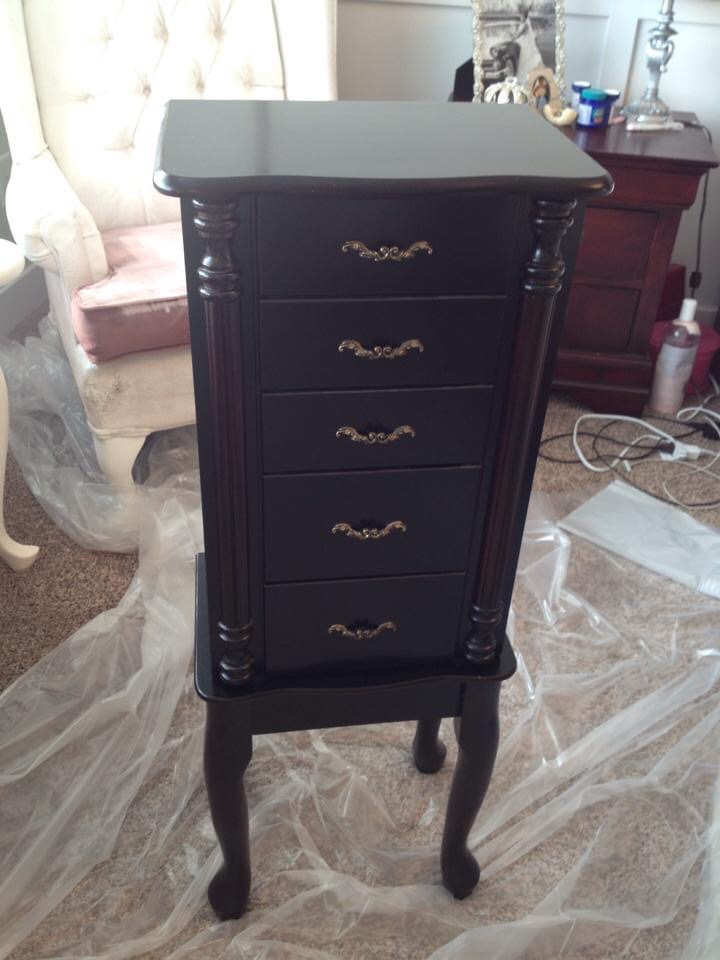
I love the style of it and the Queen Anne legs on it are a favourite of mine.
Steps
To begin, you will need to wash the dirt and grime off of your piece. Mine wasn’t too bad as it was fairly new.
This piece was very shiny and very cherry colored and I needed to go from a dark wood to a nice white.
Prepping the Furniture
I began by taking a fine grit sand paper and lightly sanding the piece. When you begin with a shiny surface, it’s always best to scuff up the surface first to make way for the paint to have a surface to adhere to.
If you skip this step and just apply paint, your paint will literally almost “slide” off the shiny wood. Believe me, I know from experience.
My first ever chalk painted project did not go well for this reason!
Primer
I always suggest a primer; especially when going from a dark wood to a light color. Apply 1-2 coats of a white primer. My go to primer is Zinsser.

I applied 3 coats of my white chalk paint. Make sure that each coat is completely dry before moving onto the next coat.
Make sure to cover your flooring with some sort of plastic sheets to protect it. Although chalk paint is water based, it will have a difficult time coming out of fabrics.
Distressing
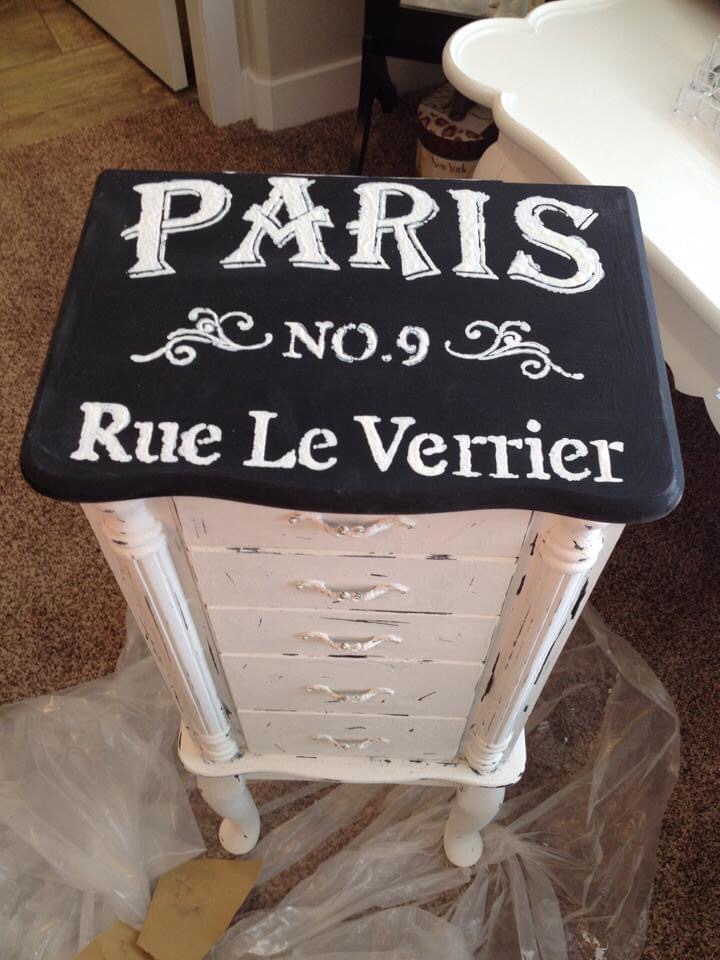
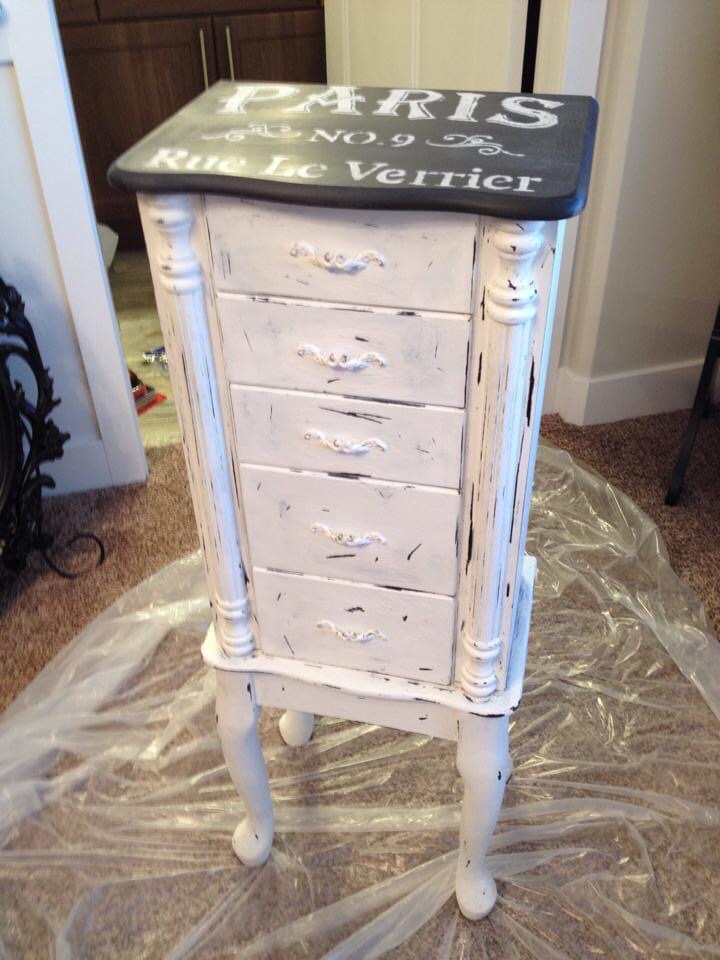
I wanted to do a heavy distress with this project; I used a medium grit sandpaper and a wet rag to distress. I usually lightly distress, but I wanted to try something different! I’m not sure if a heavy distress is my favorite way to distress, but I do love how this project came out!
Remember when distressing, if you should take off too much paint for your liking, you can always apply more paint and start over! So don’t be intimidated!
Mylar Stencil
I also wanted to add a stencil. I painted the top of the piece in black chalk paint and used white chalk paint with a stencil for the top. I used a mylar stencil.
Mylar stencils are reusable stencils. This is a similar stencil but the options are endless! Reusable stencils can be used for many projects as long as you wash the paint off of the stencil right away!
Applying a Wax
After finishing painting, I applied a clear wax to the piece. You can use a wax brush or just a nice dry cloth to apply the wax to your project.
It is also up to you if you wish to buff your wax after it has dried. I do recommend using one as it will protect your piece over time.
After

Here is the final result! I love the way it turned out. Please share your jewelry armoires! I would love to see them.
Before you Go, HERE are more inspirational furniture before and afters!:
- Chalk Painting Furniture Ideas for Beginners
- Painted Armoire Before and After
- Vintage Cart Makeover with Furniture Decor Transfers!
- Vintage Nesting Tables Painted with Chalk Paint
pin it for later!




Leave a Reply