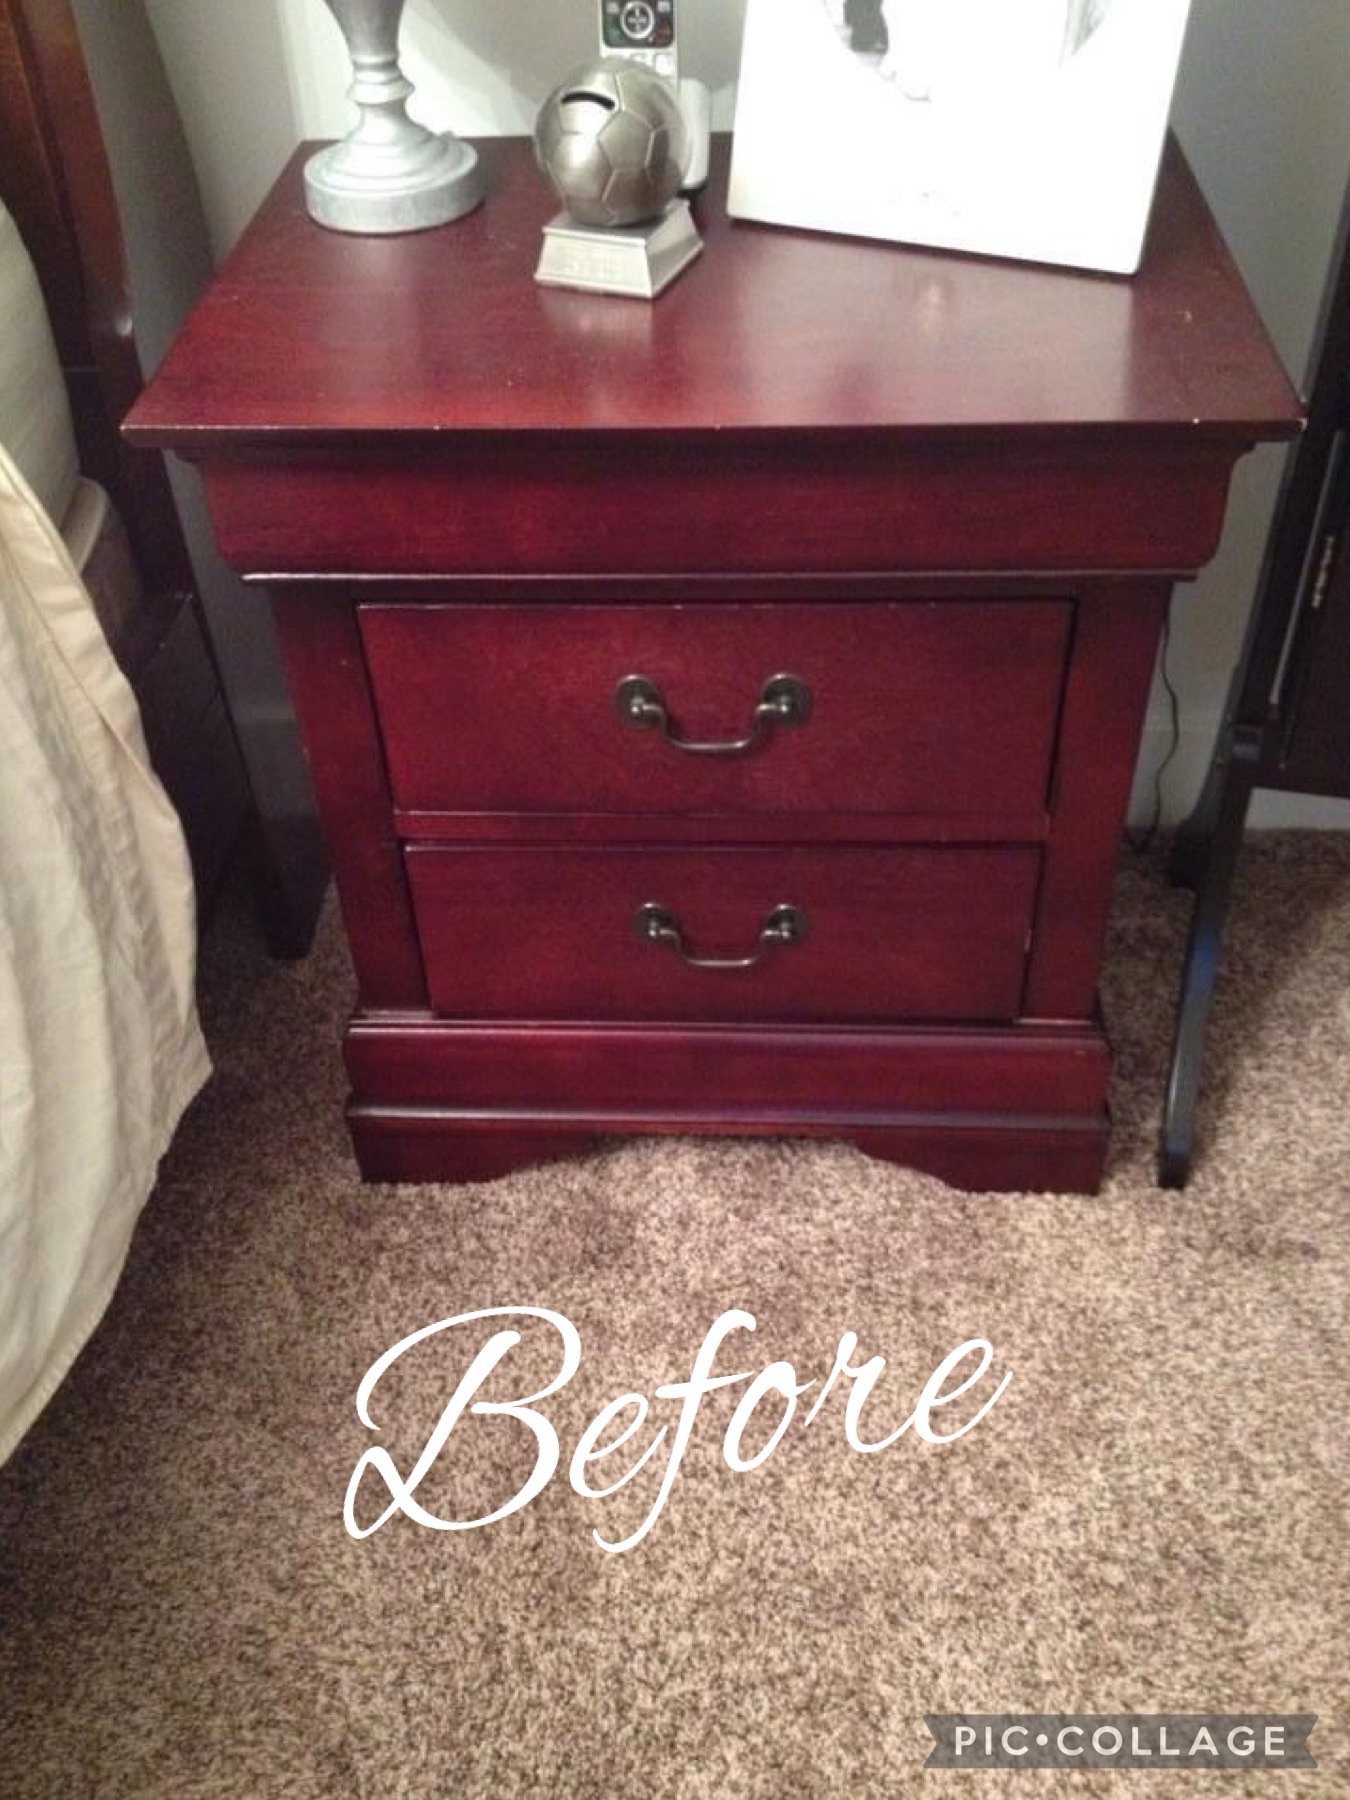
When we moved into our new house, brand new furniture was not in the budget ! As you can see from the furniture, it was still in really great shape with no need to replace! But it definitely needs an update from the dark cherry color!
I think my bedroom suite is now from at least 20 years ago and my style has definitely changed over the years! No more dark wood for me!
This post may contain affiliate links, please see Disclosure Policy
Step 1
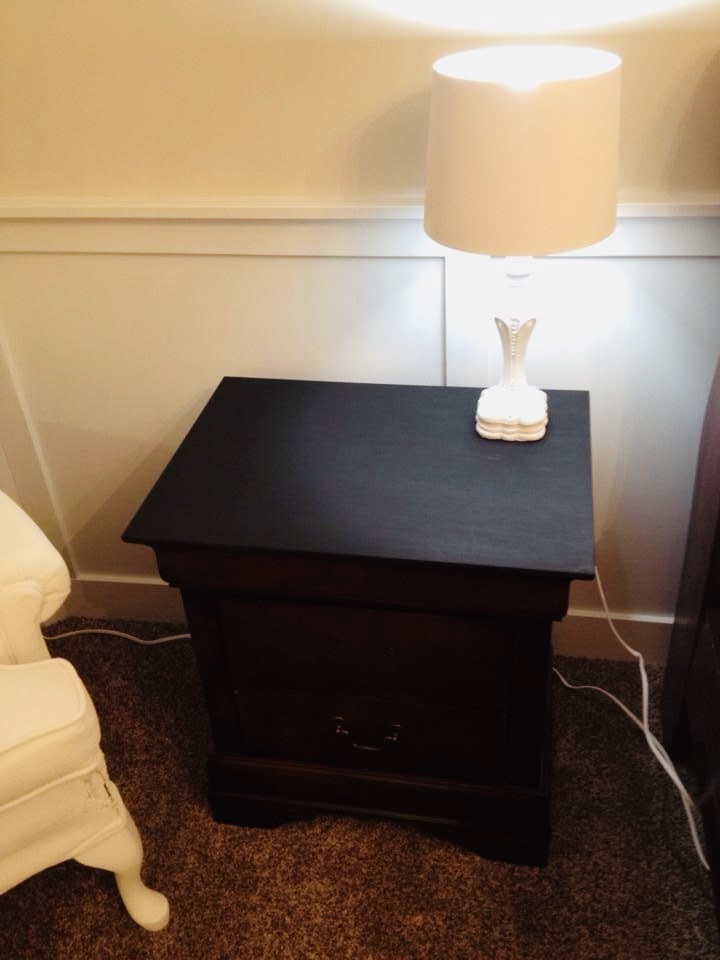
First step in my plan was deciding the colors for the project. I had already decided on black and white as the new color scheme for our master bedroom.
My plan is to paint all of the pieces in the bedroom with a black chalk paint on the top of the tables and then a crisp white for the bottom of the furniture, a quick distress and new hardware.
Step 2
As with all of my furniture painting tutorials, I always suggest that you give your furniture a good wipe down with a clean cloth.
With this particular wood product, I would also suggest a light sanding for ease of the chalk paint to adhere to the surface well.
Step 3
I would suggest a black chalk paint for this project. I would also suggest a good quality furniture paint brush as well! It will take the paint easier and will adhere to your surface in nice broad strokes with less chance of having bristle marks in your project.
This is a super easy step as it doesn’t even require a primer first as we are going from a dark wood color to an even darker paint color.
Step 4
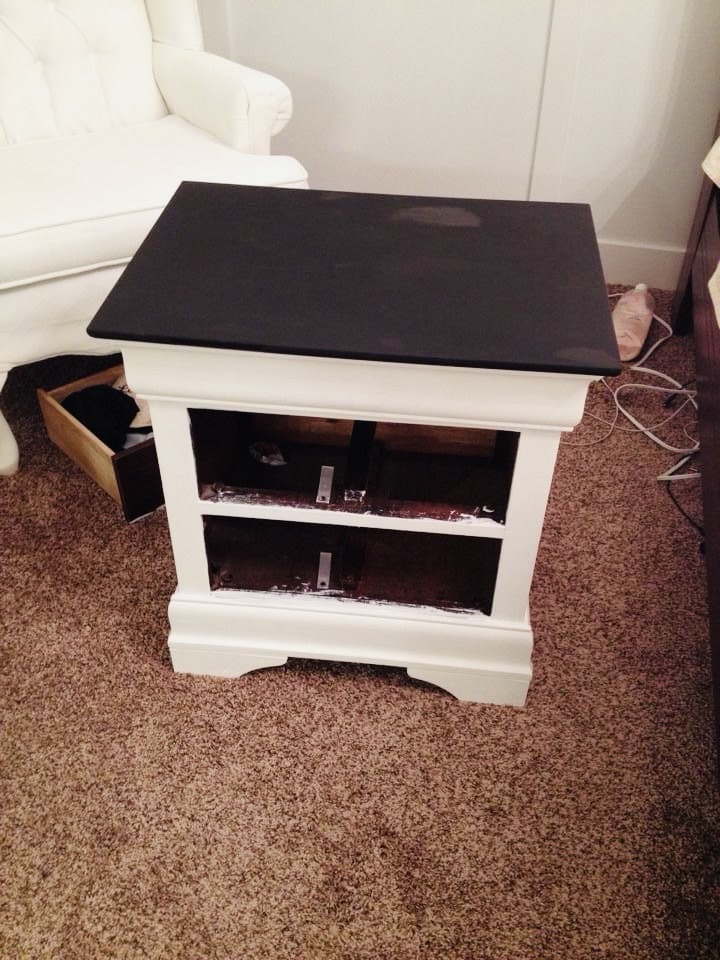
After the top of the nightstand has had a chance to dry, its now onto painting the body of the piece.
I did not use a primer in this case and I probably should have! It would have been helpful going from a dark wood to a stark white.
Instead I used about 3 coats of Folk Art white paint. Check out the paint here, its an amazing product for furniture!
Step 5
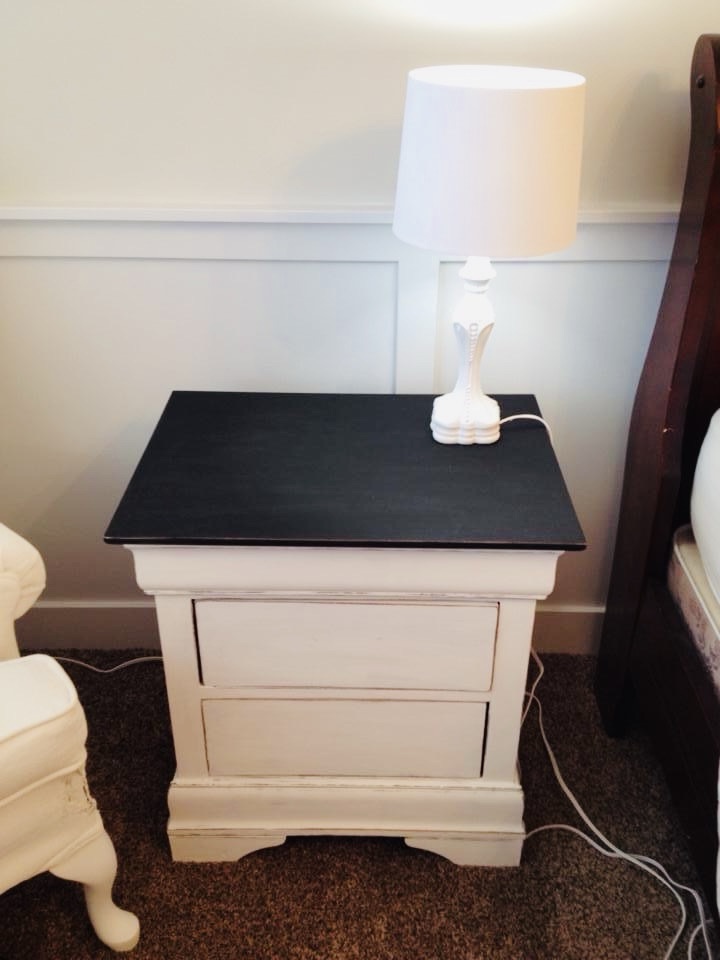
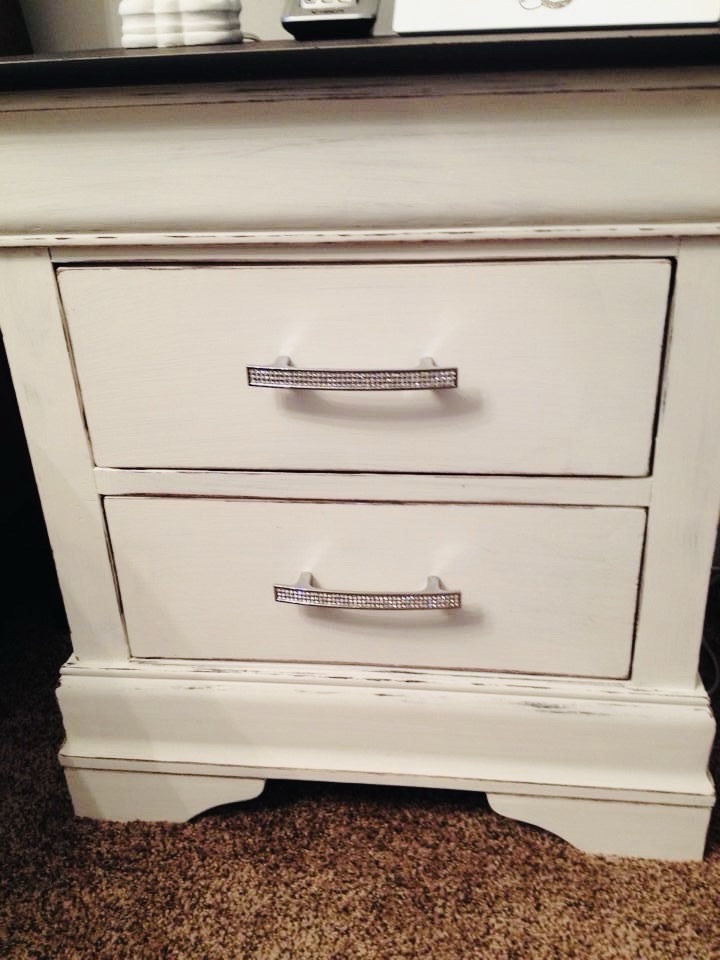
I would suggest if you are changing out the hardware, to make sure you drill new holes in the right spots for the new hardware.
I used wood filler for the old holes and sanded it down and painted over the holes after it was dried. I also drilled new holes for the table to fit the new hardware.
Step 6
This step was the fun part for me! I love the distressed look on furniture! I have found many ways to distress and just to give you some quick tips, I would use a sandpaper in a very light grit and in a very light application.
You do not want to distress so much that you start sanding off the actual wood. I have done this before and the results were less than ideal.
Another way to distress is to take a wet shop rag just after you have painted and it has started to dry. You can wet distress as well and I find that helps not to distress too much. The only issue with that is that you cannot let your piece dry completely or say over night as the paint will have cured and it will take a lot of elbow grease to distress!
Step 7
I love the last step! Time to apply the hardware to your project and for me, it had to be a bling handle pull! I had so much fun shopping for these and if this style is up your alley, take a look HERE at all these bling drawer pulls!
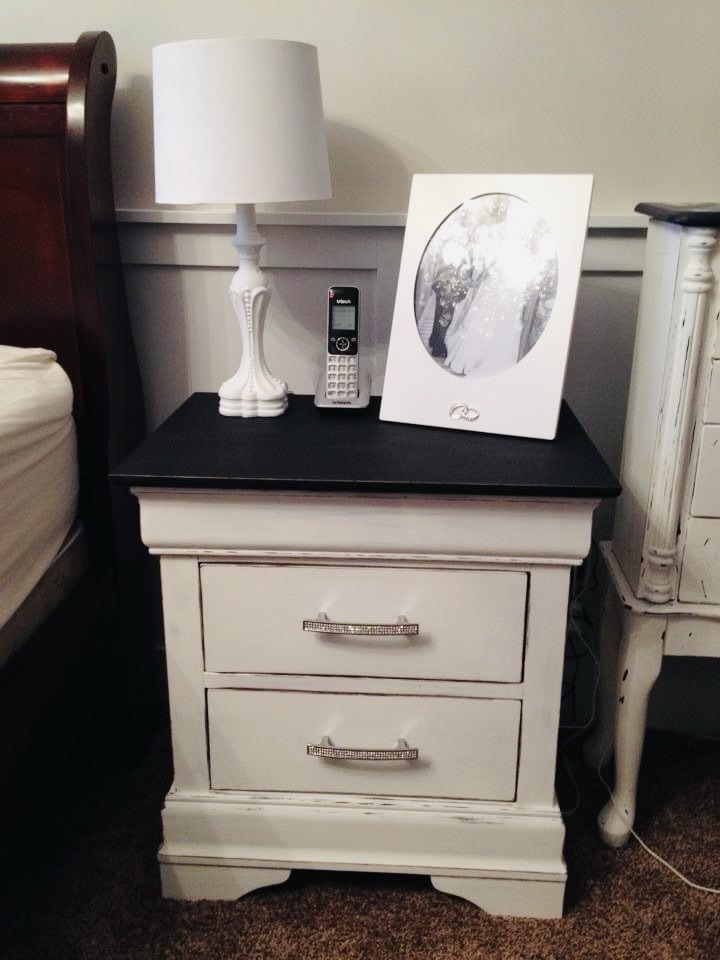
Such a simple and easy nightstand makeover! I hope you enjoyed the makeover and if you are interested in more furniture inspiration, check out more HERE:
- Painting Old Dresser with Chalk Paint
- Hand Painted Grandfather Clock Makeover
- Baby Boy Nursery Side Table Makeover