How I Make Personalized Wooden Planter Boxes
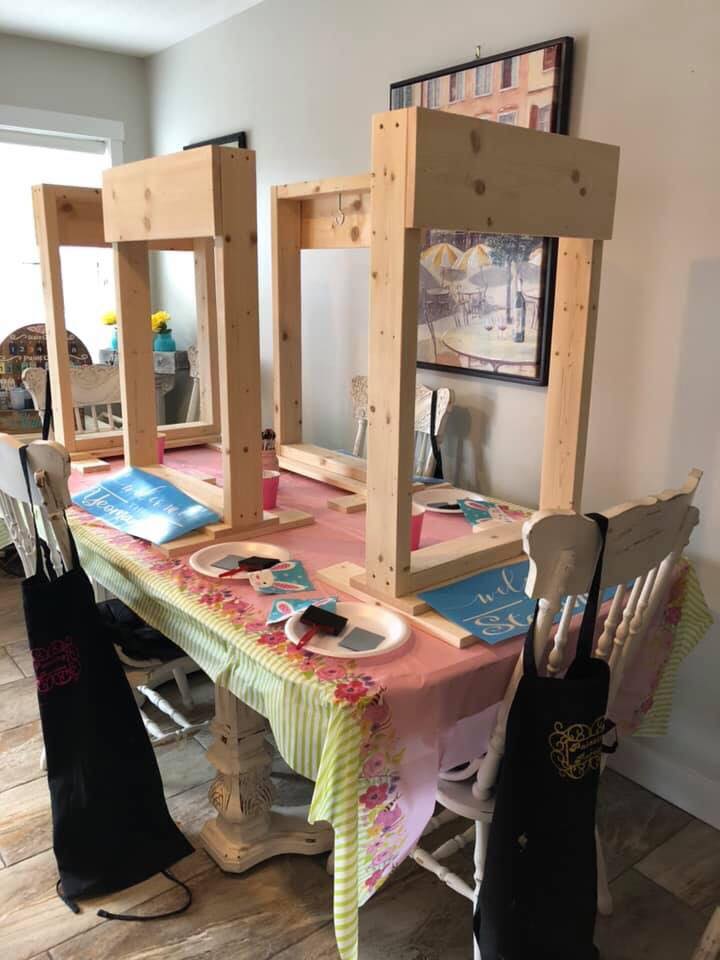
I’ve been wanting to make one of these beautiful plant stands for years and this year I finally got to make a few! I gave a few as gifts, I kept a couple (one for the front of the house, one for the deck); and I also had a paint party where some ladies were able to paint their own!
My husband made these for me and I also had a local woodworker in my town help with making some as well. In this post, I will be sharing with you the steps to making my personalized wooden planter boxes !
This post contains affiliate links. See full disclosure HERE.
Supply List
- Rustoleum Chalked paint, linen white
- Oramask 813 Stencil Film
- Transfer Tape
- Cricut Cutting Machine
- Walnut Water Based Stain
- Ryobi Hand Sander
*I used Minwax Water Based Stain in Dark Walnut and Deep Ocean. These stains need to be pre-mixed at a store. So for the purposes of this post, I listed an alternative water-based stain brand for your convenience that is already mixed*
This one I painted for my mother in law for Mother’s Day! These plant stands are so great for spring or for a gift for Mother’s Day!
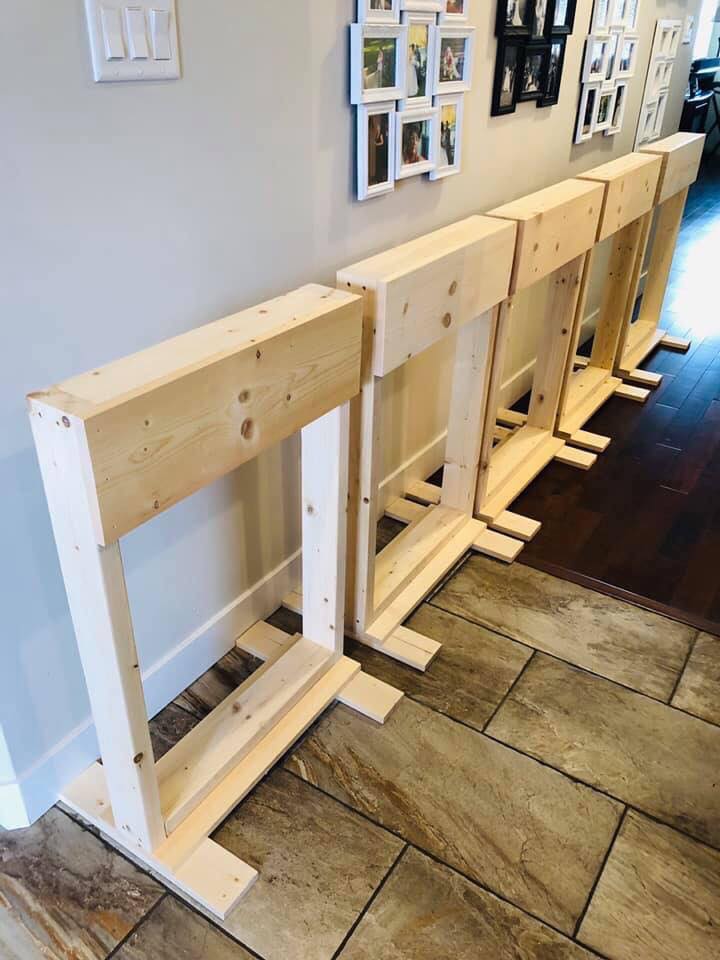
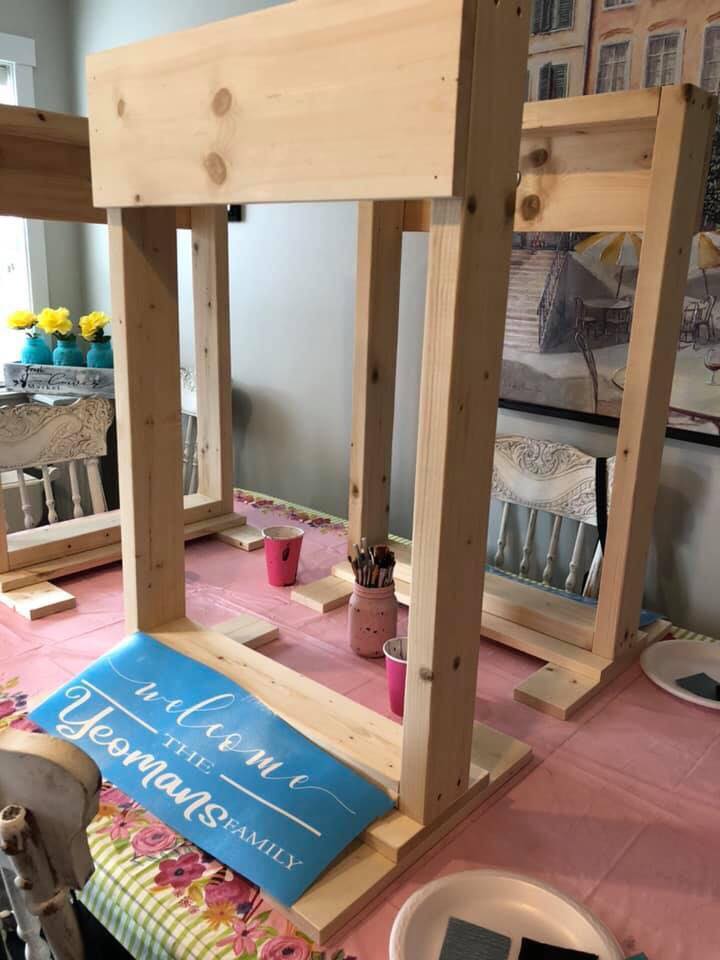
Step 1
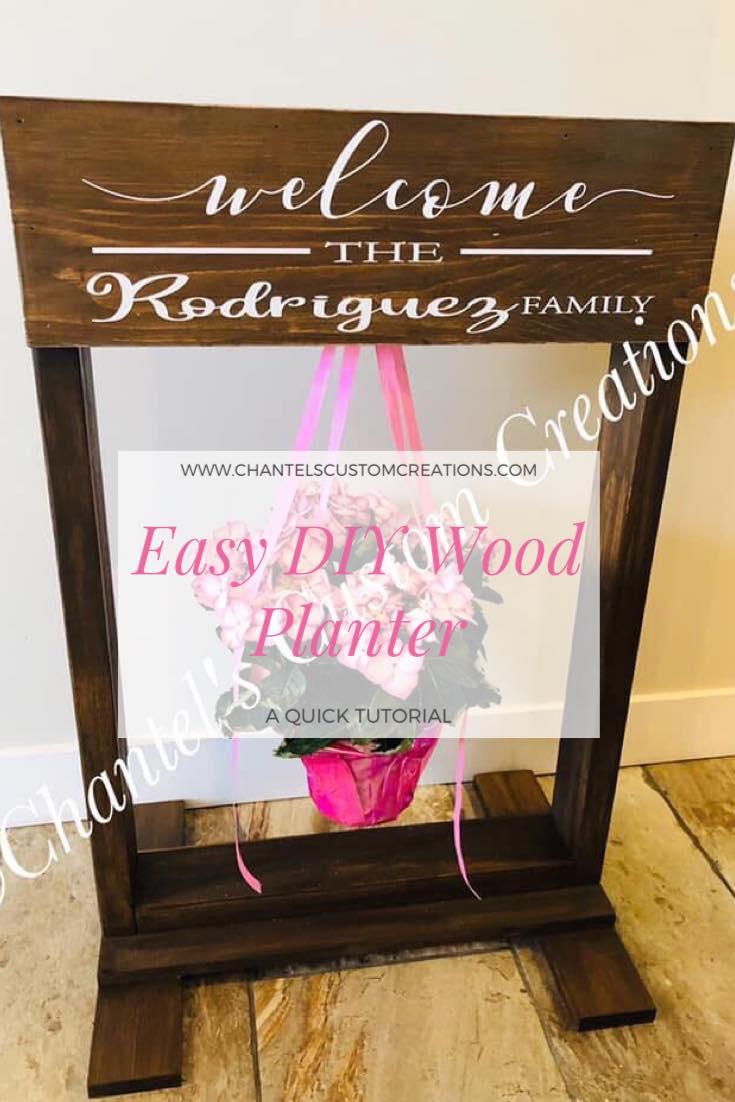
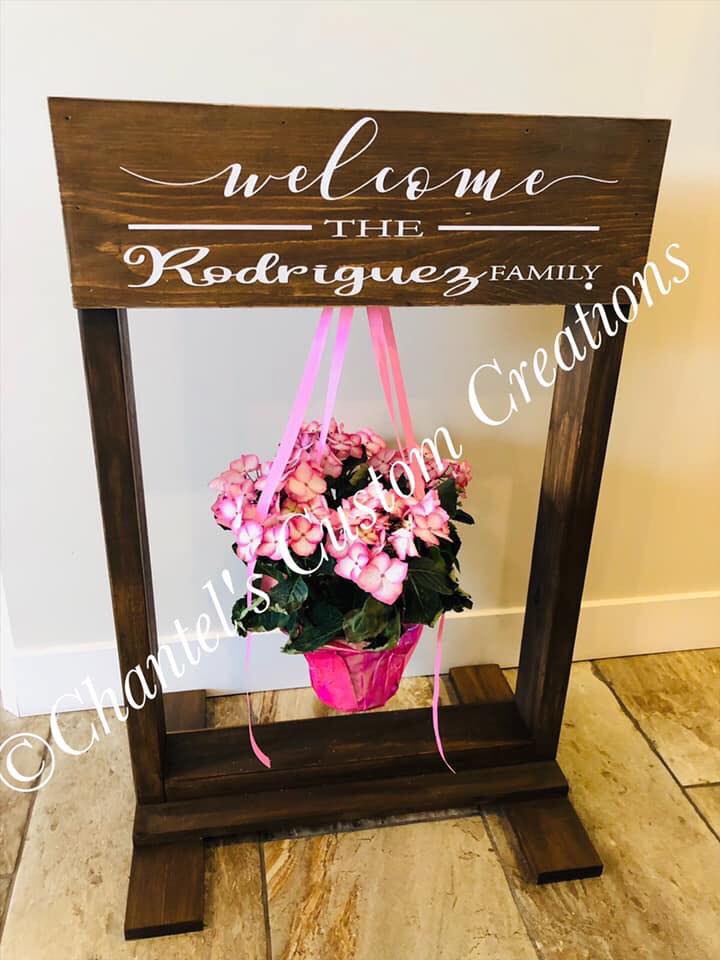
These are the plant stands ready to be painted! The dimensions of the planter are as follows:
- 34.5″ high
- 23″ wide
- 7″ for the top piece where I stenciled the name
Step 2 to the DIY wood planter
Prepare the stencils if you are using stencils on your planters. You can contact me to order a stencil or use your Cricut Cutting Machine machine to cut one out.
Step 3 of the DIY wood planter:
You will want to pick either a stain or a paint color for your plant stand. I went with a Minwax Dark Walnut stain for this one.
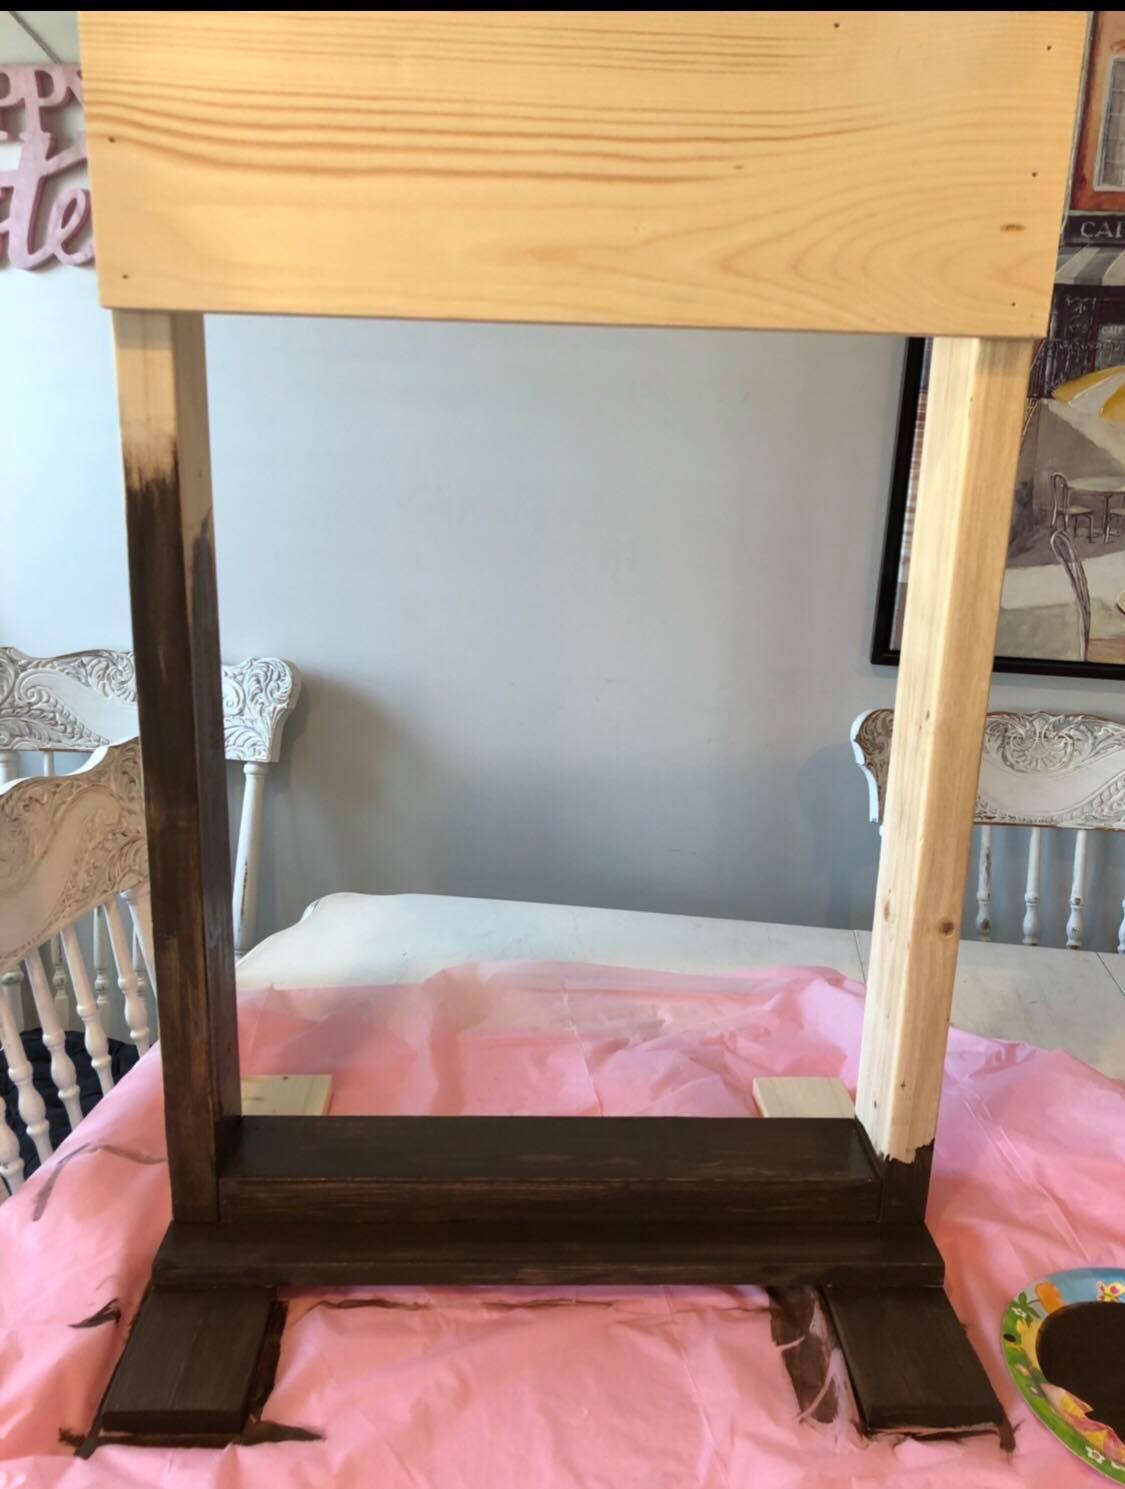
It is very easy to apply the stain when you work with a water based stain! Staining can be done indoors as you can see, that is how I stained mine.
I used a dry rag and carefully applied the stain with a rag. Always be careful with stain and clothing. Even with the water based stain, removing a stain from clothing is virtually impossible.
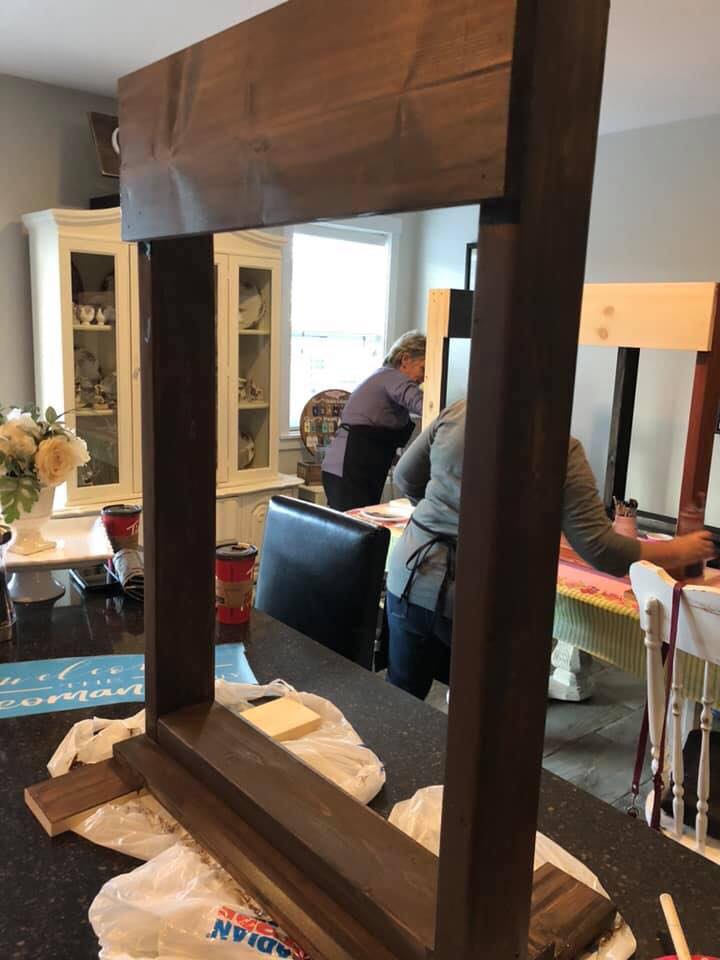
Step 4 of DIY Planter:
After the stain or paint has completely dried, you will want to lightly sand with a 400 grit sandpaper to remove any ridges that the stain may have left in the wood. This is an important step when stenciling as you will want a smooth surface for the stencil to be applied to the wood.
Starting with your stencil, you will want to remove the backer to it and adhere your chosen stencil to the top of the planter stand. Make sure to remove the transfer tape off the top of your stencil.
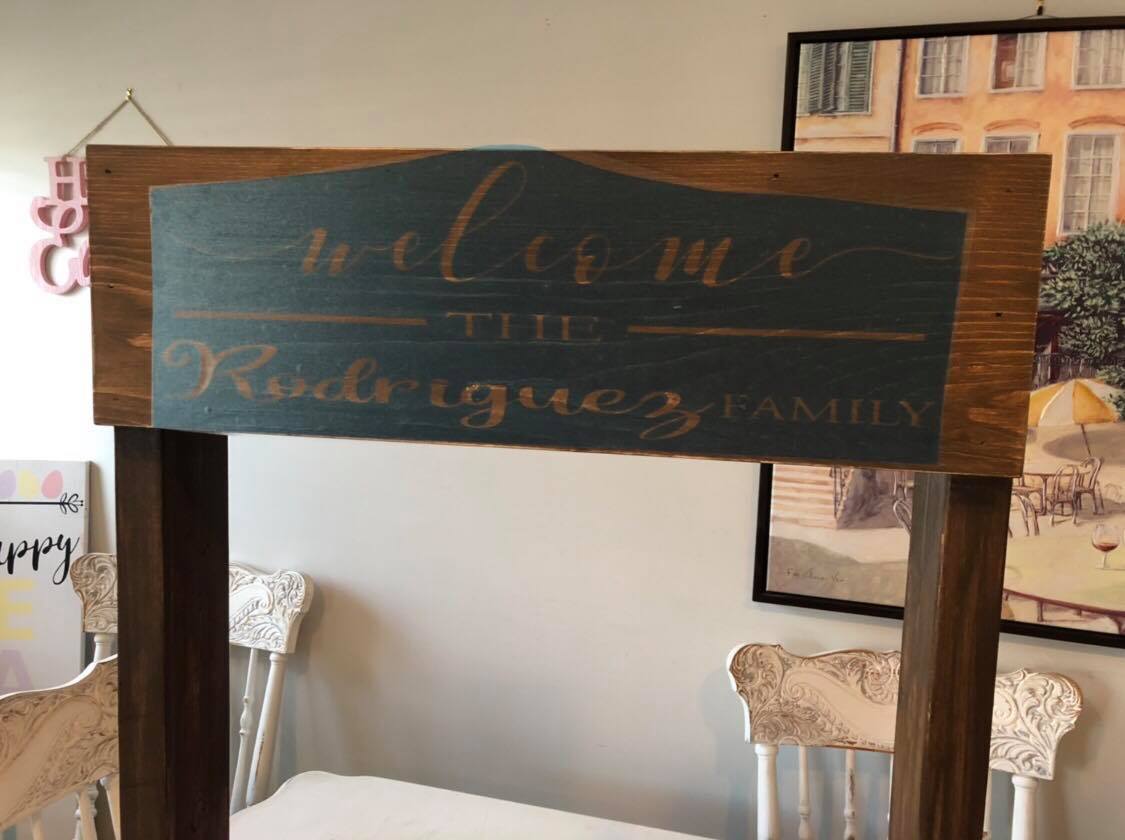
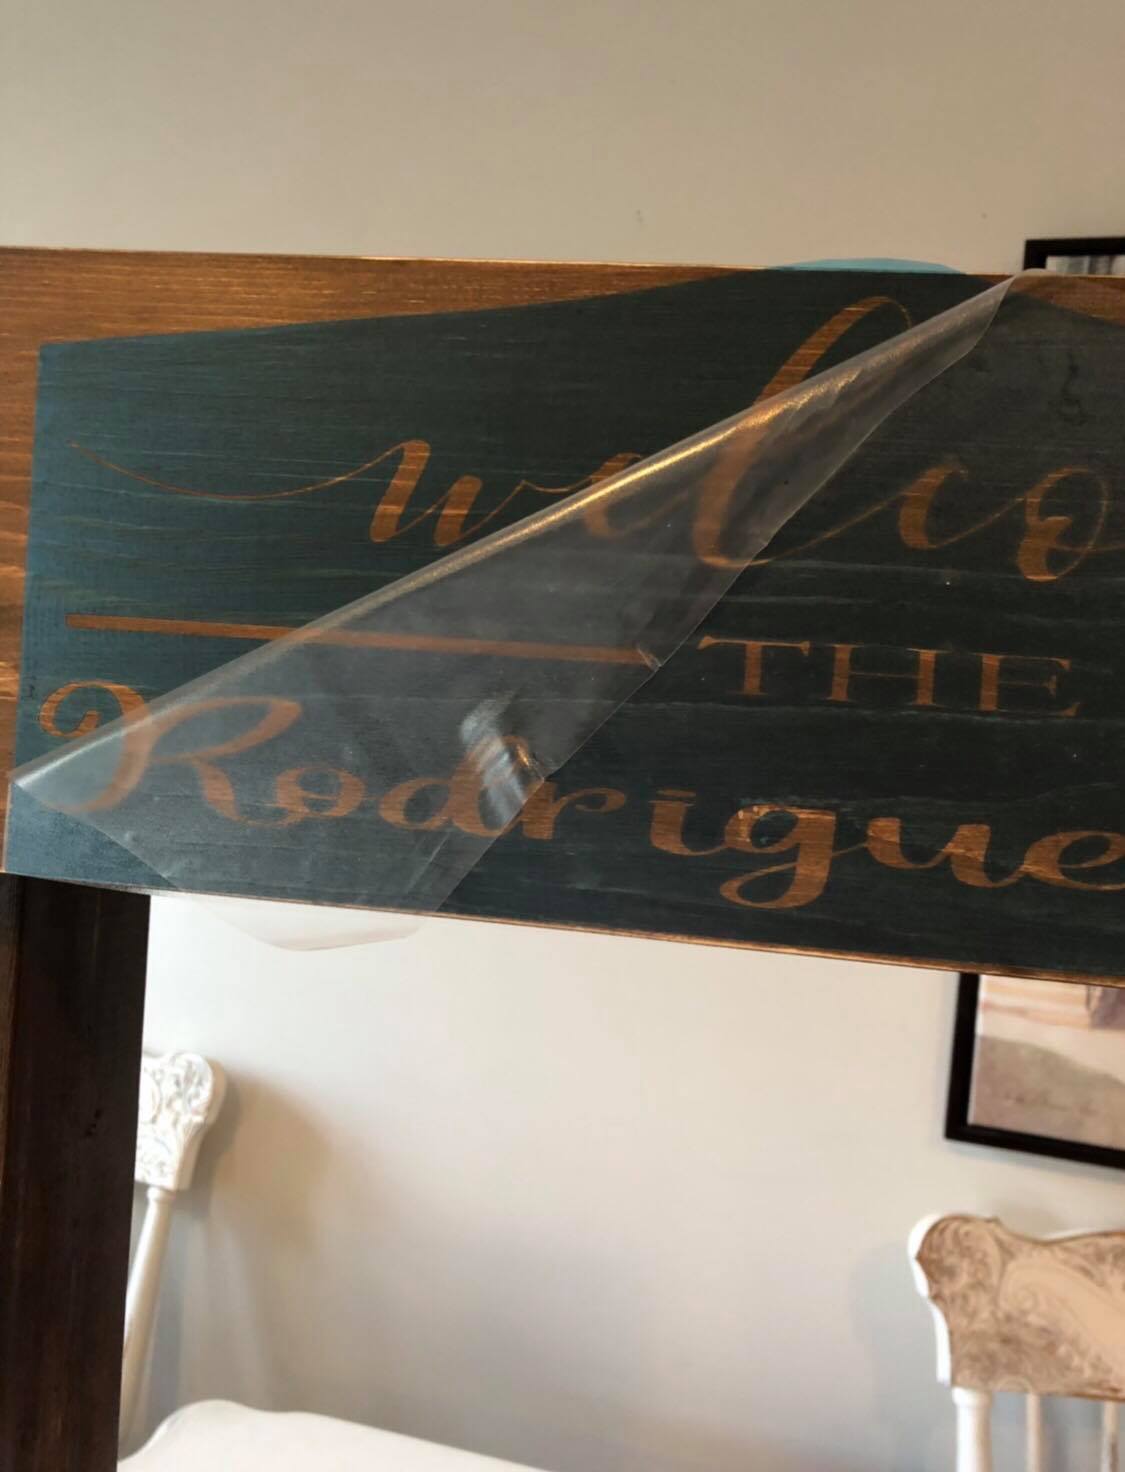
Step 5
Lightly apply the Rustoleum chalk paint to the stencil. I always advise 2 light coats of paint maximum and let it dry in between coats.
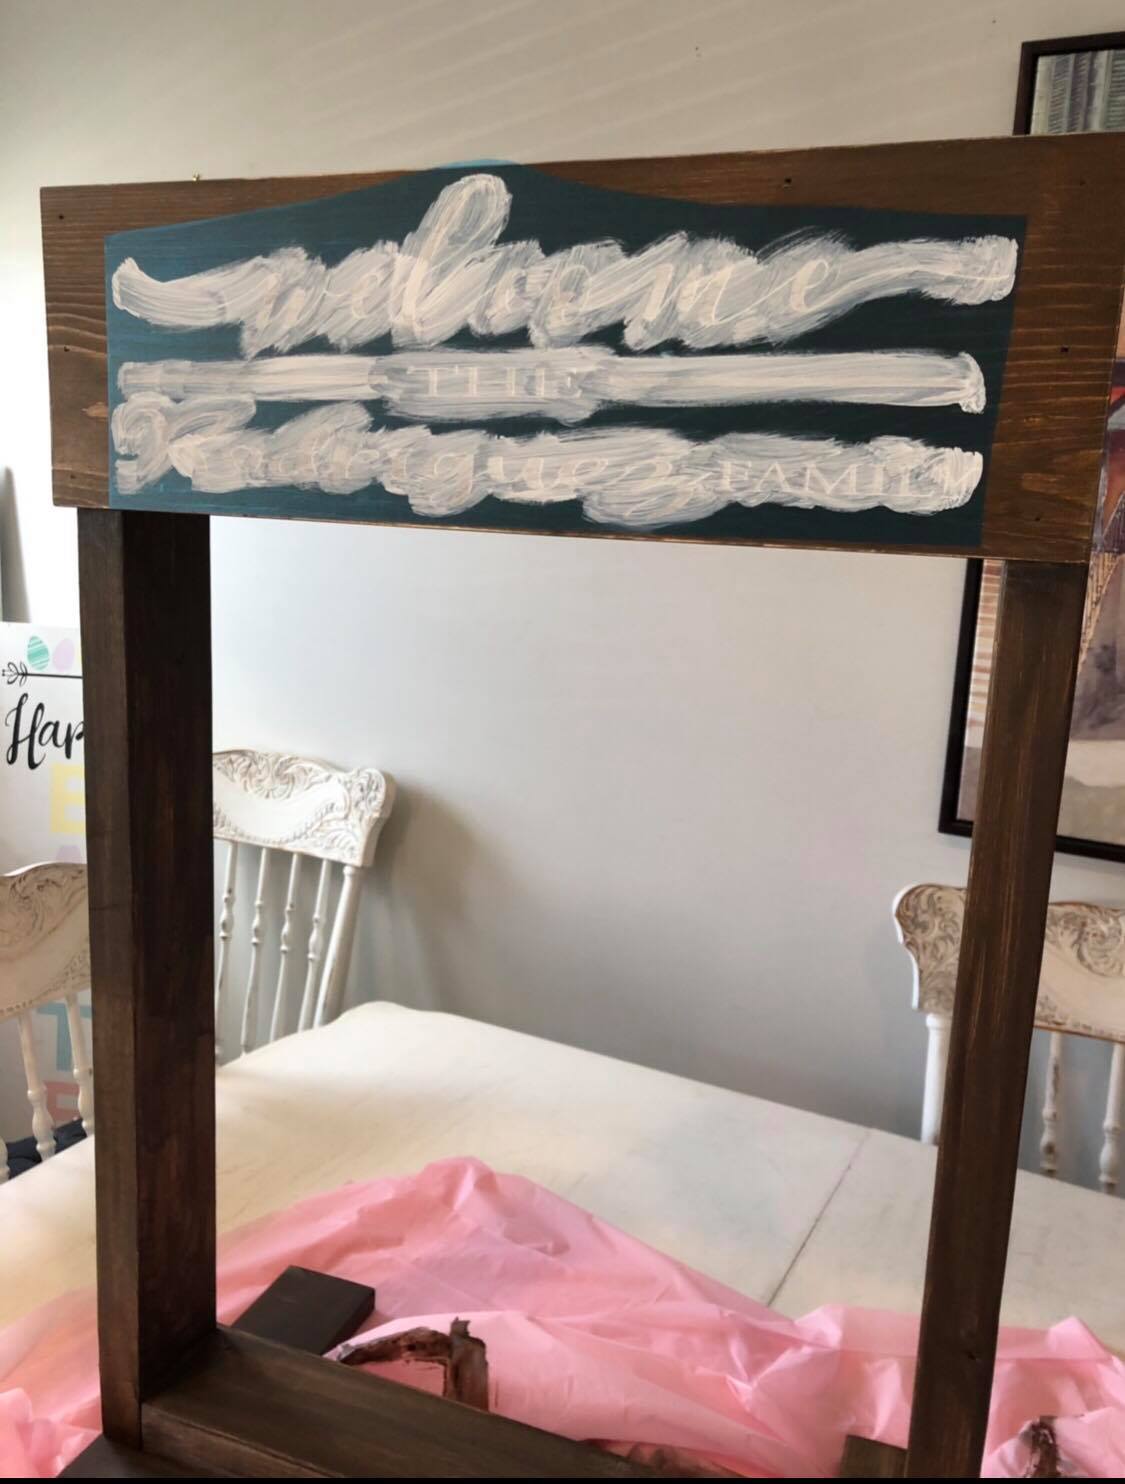
Remove the stencil to reveal the design. These stencils are a one time use stencil. I always take a sharp object to remove the insides of the words easily.
Beautiful Results:
This particular DIY wood planter stand I made for my stepmom for Mother’s Day. I used Minwax water-based stain in Deep Ocean for this project and I was so pleased with the results!
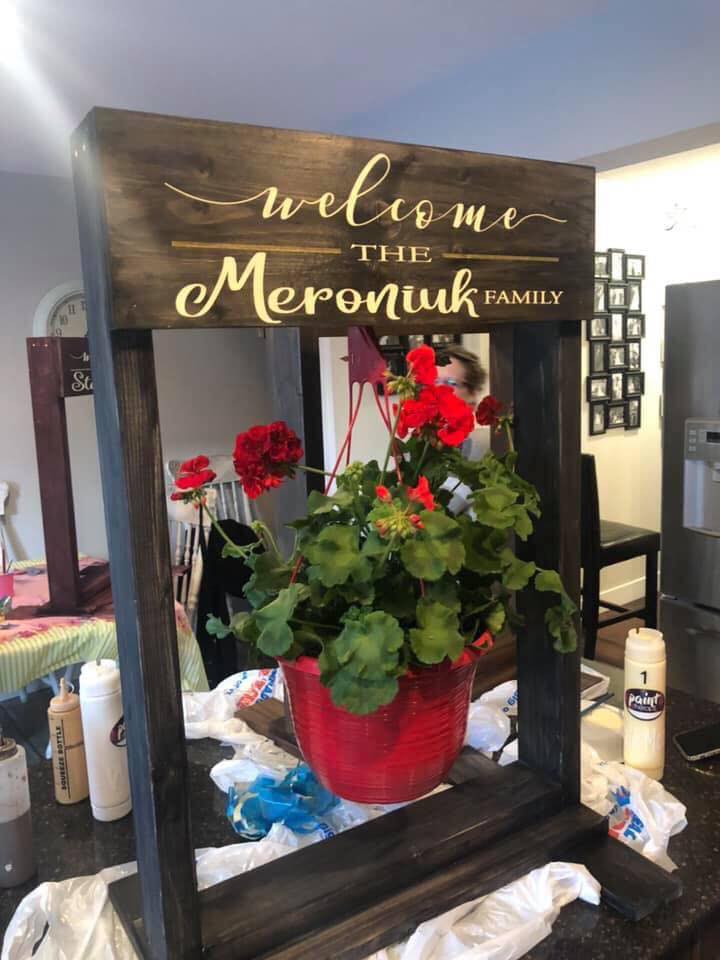
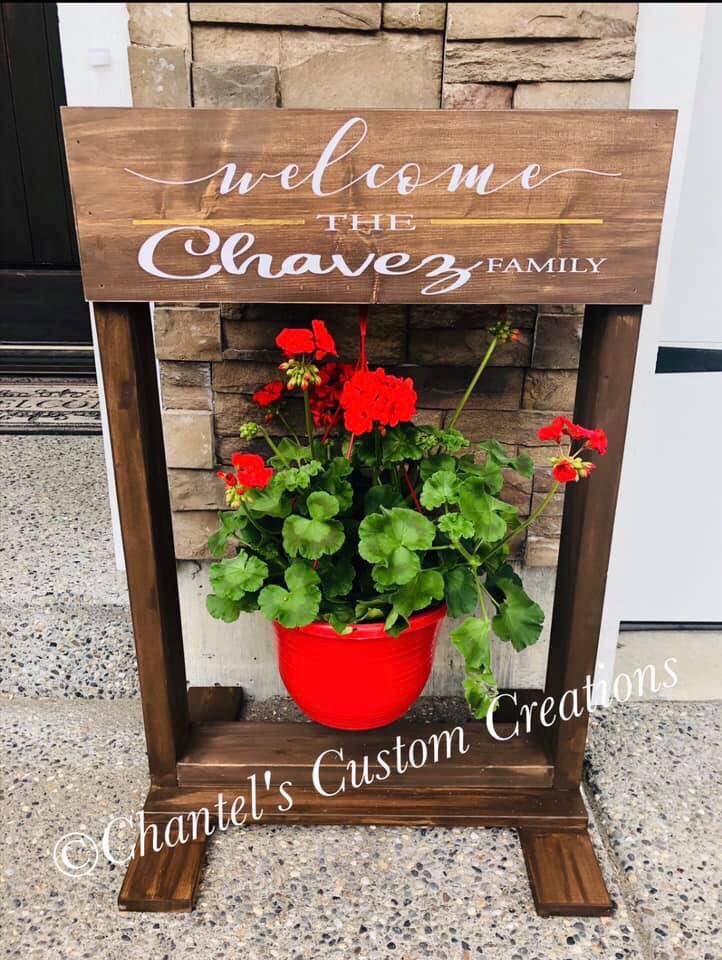
This particular DIY wood planter stand was made for myself and this one I personalized with our last name and it sits in the front of our house. I added a touch of gold metallic paint to it on the lines under the “welcome” and I just love how beautiful it turned out!
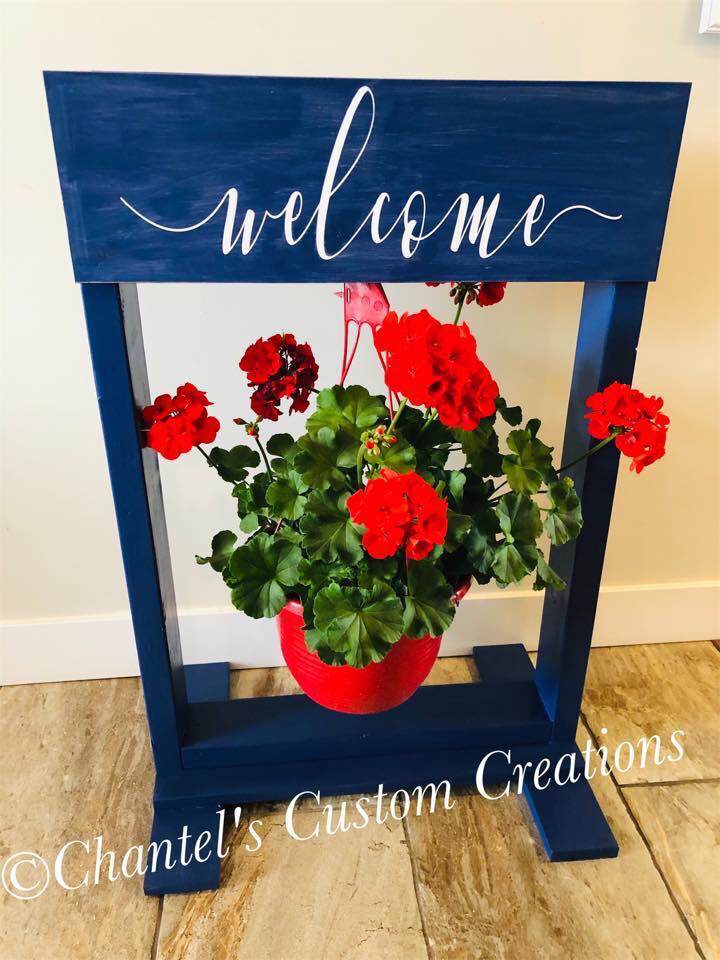
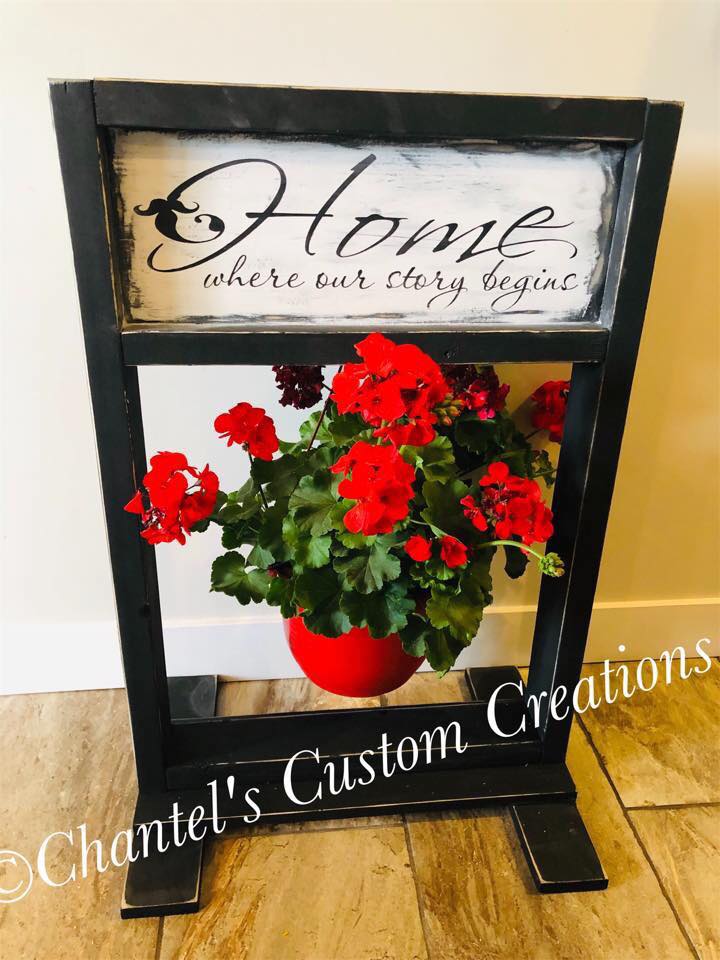
For the last DIY wood planter, I had my husband re-design it a bit different, he added an extra board on the bottom and I just love how different it is from the others and that is the only change that was made!
Instead of stain, I decided to use black chalk paint to paint it all out and then I added the stencil to it. For the final touch, I took my Ryobi hand sander and sanded it down on the corners to give it a rustic look!
This stand will go up on our deck for us to enjoy as we sit out on the patio enjoying the sunshine!
I would love to hear about your personalized wooden planter boxes ! Post a comment and better yet, a photo showing me your version !
Before you Go, check out some of my other tutorials with stencils!
pin for later!


Leave a Reply