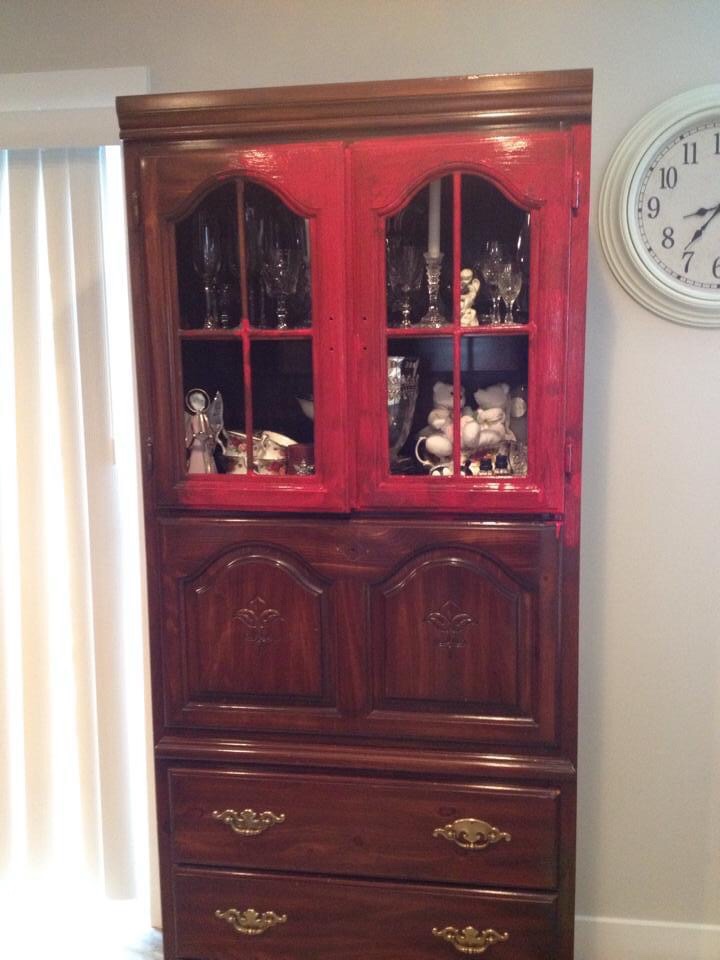
I was gifted this 80s TV armoire! It is a nice solid wood piece and I was able to use it in my kitchen to put my china in it and to use as storage for my other dish sets.
The dark wood definitely did not fit into my current kitchen style. Chalk paint to the rescue !
This post includes affiliate links; here is a link to my Disclosure Policy
Before

Prepping Steps
- The first step was prepping the piece by washing it down with soap and water. Since it was not a vintage piece, I was able to just clean it up well.
- I removed all the hardware as well as I knew I wanted to paint those out too.
- I then scuffed up the piece lightly with a fine grit sandpaper which allows the paint to adhere to the furniture better.
Paint
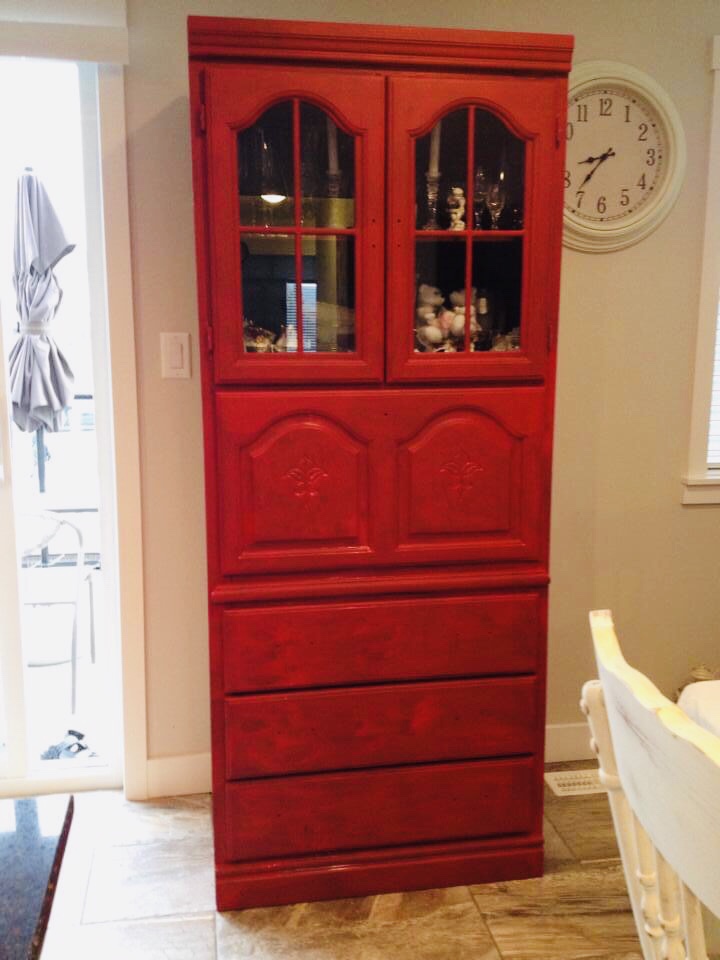
As this piece is a dark cherry wood color and I wanted to paint it a dark red, I did not use a primer with this piece. I just went straight to painting. It took me about 3 coats of red chalk paint to achieve a nice coverage.
Next I took black paint and painted out the hardware. I definitely did not want to leave it as it was which was a brass color !
Distressing
After I was happy with the paint coverage, I went about distressing it. For this piece I opted for a fine grit sandpaper to distress the edges and any natural corners that would be worn. I also distressed the hardware.

Clear Wax
Lastly, I wanted to make sure the piece was fully protected from the elements and opted to seal it with a clear wax. I always suggest that when chalk painting furniture, that you seal your furniture.
I like to use a lint free rag when I apply the wax. Some furniture painters use special wax brushes but I have found them to not be necessary especially as they can be expensive.

I was so happy with the way this one turned out! It was one of the first big projects I ever chalk painted and it remained in my kitchen for many years !
Looking for more furniture refinishing inspiration?!
pin it later!


Leave a Reply