The newest greatest craze is UV DTF decals for tumblers in the crafting circles !
I have been so excited to try these decals. They are very vibrantly printed on laser printers.
I will bring you along to my first attempt at a decal. It didn’t go as well as I had planned so I thought it would be a great way to help you out on your decal journey!
This post may contain affiliate links, please see Disclosure Policy
Step 1
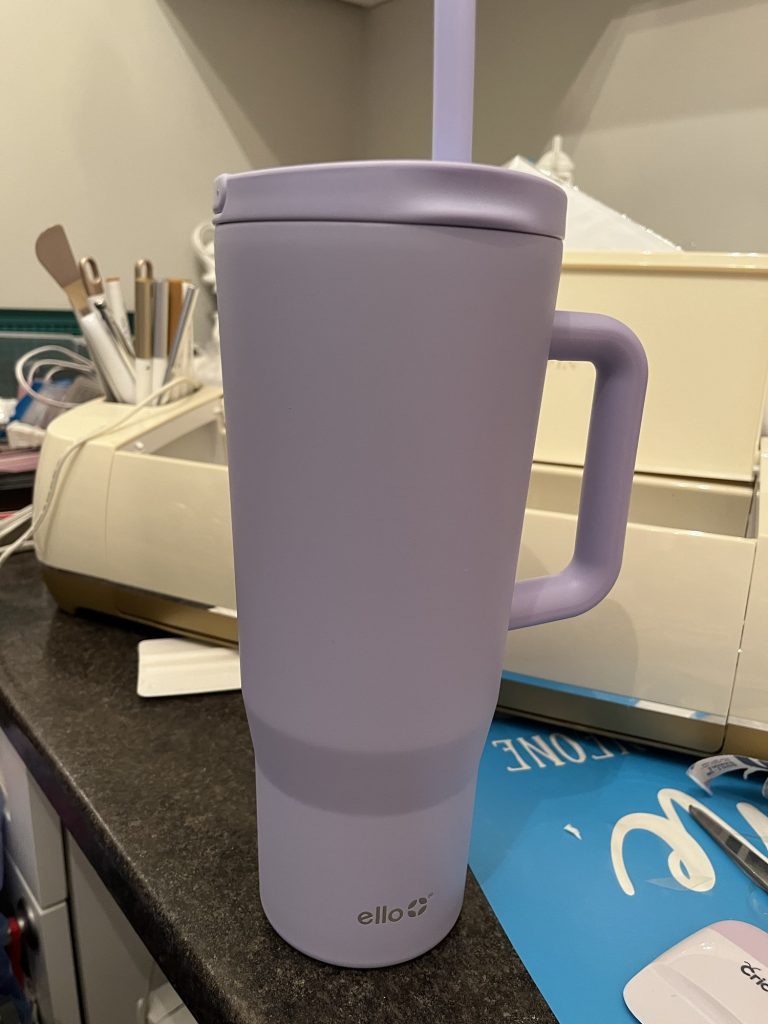
You will need to purchase an inexpensive tumbler of your choice with no logo or design on the tumbler. You can find inexpensive ones at any home decor store such as Walmart or Home Sense or even Superstore.
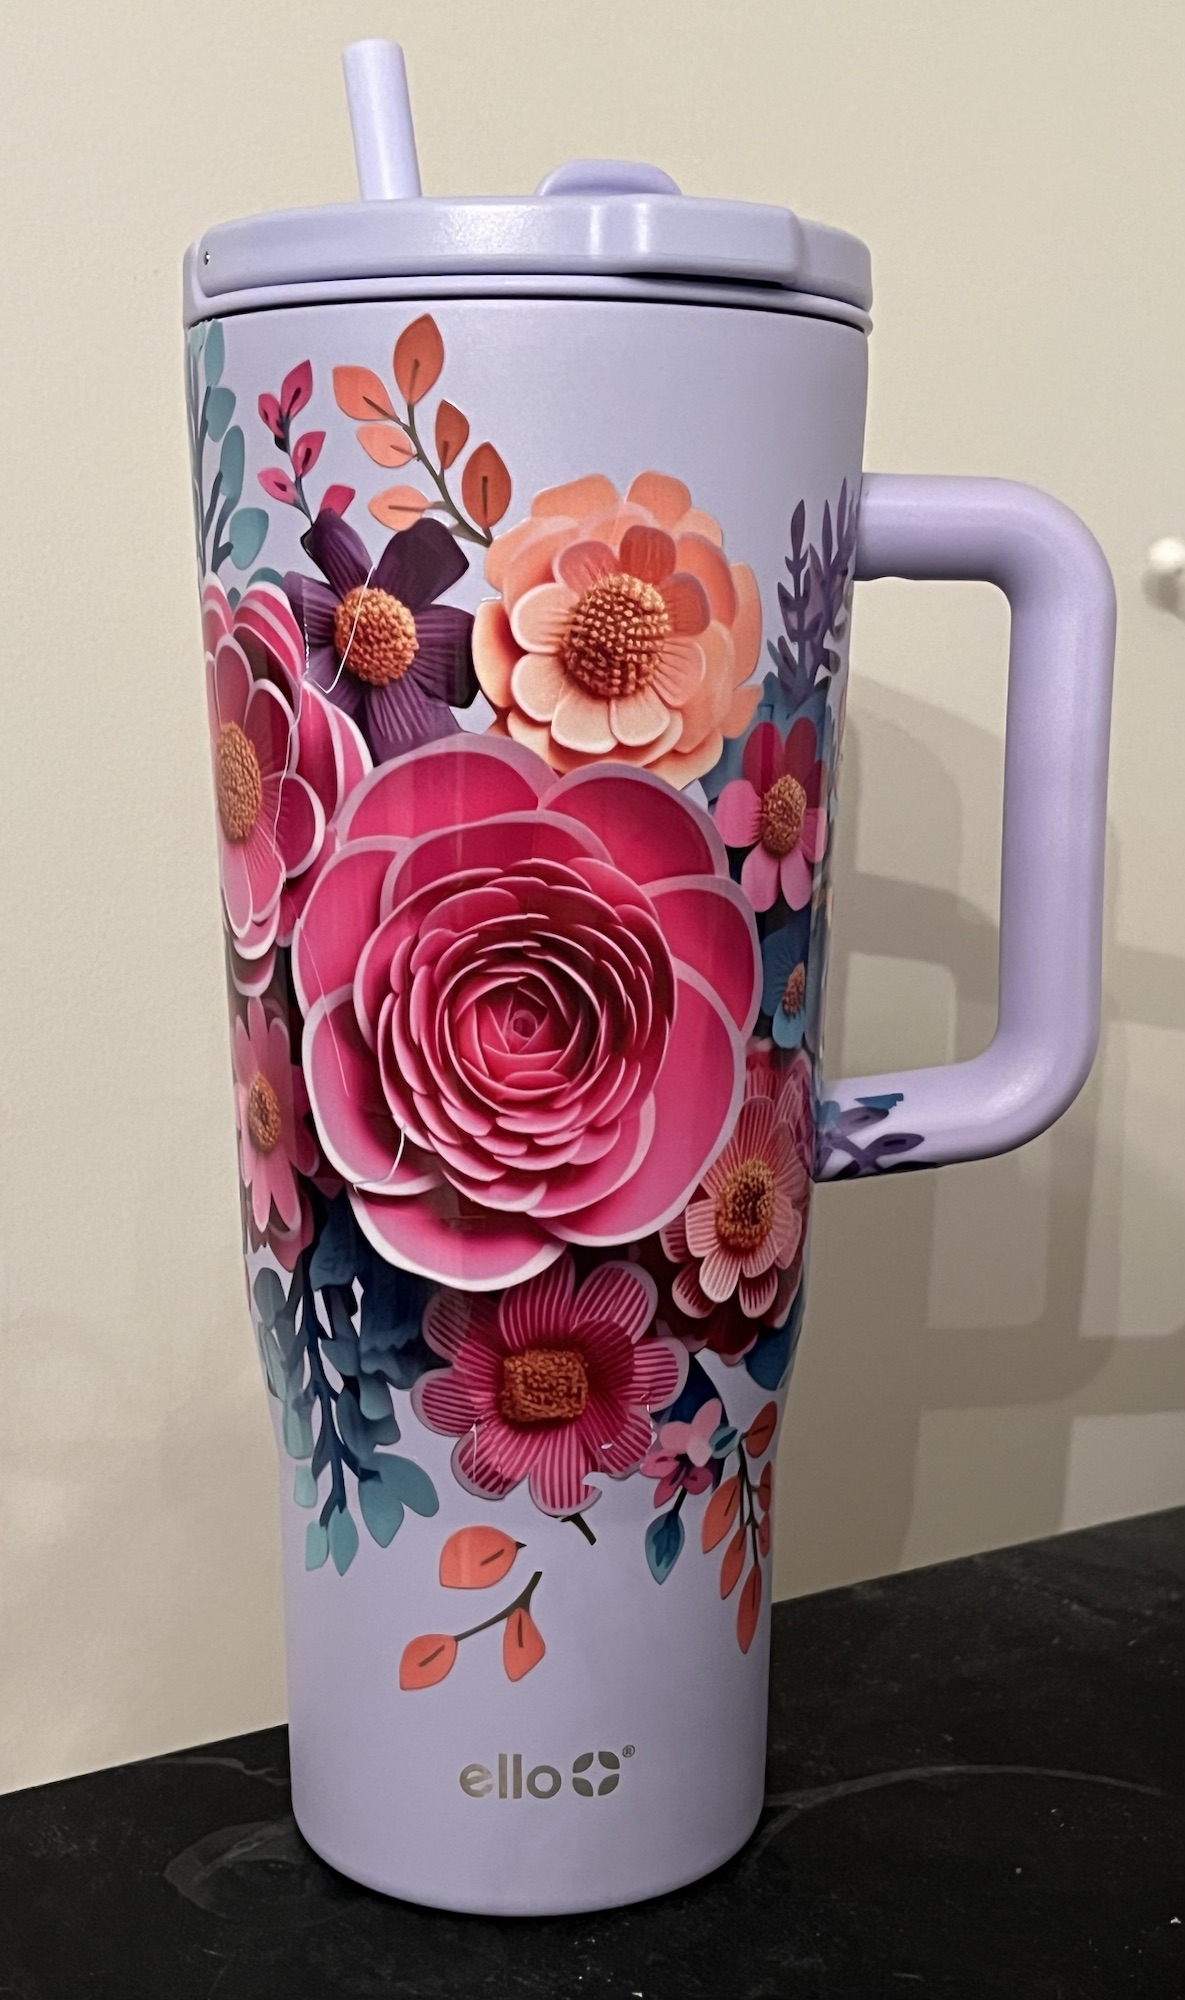
I found this beautiful lavender one at Home Sense!
Step 2
Purchase your UV DTF tumbler wrap. You will want to make sure you buy the proper size of wrap. I was using a 40 oz tumbler but I had a smaller wrap on hand at the time of doing this craft. I also find that the bigger the wrap, the harder to place on your tumbler, so keep that in mind.
I was able to find many kinds of designs and sizes of wraps on Amazon. Check it out HERE!
Step 3
You will notice when you receive your wrap that there is a clear top sticky portion, the actual design wrap and a bottom sticky portion.

Step 4
I would also suggest that when you receive your wrap, you take scissors and cut around the design as close as you can to the design in order to make application easier.
Step 5
You will want to remove the stickers from your tumbler and wash very well with warm soap and water.
In order to adhere the wrap to your tumbler, you will need some sort of denatured alcohol or even some Windex if you have it on hand in order to remove any oils or fingerprints as to apply the decal well onto your surface.
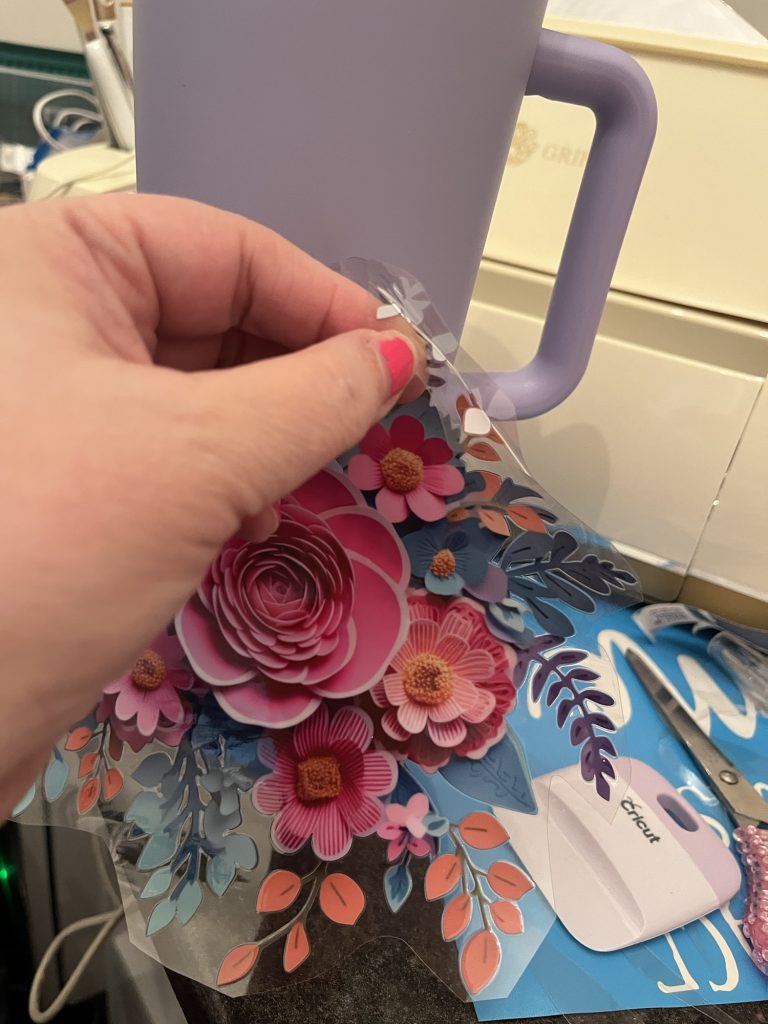
Step 6
You will want to remove the backing to the decal to start the process. These decals are amazing. They come in vibrant colors and are usually high quality. They are printed by high end laser printers and have amazing details.
Before you remove the backing, be sure that you have taken some time to imagine where you would like to adhere your decal. Once the backing is removed, you will want to place it on your surface straight away.
Step 7
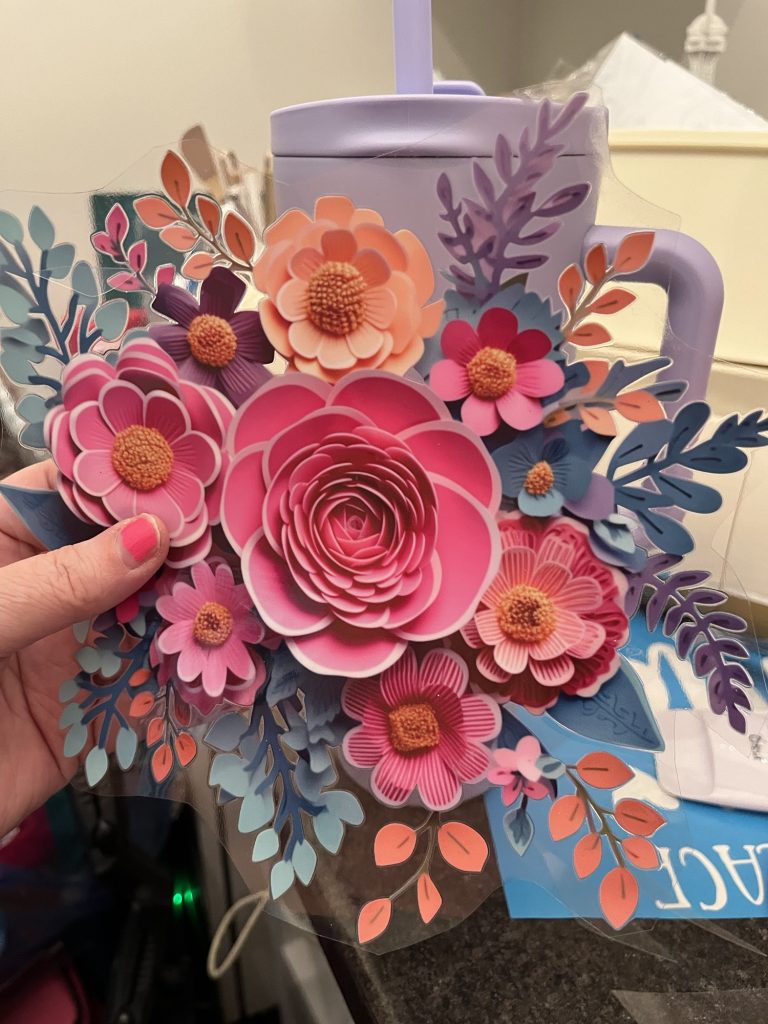
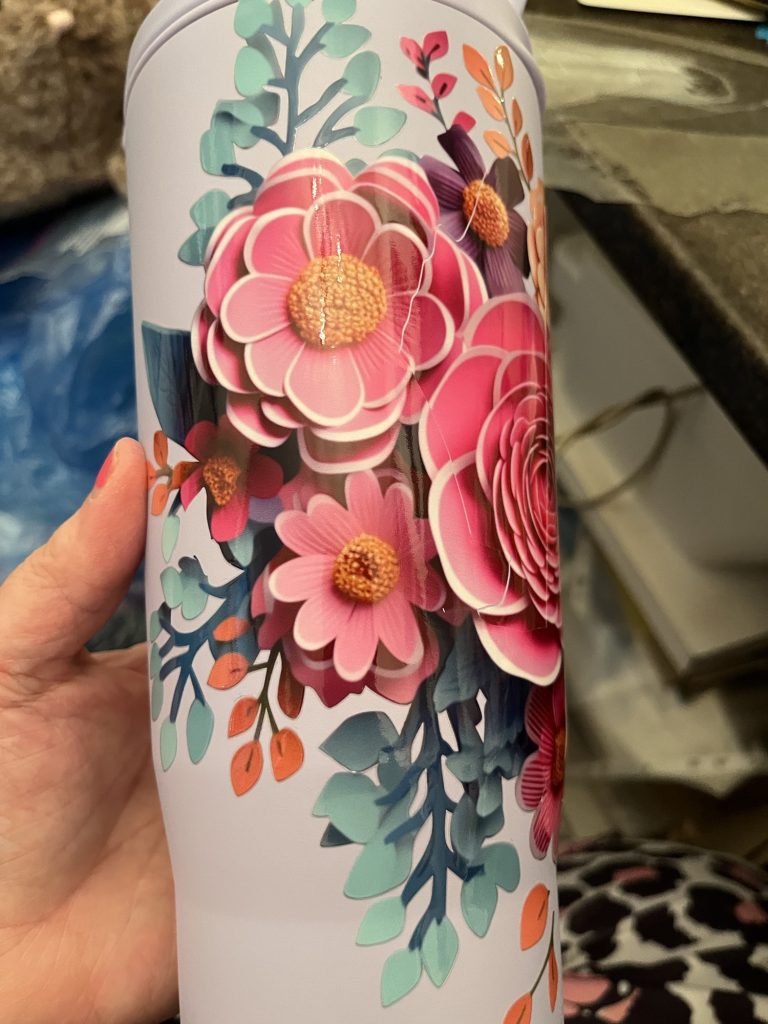
Once the backing is removed, you may start using your finger to place the decal down on to your surface, If this is a larger decal, you will want to go very slow to place the decal. I was in a rush when I did mine and unfortunately I placed it in the wrong place and went to remove it and it ripped!
So another tip for these decals, they cannot be removed once you start to place them down! I have a rip in my decal but I continued to use my fingers to place the decal down on my cup.
I also used a small brayer to adhere the decal to the cup. You can use anything with a straight edge, for example , a credit card.
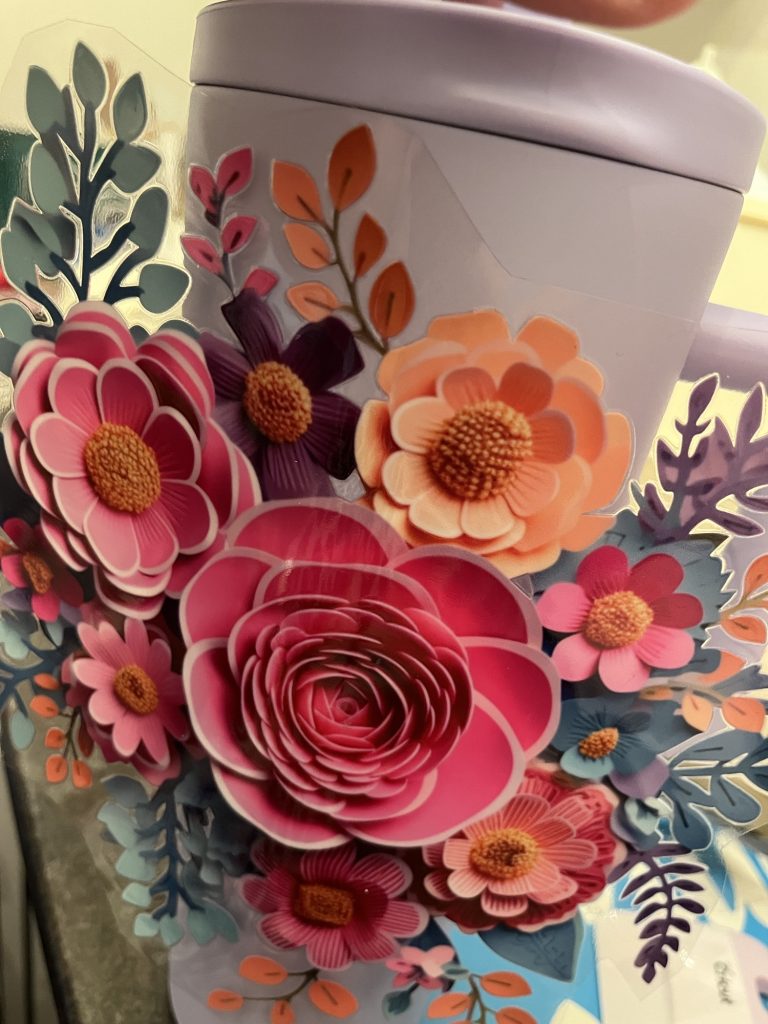
Step 8
For the last step, you will be removing the clear plastic top sheet of the decal off of your design and voila! You are done!
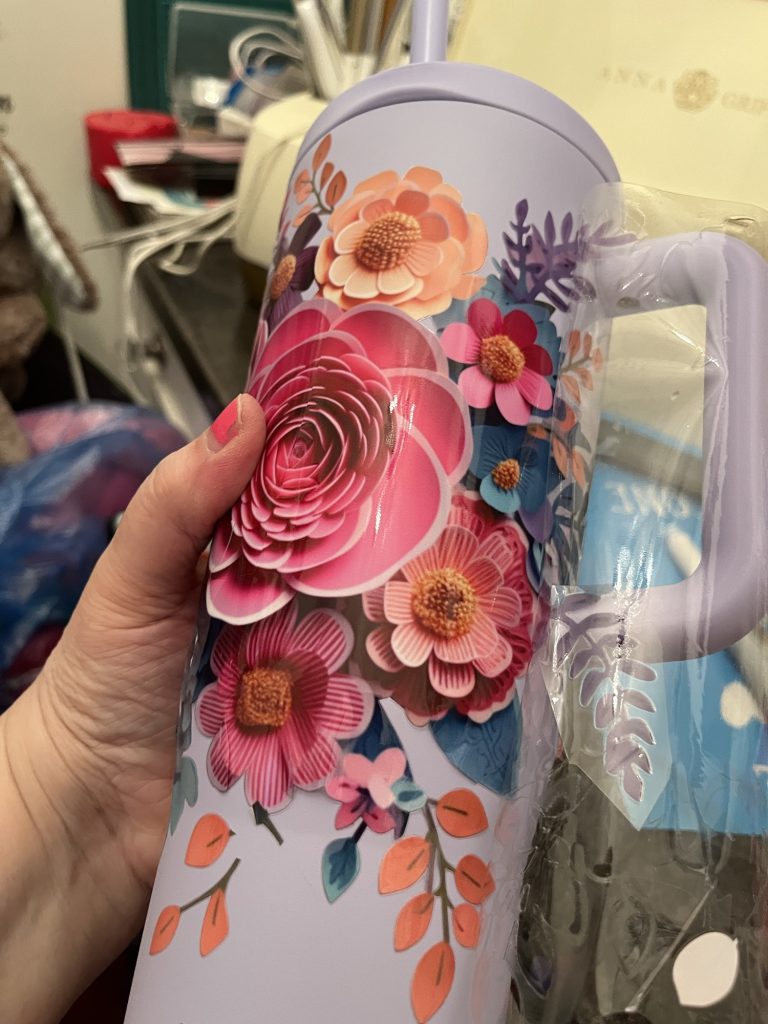
Result
Although I am very pleased with how my tumbler turned out for my first try of a UV DTF tumbler wrap, it does bother me that I ripped my decal! I also had a hard time smoothing out the decal on the bottom and some of the design came off. I would suggest to start with a small wrap to get the hang of applying your decal before moving on to more expensive one!
Can’t wait to try out more decals and get better at this!
This project was so fun and so easy! I encourage you to have fun with this and don’t worry if you rip your decal, it will still look amazing in the end and if all else fails, you can pick off the decal and start again, which is something I may do!
Let me know how you make out with your tumbler decal!